123D Catch Tutorial: 3D Printing your Autodesk 123D Catches
Posted By Zach Correa on Oct 7, 2014 | 4 comments
Can’t make it to our meetup in Paris this weekend with Autodesk? Learn how to use 123D Catch app to get your 3D models printed from anywhere in this tutorial!
123D Catch app offers an easy, seamless way to get a 3D scan of any physical object you can imagine. With the app you can take pictures and generate a 3D model through the cloud without using an additional camera (or even saving all of the pictures on your phone’s camera). However, there is no way to get a 3D print from within the 123D Catch app interface (this is likely because the models usually need additional optimization in order to 3D print). You can still print the objects you catch using the app, it just takes a few more steps.
This 123D Catch Tutorial will teach you how to use the 123D Catch Smartphone Application, the 123D Catch PC software, and Sculpteo to create a figurine in Sculpteo’s multicolor material.
We’ve broken the process down into 5 Steps
-
Download the 123D Catch App from Autodesk
-
Take the pictures with 123D Catch App
-
Upload to the Autodesk Servers
-
Edit your 123D catch model
-
Upload to Sculpteo.com and 3D Print!
1. Download the 123D Catch App from Autodesk
The 123D Catch app is available on two different smartphone platforms: in the App Store, in the Android Marketplace. Download the one for your smartphone by searching for ‘123D Catch’ in the corresponding marketplace. After downloading, open the app and create an account – this step will make it easier to find your catches later for download.
2.Take the pictures with 123D Catch App
For a successful 3D capture there are a couple things to keep in mind:
- The object should be clear of obstructions
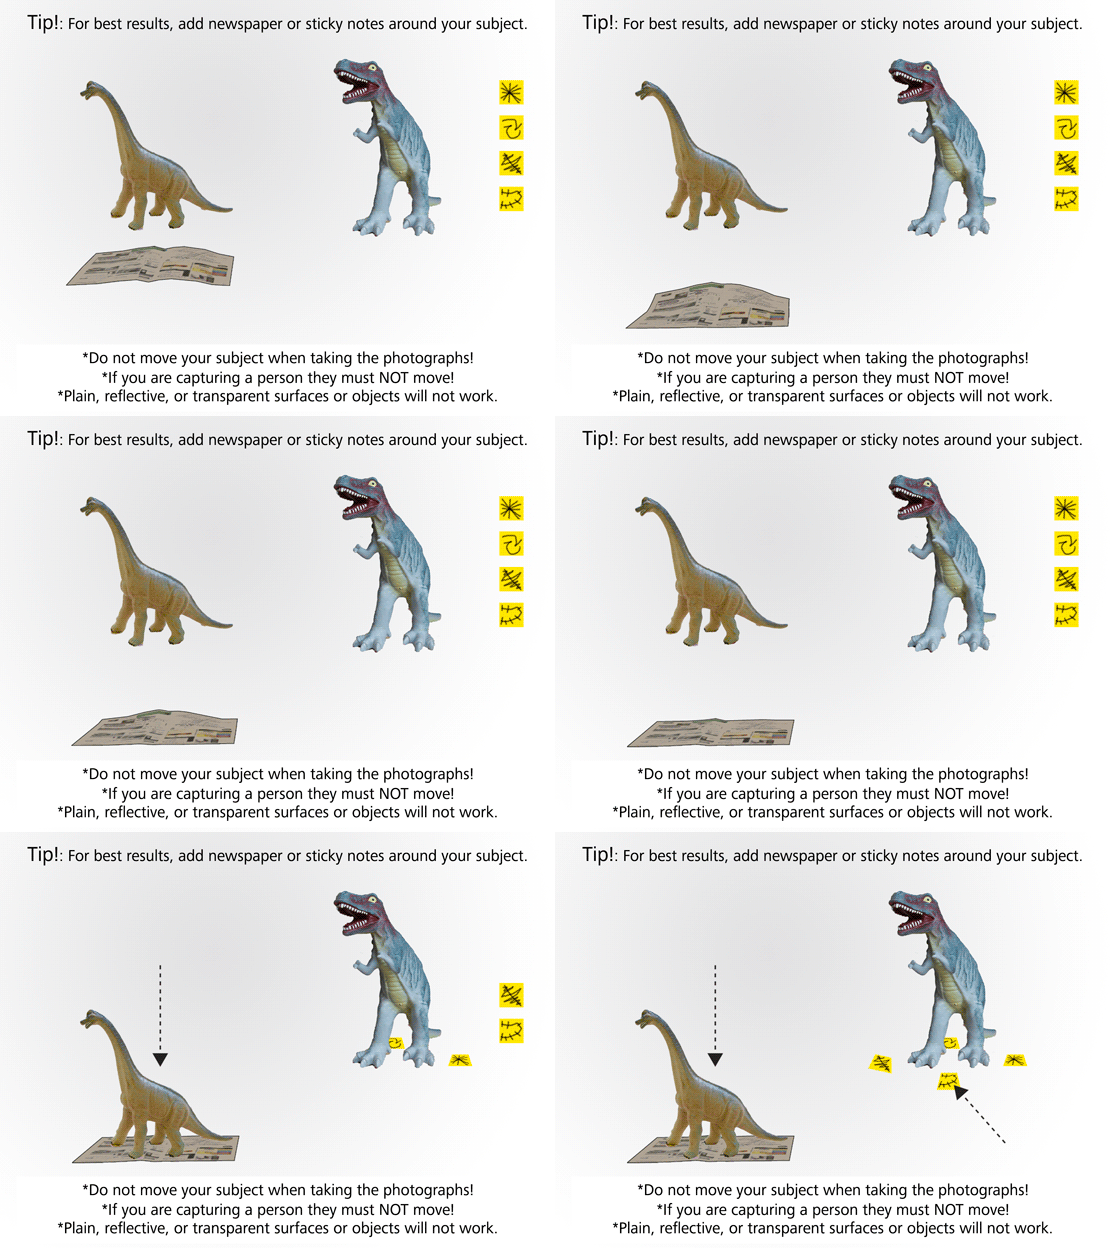
- The object should NOT be transparent, translucent or reflective
- There ought to be enough room to view each angle of the object
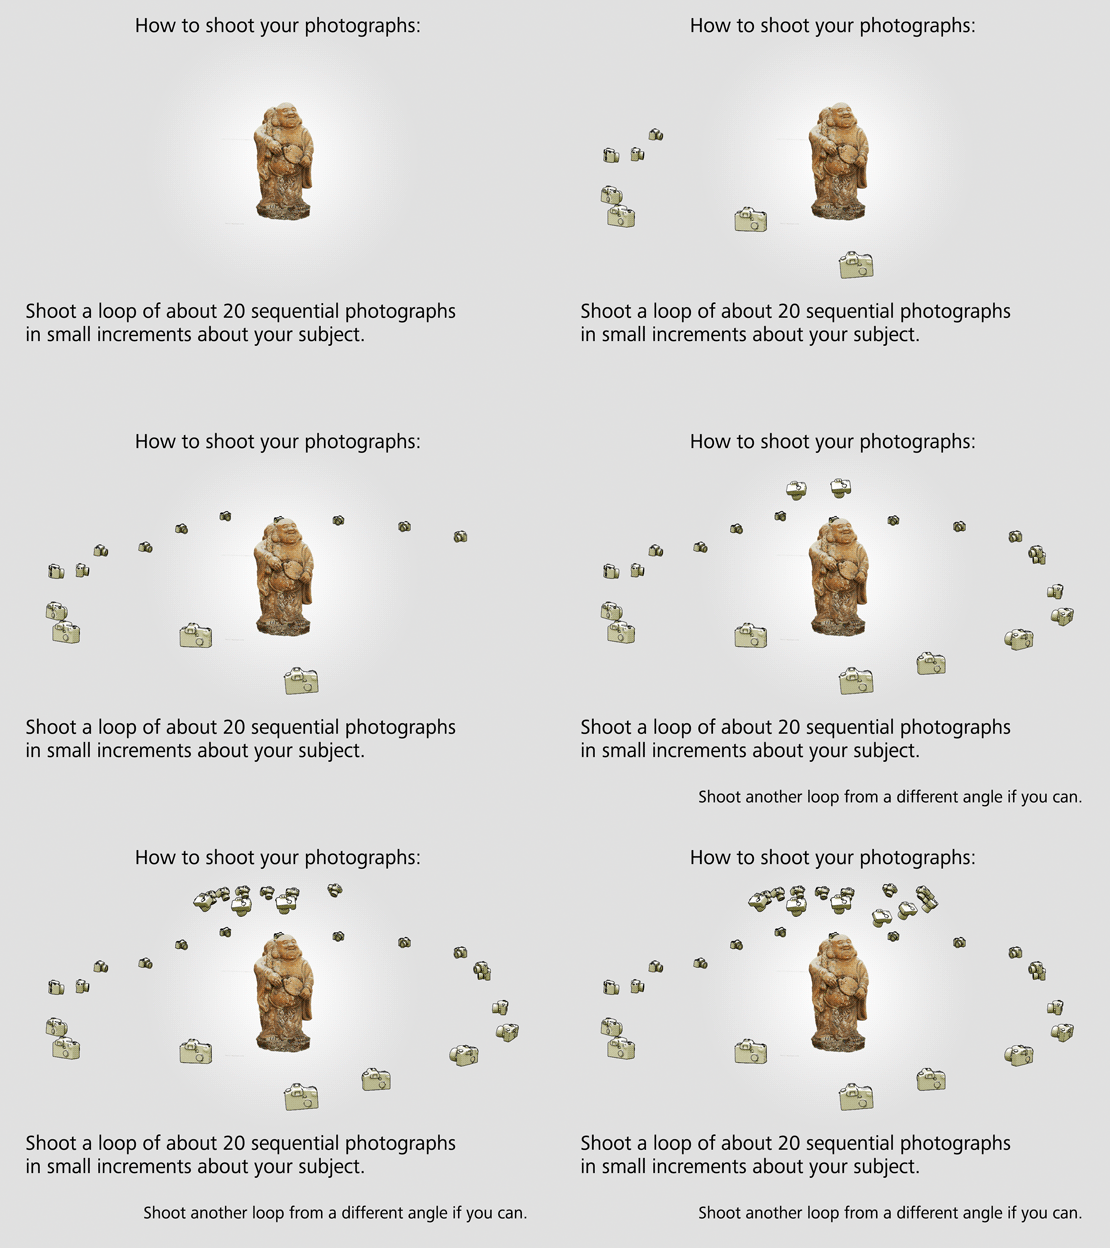
From there follow the in-app guides to circle the object. Remember you must move around the object, do not turn the object itself. The app uses the area around the object to orient the camera’s locations.
As the app uses the area around the object to orient the camera location, it sometimes helps to give the app some more objects with which to orient. Adding post-it notes or a piece of newspaper can do just that.
3. Upload to the Autodesk servers
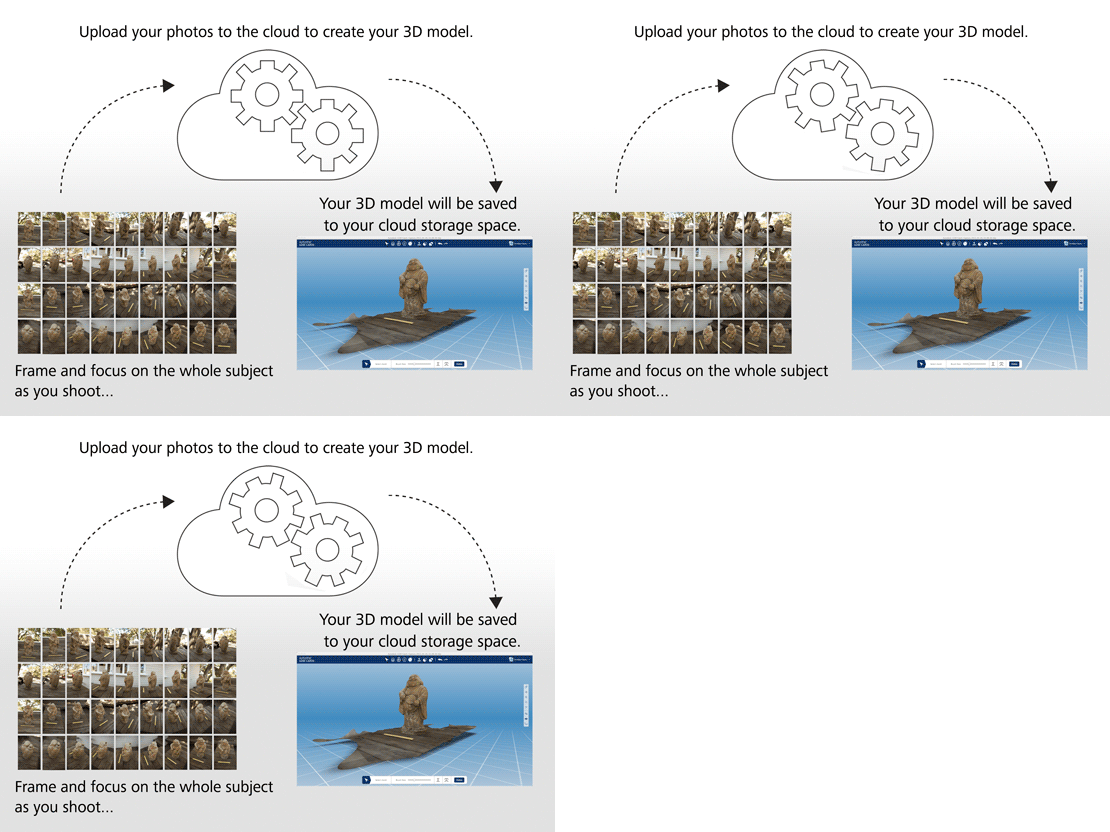
The 123D Catch app uses cutting edge photogrammetry software that quite simply could not fit on most phones (at least without taking up a large portion of the phone’s storage space). All of the app’s processes are done through the cloud. That being said the upload and processing times can be somewhat lengthy but don’t get discouraged! It’s well worth the wait, not to mention.. its free!
4. Edit your 123D catch model
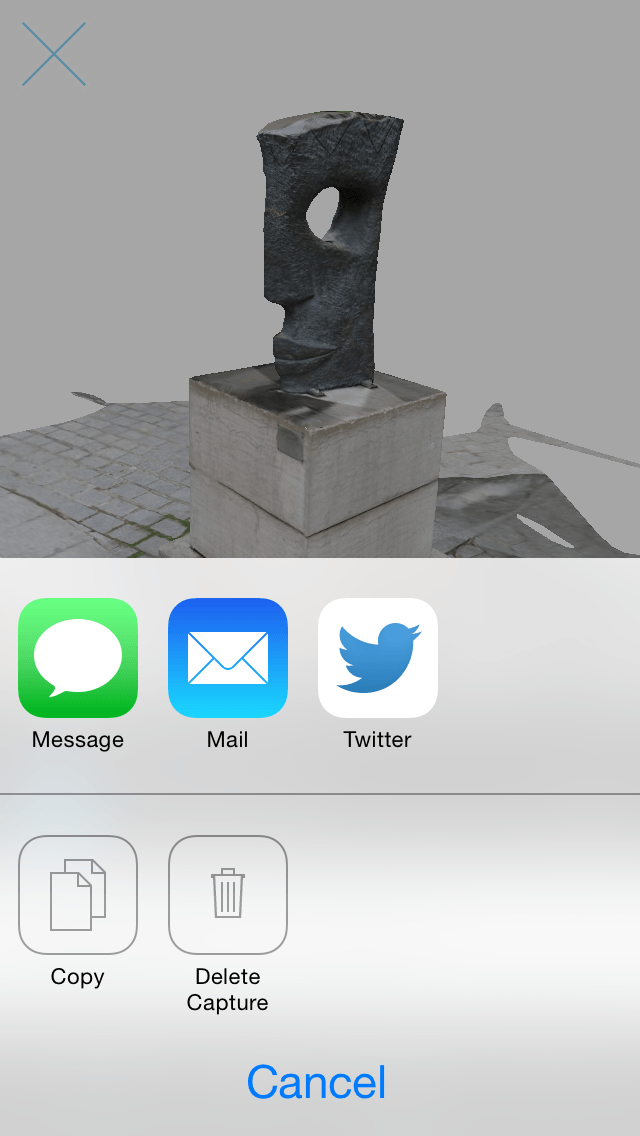
After your file is finished uploading it will be automatically become available on the Autodesk 123D website. You can email a link to yourself that will take you directly to the online version from within the app. This can be done from the object view screen then by click on the share button in the bottom right corner.
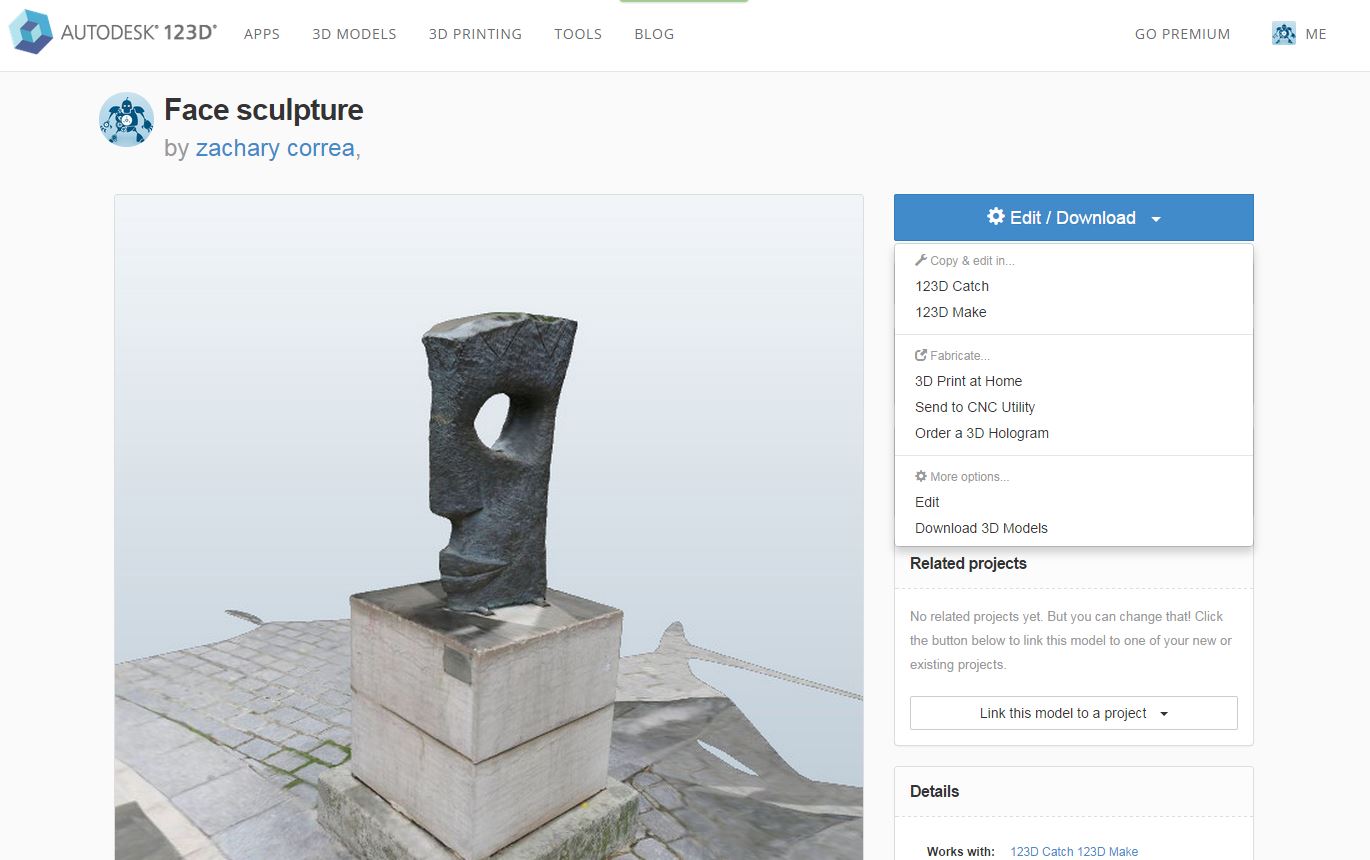
When you are on the online page of your 3D model, you can download the object from ‘Edit/Download’ menu, then click on ‘Download 3D Models’ at the bottom of the list.
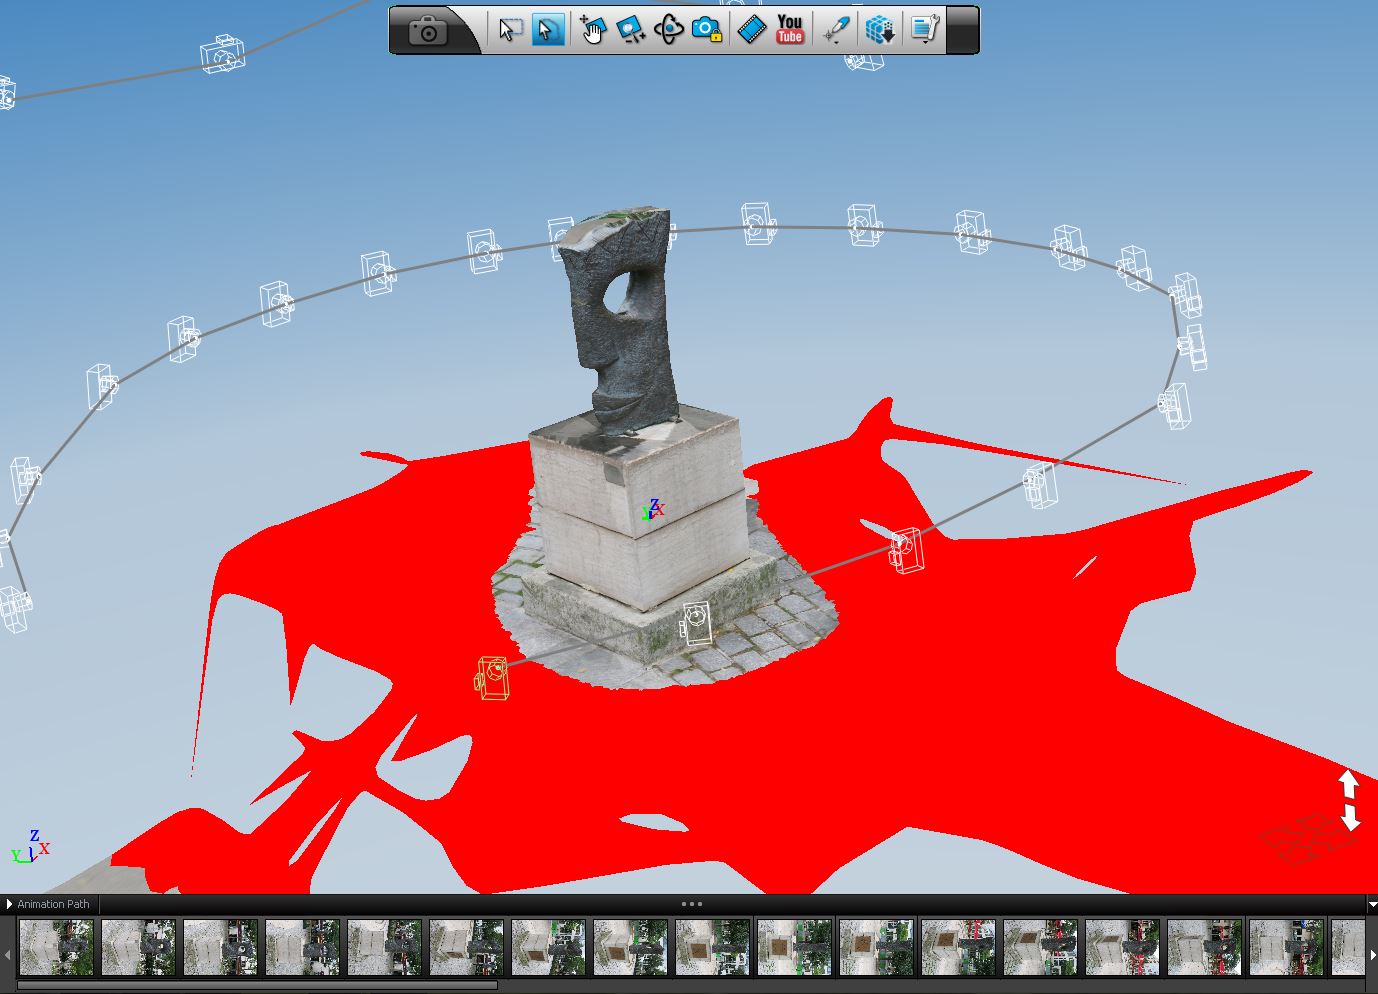
The current version of the 123D Web application does not allow for optimization of the 3D File, such as deleting of excess information or filling holes. However, you can download the 123D Catch PC software to optimize the file for a print. (If you are using a mac, there are other programs that will recognize the models you download and allow you to edit them).
The PC app is extreme intuitive. Simply use the lasso select tool, select the information that you dont want in your print.
After you delete the information you want excluded from your print, select the area of the object you’d like to print and choose ‘Export 3D Model As…’ from the ‘File’ menu.
This will export the files into a folder with all of the information you need for a 3D print. From there simply take the file and compress it and you’re ready for Upload to Sculpteo.
5. Upload to Sculpteo.com and 3D Print!
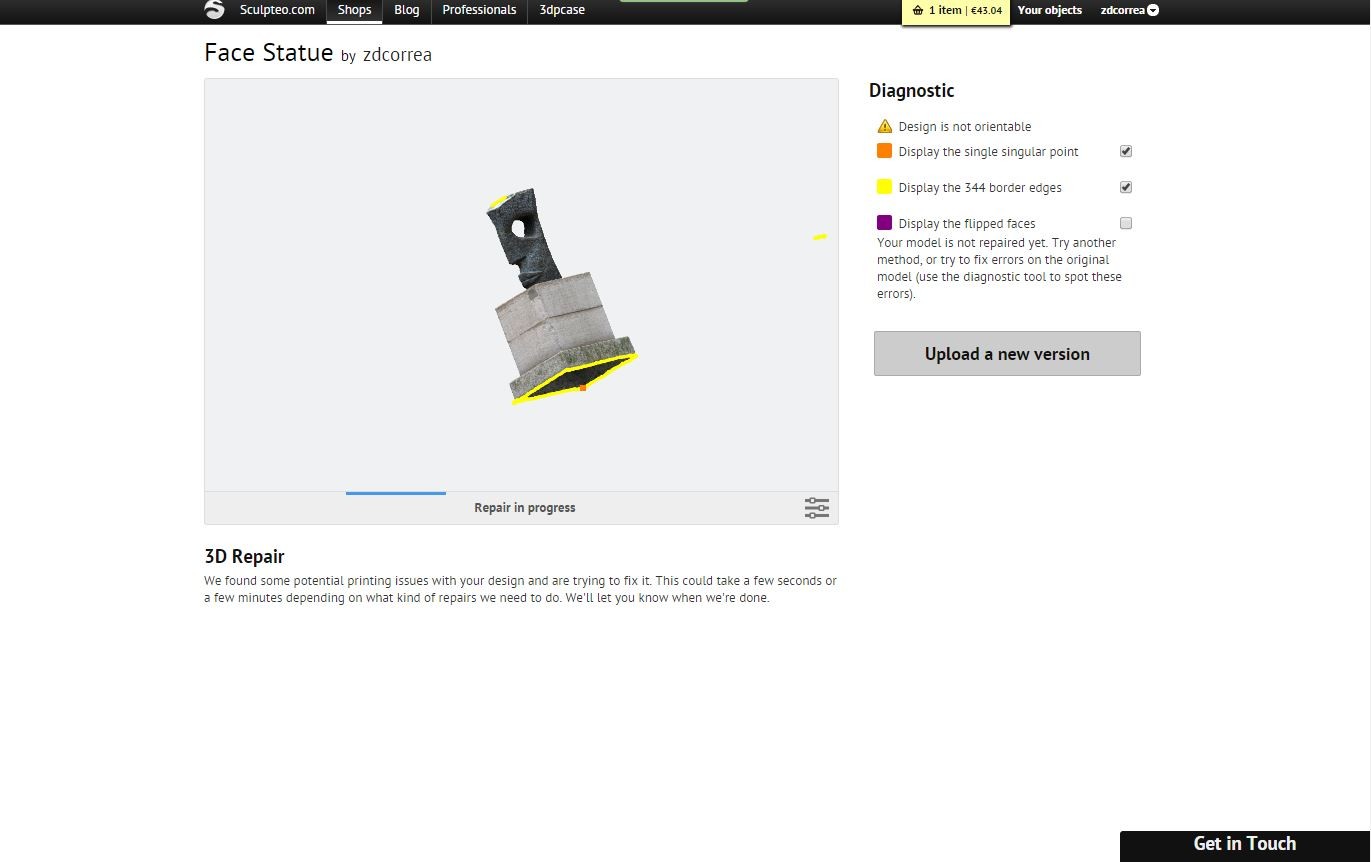
On the Sculpteo website, click on ‘Upload a 3D File’ and drag your compressed folder into the website. After it is finished uploading it will optimize and repair the file automatically for a 3D print.
From there choose the material you’d like (likely multicolor to keep all of the fine details), choose the size you’d like according to your budget, and print!
We’ll update the blog post with pictures of the final print in a few days!
Another guide on photogrammetry using high quality photographs and Autodesk’s memento is coming soon.
If you have any other questions don’t hesitate to contact us!


 Connect with Google
 Connect with Facebook