 Connect with Google
 Connect with Facebook
What are Sprues and how can they make your 3D model easier to print?
Posted By Jess Hedstrom on Oct 28, 2015 | 0 comments
Traditionally sprues have been used for injection molding; however in the 3D printing industry you can use sprues to provide easy assembly for your customers! Keep reading to learn more about this smart solution for 3D modeling “ensembles” using sprues.
We can quickly and correctly add sprues to our model which will allow us to 3D print two or more items as if they are only one part. To complete this task we will use Meshmixer, not only is it user friendly it is also completely free. You will notice that we use it in many of our Sculpteo webinars and tutorials.
Now it’s time to duplicate the model
To duplicate the part we are going to need to import the object into Meshmixer. Our goal is to use a spruce to connect their duplicate models so that they can be printed as 1 part in Meshmixer select “File” then select “Import”.
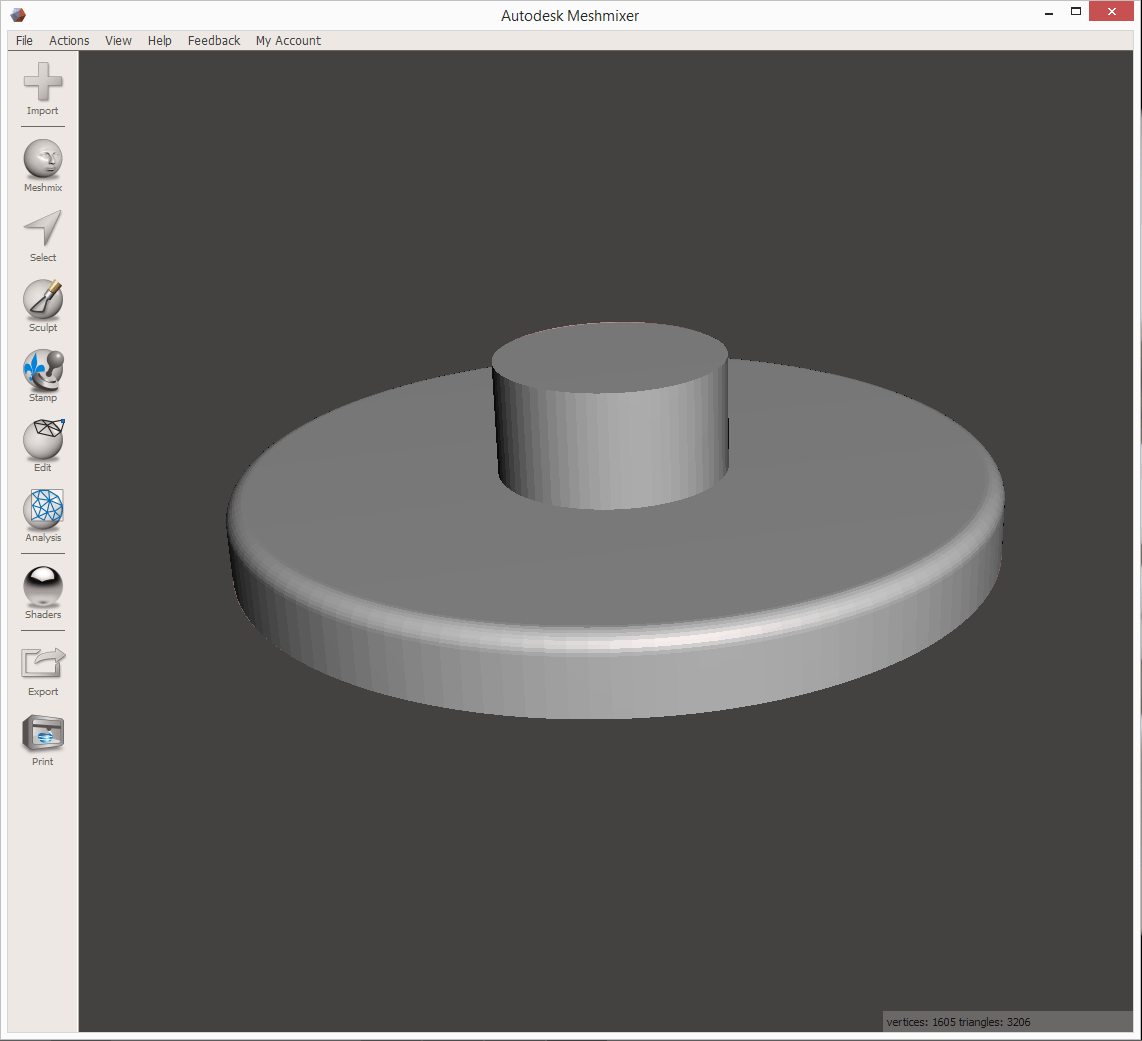
We can now duplicate the part by pressing “Edit” and then “Duplicate”. The object browser automatically displays showcasing both parts (pictured below). Next we will select only one of the items and move it aside because we do not want the items to intersect.
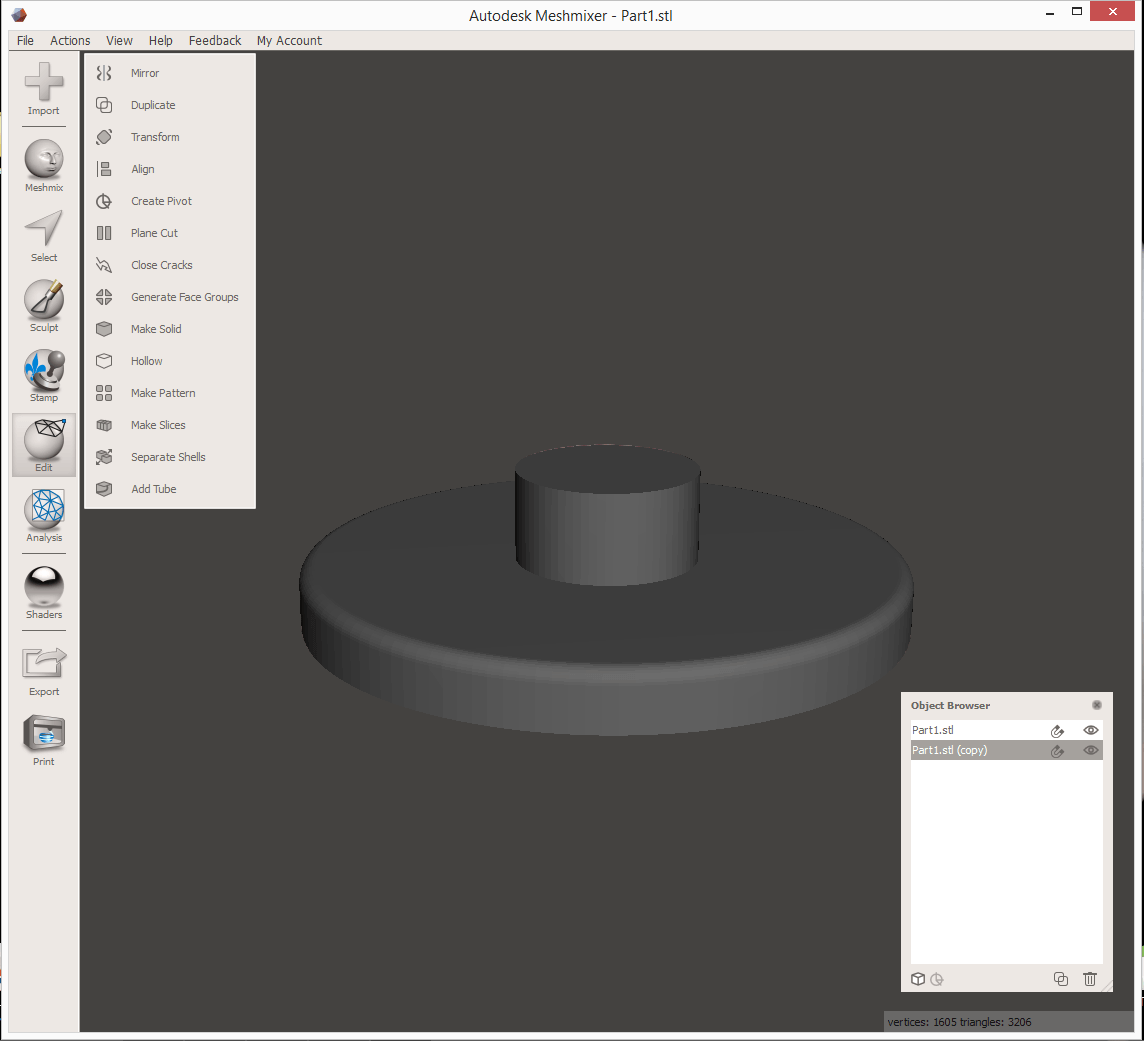
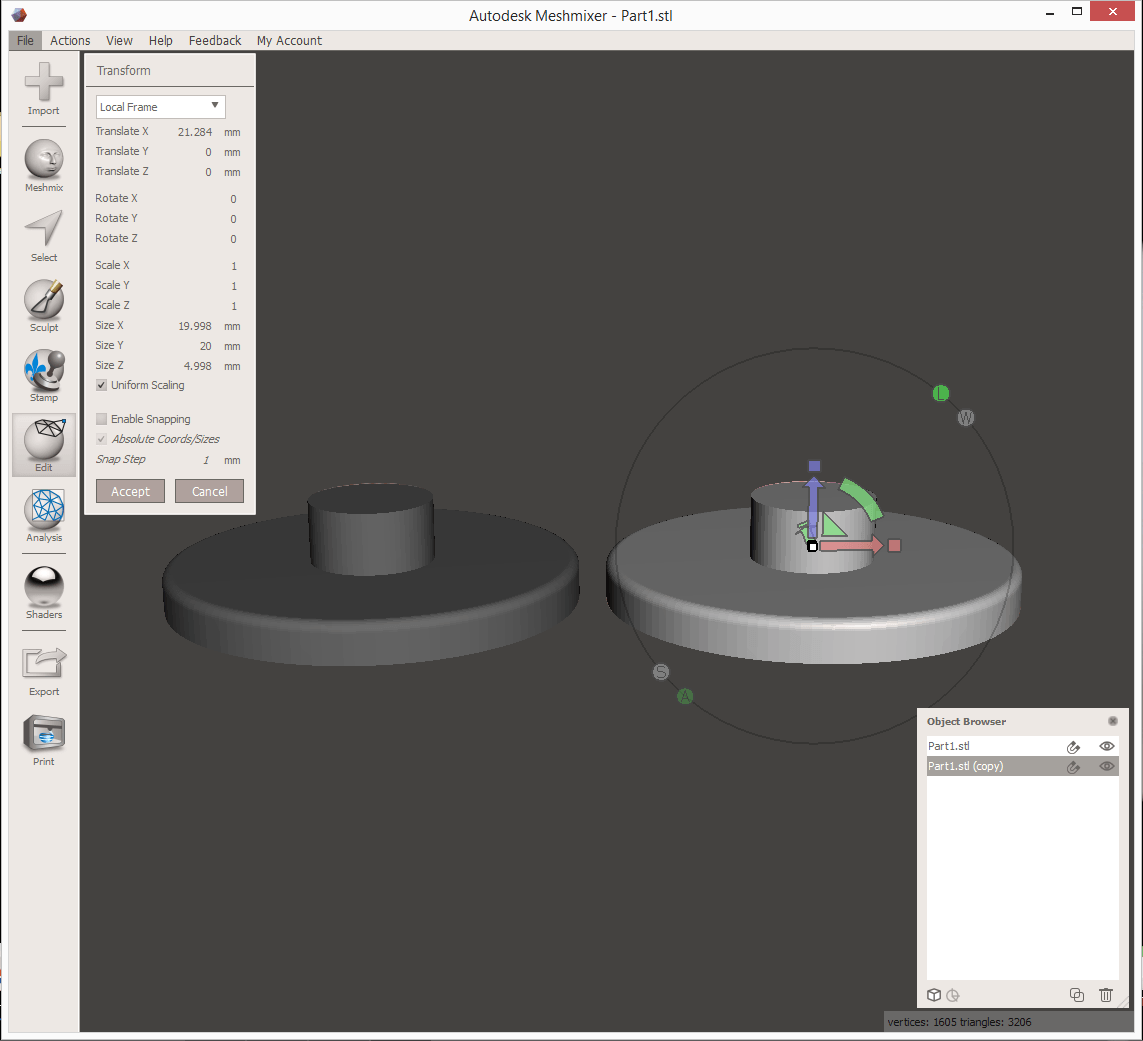
To do this we need to use the “Transform” function which you can find under the “Edit” menu, we are then going to press “Accept” to confirm the operation.
Now that we have duplicated our item, let’s add a sprue to our model.
On the Meshmixer panel we will drag-and-drop a cylinder between our models. The software will guide you by connecting one side of the cylinder to the surface of the model which makes it easy to position it properly between the two parts.
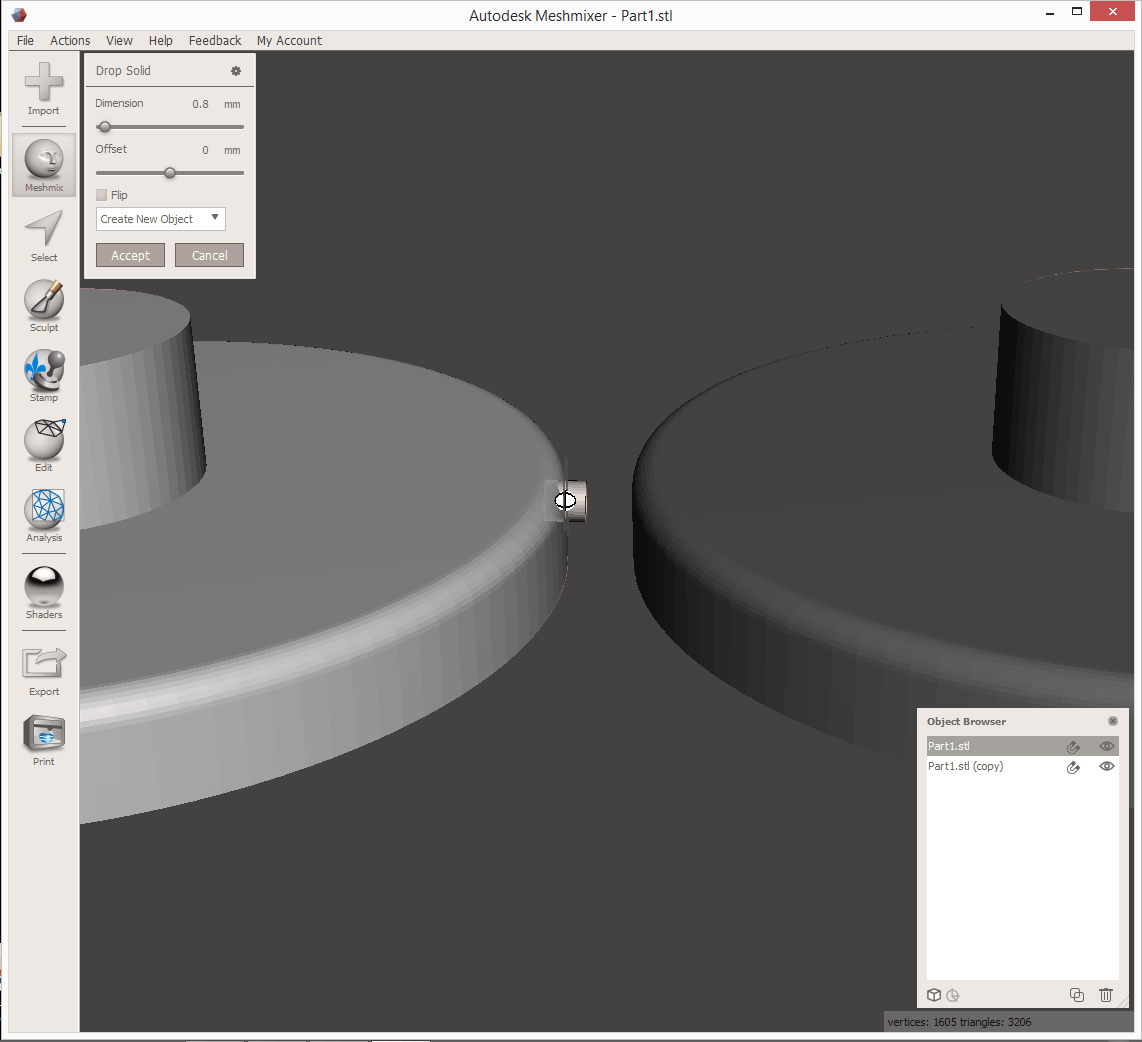
On the top left you can see that a window has opened. From that menu you can select the cylinder’s diameter, you’ll want to choose the minimum thickness required for the material you have chosen. In this case plastic is the selected materials so the minimum thickness will be 0.8mm. After confirming that your minimum thickness is met you can approve by selecting “Accept”.
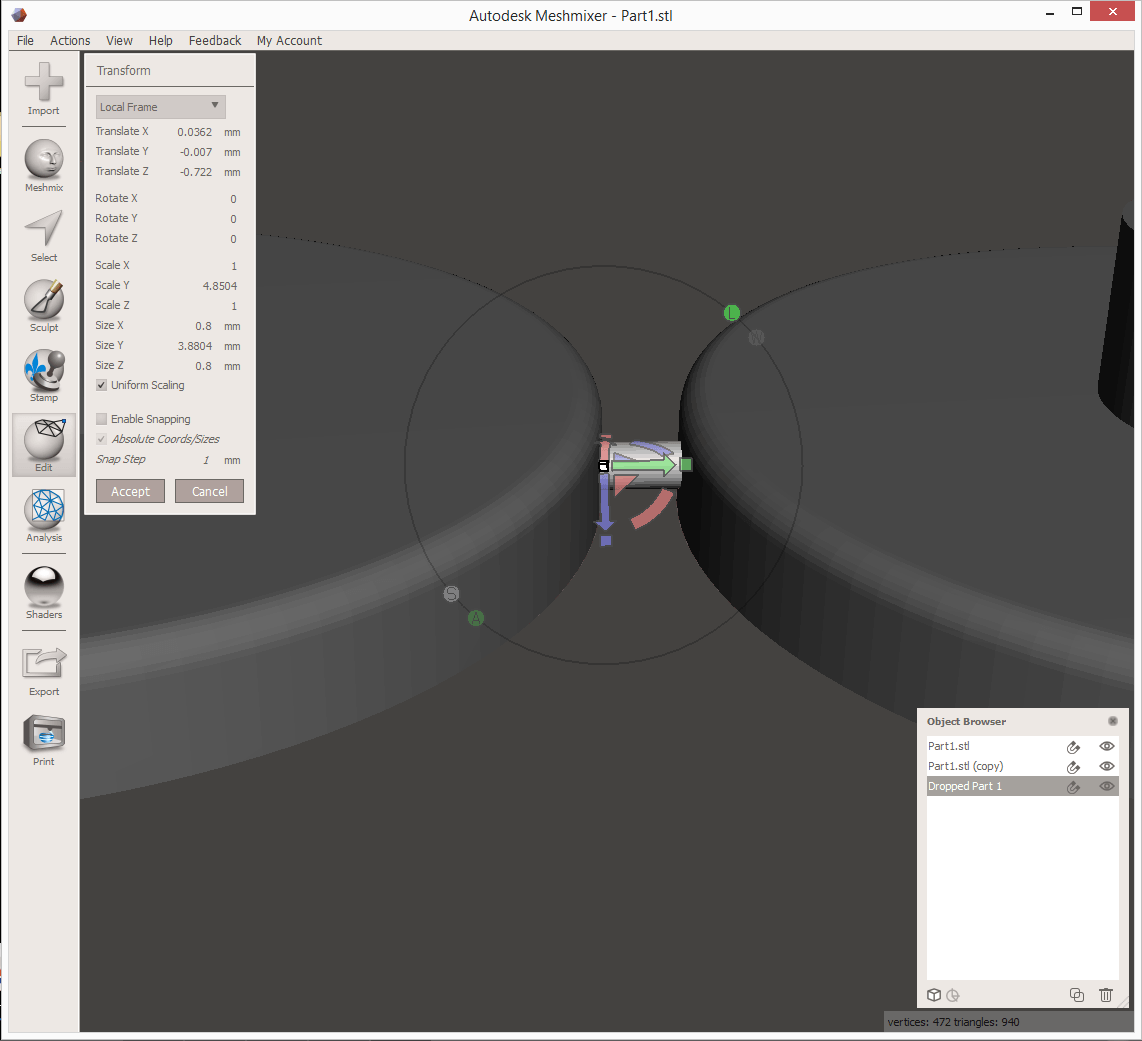
Because we have chosen the diameter of the cylinder first, Meshmixer software automatically sets the rest of the measurements to scale. Now to connect the cylinder to both items we can scale it on the Y axis by selecting “Edit” and “Transform”.
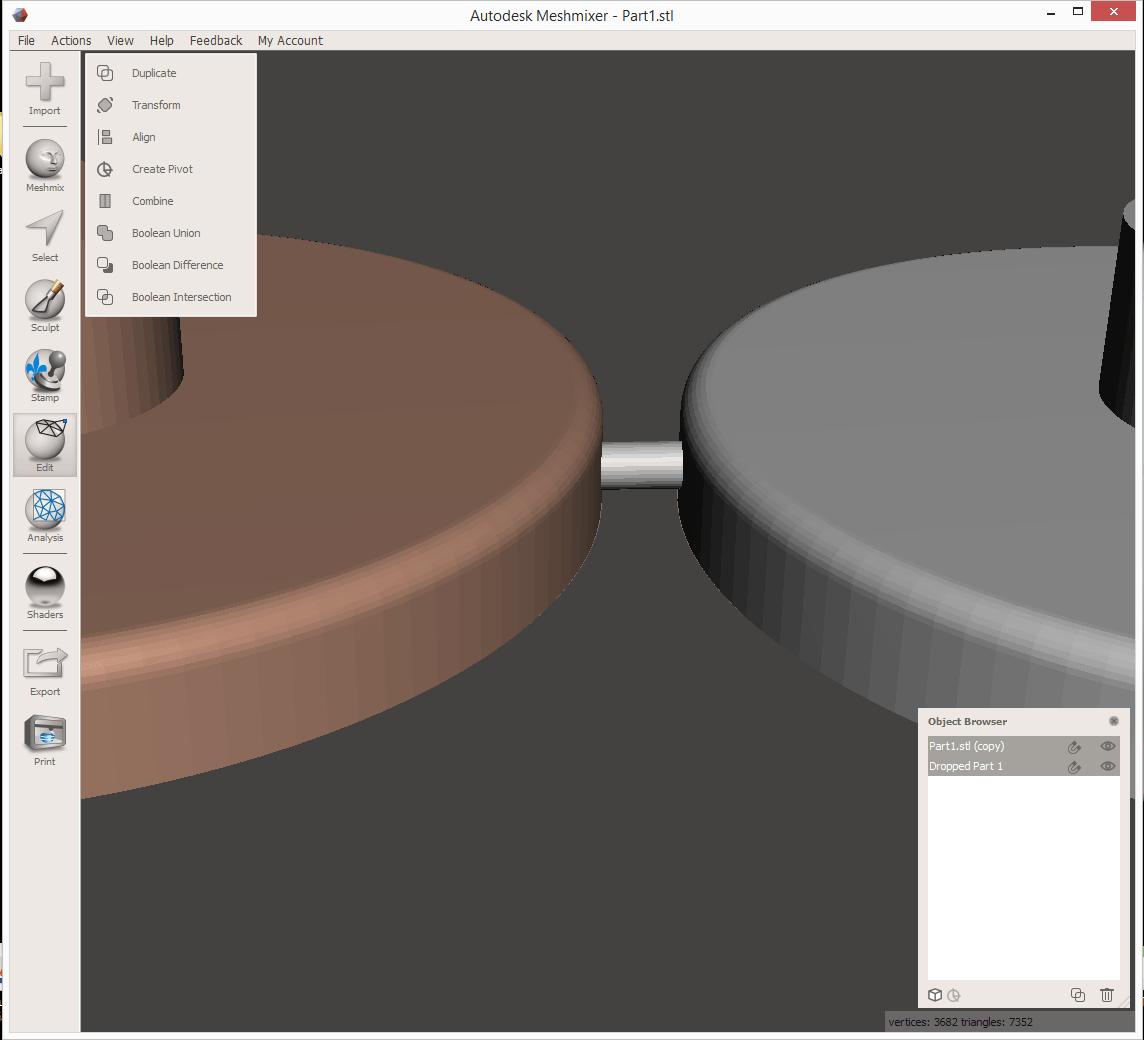
Now that the 3 objects are properly touching one another we can join them into 1 single item. Let’s first select the original part and its clone, by keeping the “Control” button pressed on the keyboard while clicking on the objects, then we want to choose “Merge” from the top left window, after those steps we want to then select the newly created sprue, and choosing the “Boolean Union” option.
There is now only one object on the screen, composed of two “Part 1” models and a connecting sprue. We now have our ensemble!
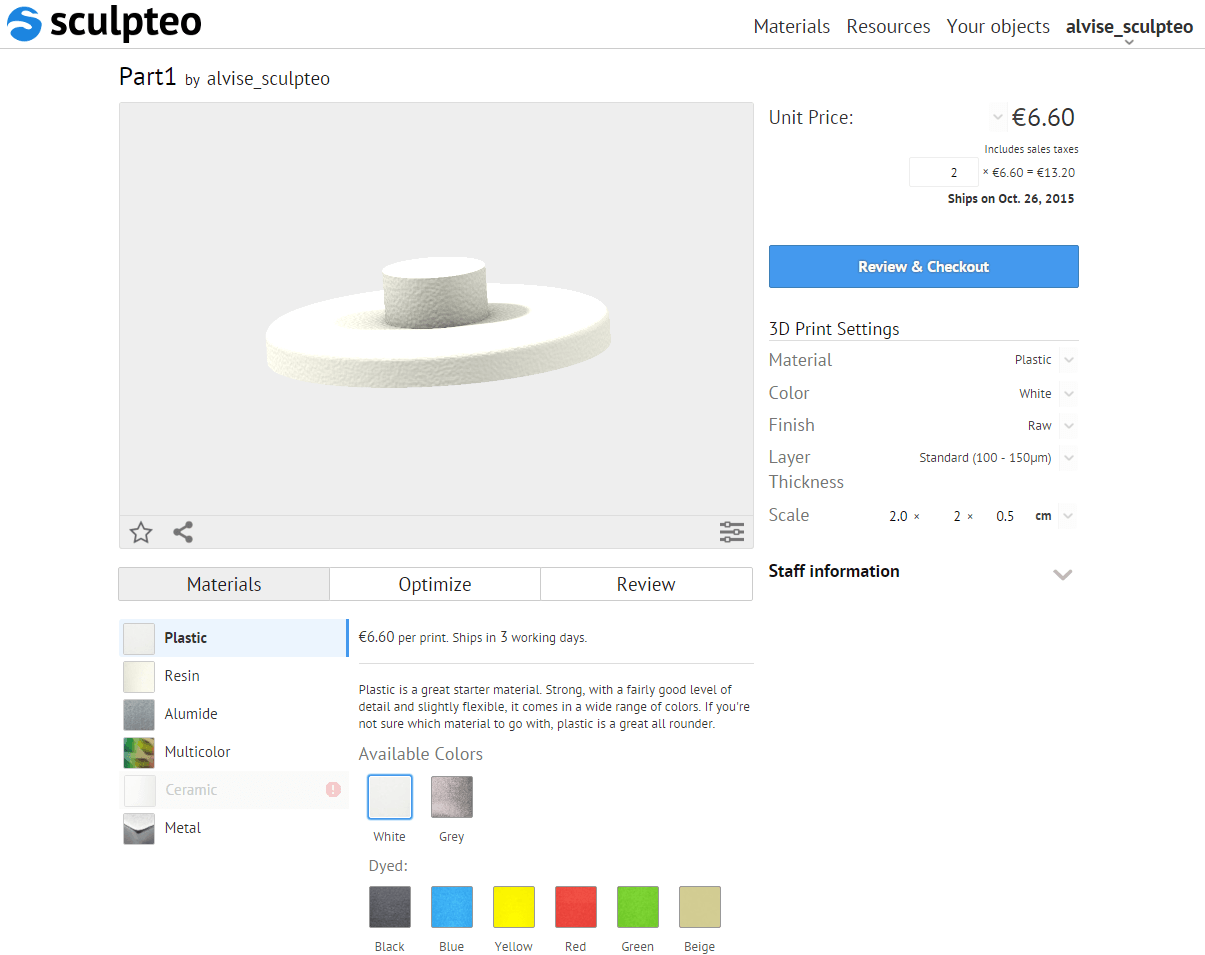
Let’s export and uploaded to Sculpteo’s site to see if our price has changed.
Let’s export it by selecting “Edit” and then “Export” so that we can upload the file to the Sculpteo website. We see here that the pricing has dropped compared to printing 2 of the same object without joining them with a Sprue!
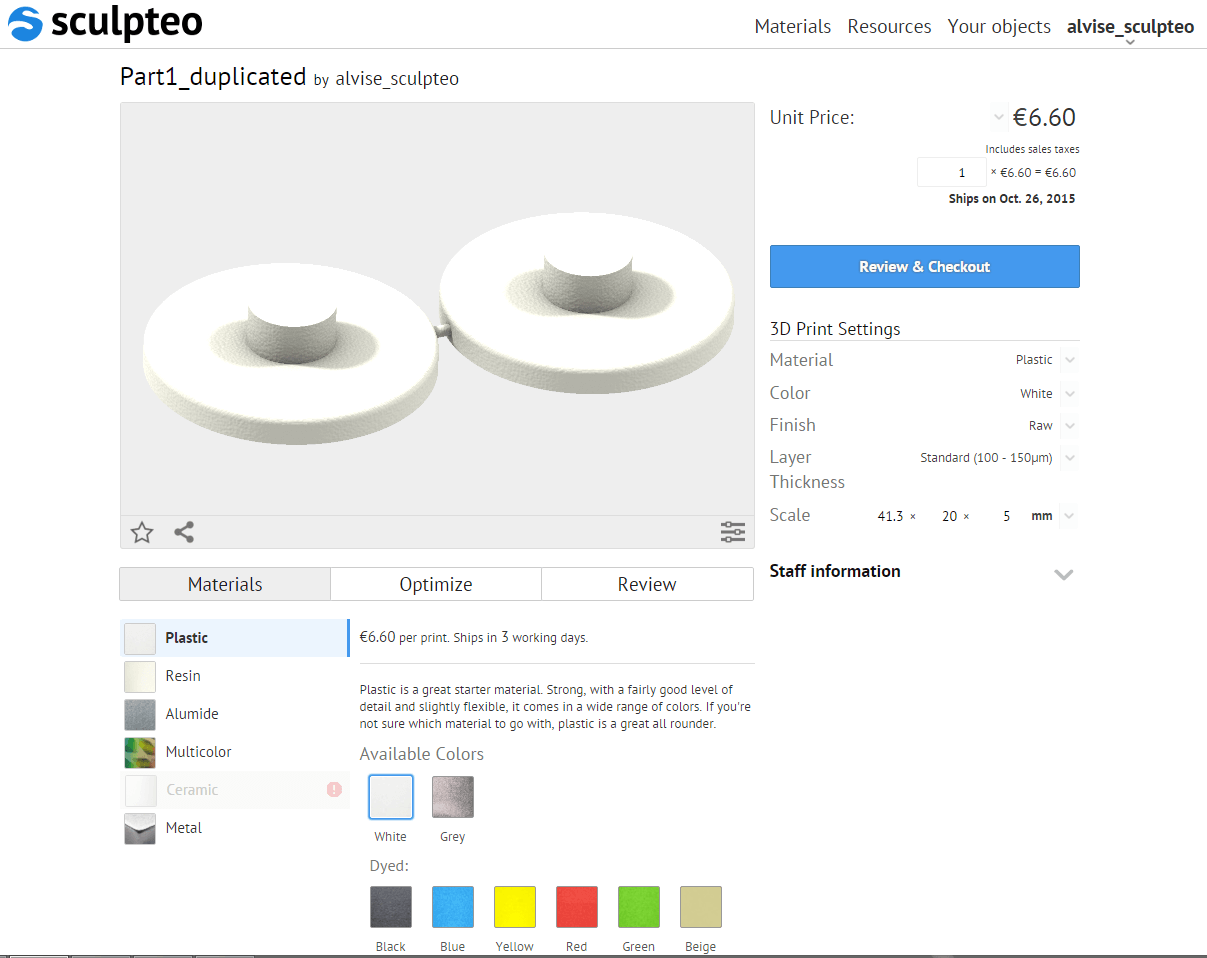
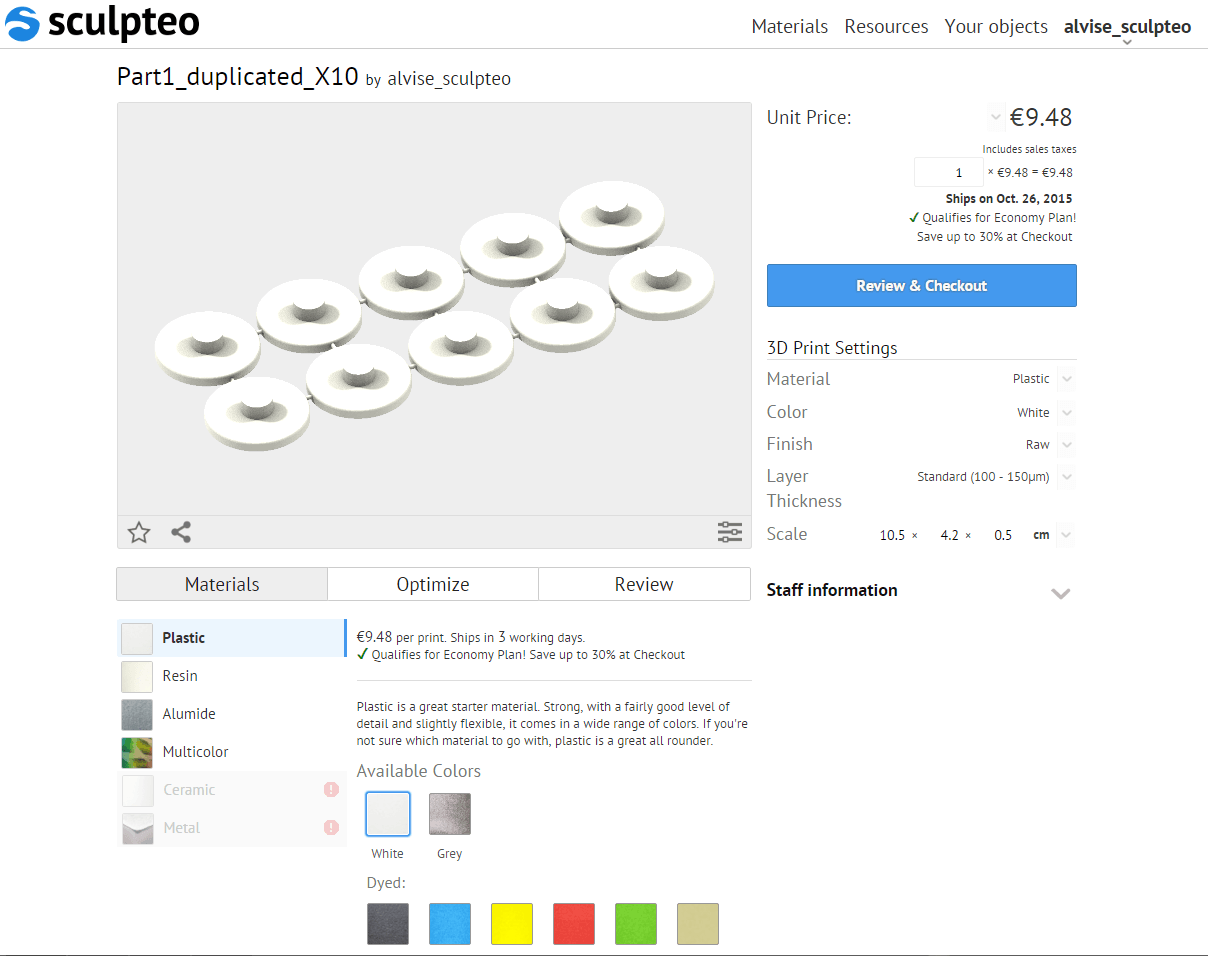
If you look at the first photo you’ll see that doubling the item doubled the price, however with a sprue the object is considered to be 1 object and therefore is less than a double order. What if you wanted 10 pieces connected with a sprue… curious about what that does to the price? It actually decreases to just 95 cents per unit!
When using methods like this just keep in mind that you and/or your customer will need to remove the sprues manually upon receiving the print. We hope that this has shed some light on the Sculpteo Optimization Tools and provided a foundation for understanding and using sprues in 3D printing.