 Connect with Google
 Connect with Facebook
DIY Tutorial: Urethane Casting with a 3D printed master
Posted By Arthur Cassaignau on Apr 7, 2016 | 1 comment
Can you create a basic mold using a 3D printed shape? The answer is yes, and it’s even easier than what you think. In this step by step tutorial, we go over the creation of a silicone mold thanks to a master that has been 3D printed and its casting in urethane. This technique allows you to create several units that will have the exact same geometry as the original master. Following the different instructions, you’ll know how to create multiple units of the same part using a CAD file, one 3D print and a little bit of time. This is a DIY and low-cost alternative to 3D printing all your parts that can be very useful in your prototyping phase.
The goal of this tutorial is to re-fabricate several units of a protection pad that goes right under a chair’s legs. I’m using the opportunity of doing this for myself to create of tutorial about this. The model of chair is the Selene model designed by Vico Magistretti and edited by Artemide. After long years of service, a full set of 4 chairs has been missing most of its protection pads and the fragility of the injected plastic prevents from using them without those parts. So our mission is to give them birth again.
Here are the model of the chair and the parts that need to be manufactured. Since the chair’s legs are looking in the opposite direction, we have two sets of parts that are identical in their geometry but symmetrical. In this tutorial, we’ll go over the creation of one of the part.
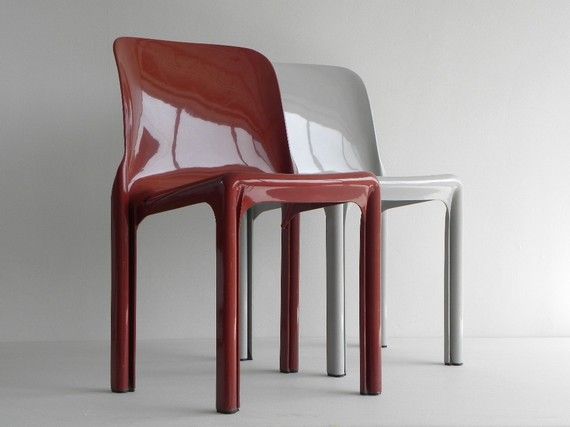
The Selene chair designed by Vico Magistretti and edited by Artemide
This step by step tutorial will go through the creation of the mold and its casting in urethane after we 3D printed a master. This master is a redesign of the parts that have gone missing.
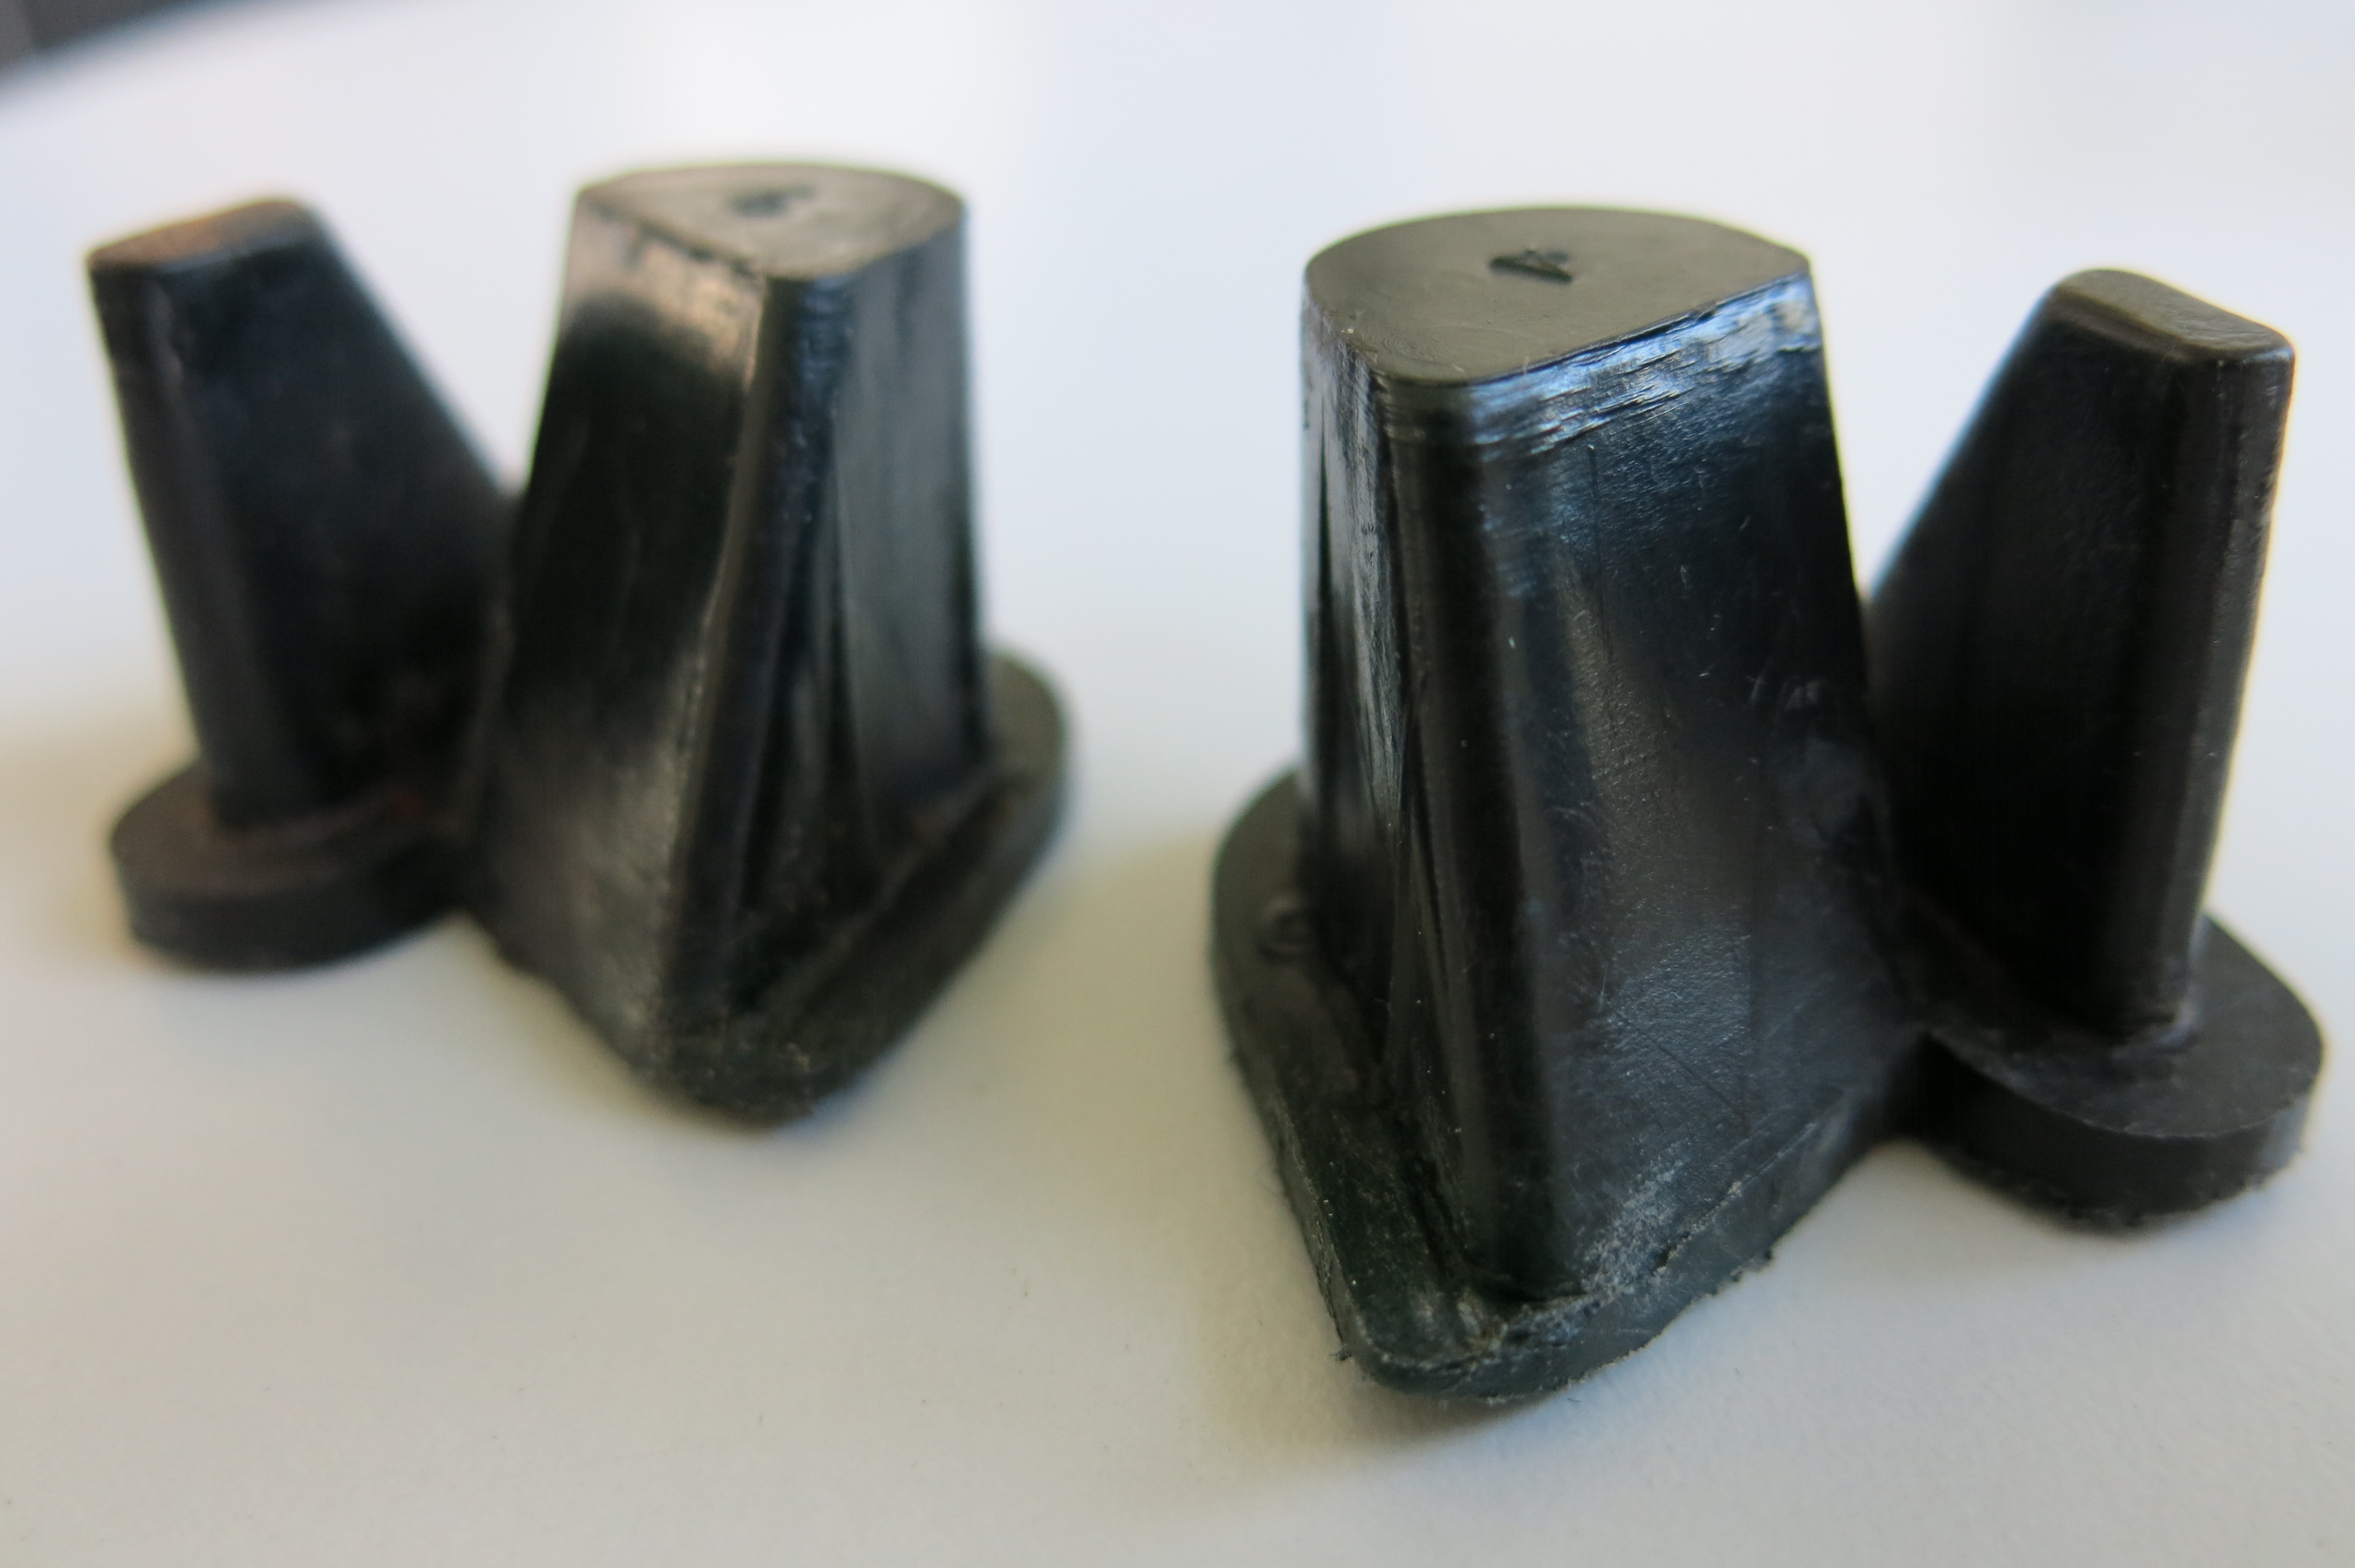
The 3D file for the master has been redesigned using Solidworks. Here is how the 3D printed parts compare to our original ones. We 3D printed int using our raw plastic material. Since the part will only be used for casting, there is no need to select a color. However, polishing makes a difference as both the silicone and the urethane are “saving” the finest details. If you use a part with a rough surface, the same surface will appear on the molded part. We’ll get to that later at the end of the tutorial. But this is something important to have in mind if you intend to use a low-quality 3D print that has very visible layers.

Original protection pad against redesigned and 3D printed version
First, the material you need:
- A set of Lego
- Siliconerubber
- Urethane plastic 70A (shore hardness)
- Plasticine 40A (shore hardness)
- Petroleum jelly or Vaseline
- one syringe
- wooden sticks
- glass, plastic or paper cups
- sheets of plastic or a clean flat surface
- latex gloves
- your 3D printed master
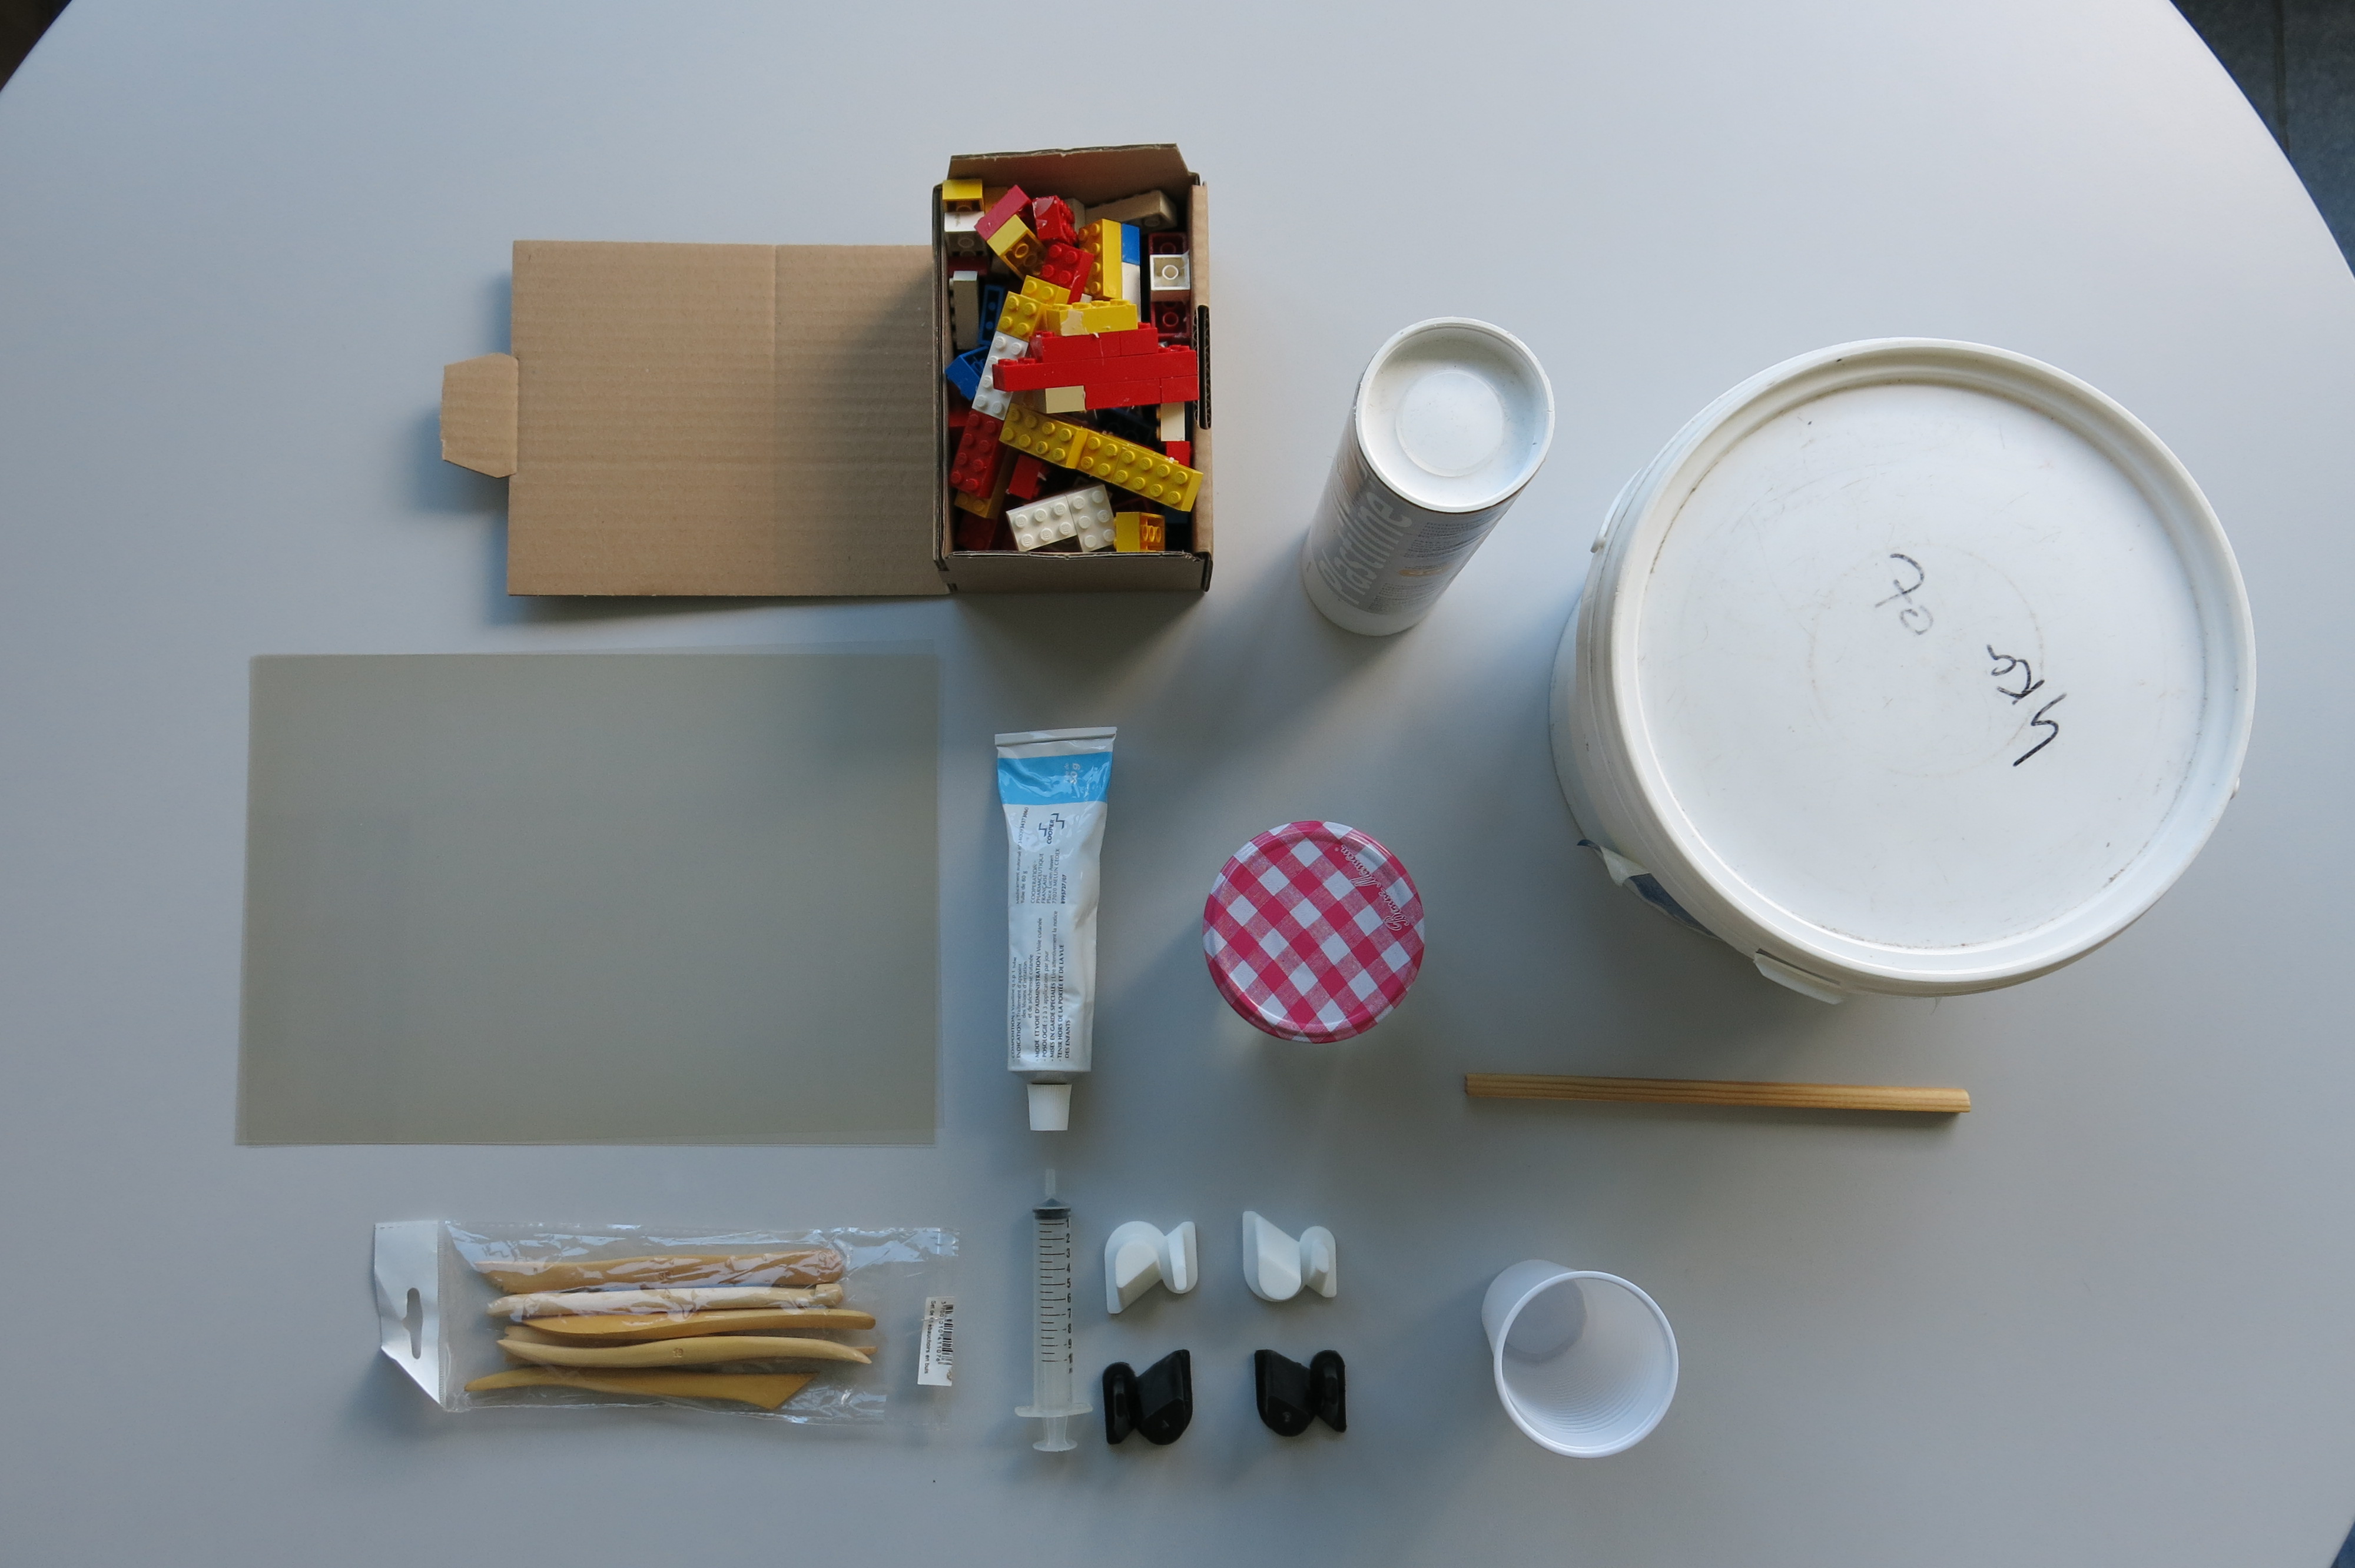
This is your shopping list
To buy your silicone rubber and urethane plastic, you can easily shop it online on Smooth-on. Here are several references that could be a good fit:
- Silicone rubber: http://www.smooth-on.com/Silicone-Rubber-an/c2_1113_1135/index.html
- Urethane plastic: http://www.smooth-on.com/Urethane-Plastic-a/c5_1120_1410/index.html
- Your 3D printed master: https://www.sculpteo.com/en/
For each section of the tutorial, the video at the beginning display the different steps visually so that you can understand. (However there is no audio yet). The description of the different steps is detailed just underneath the video. Let’s begin.
The groundwork to create to mold
In order to cast our mold and be able to remove the molded part from it, we need to make a two parts mold. The very first step is to find a clean flat surface to create the first part. In this tutorial, we’re using sheets of plastic. It gives us both the possibility to move them and also to bend them the way we want.
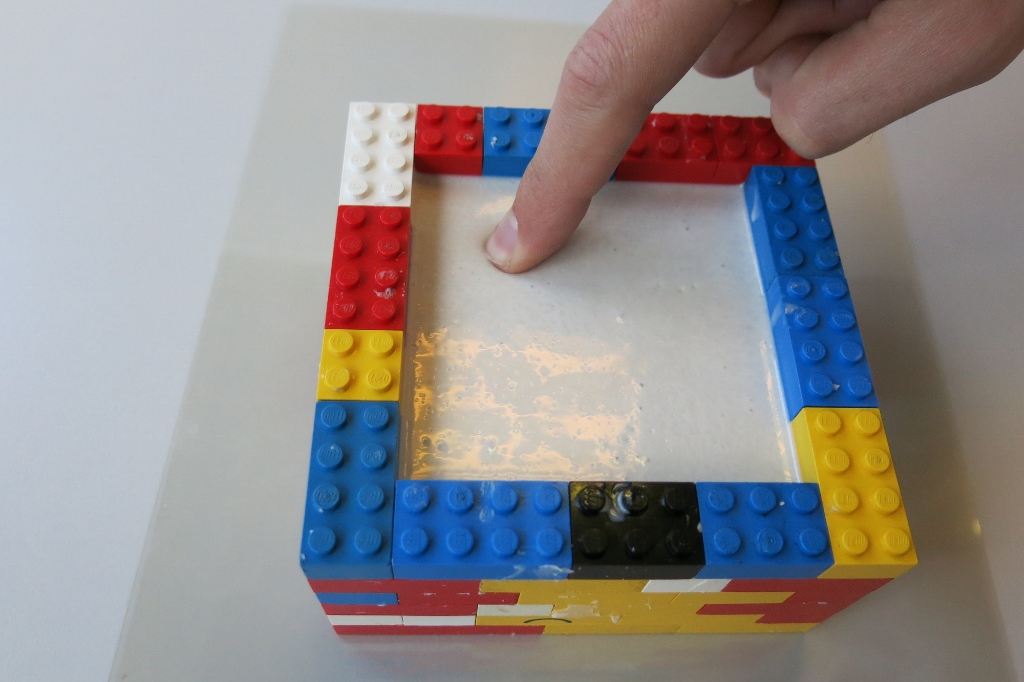
On those sheets of plastic, we’re using Lego blocks to create the mold frame. Lego are not just here for the DIY touch of this tutorial, they also very helpful as you can add on remove them very easily, they’re largely adaptable in terms of size and heights, and once you know how many of them you piled together, you’ll be able to easily calculate the volume of your mold to know how much Silicone you should use.
Since our part is not that big, we’re starting with a small frame. We’re building a square with sides of roughly 80mm. Make sure your frame is also high enough to contain the first “section” of your master. Once this step is done, it’s time to warm up our Plasticine. To warm it up, you’ll simply need to knead it until you think it sufficiently malleable to fit into every corner of our Lego square.
The reason why we’re using Plasticine is to create the support that will help us make the first part of the mold. Since silicone rubber solidifies in about 12 hours depending on the kind of silicone you’re using, it doesn’t offer you the chance to add the imprint of the master neither to be very precise even if you were to wait for the perfect timing. Instead, Plasticine will work “virtually” as the second part of the mold that holds the master while we make the first part. The good thing about Plasticine and silicone is that they’re not sticky together and they will be very easy to remove from one another.
An important step is to level out the surface of the plasticine so that it’s as flat as possible and very regular. This will help you achieve a first part of the mold that’s very clean, not grainy and with no hole caused by the presence of air bubble. To achieve that, just use the wood sticks that we added to the shopping list. It will help you create a flat surface.
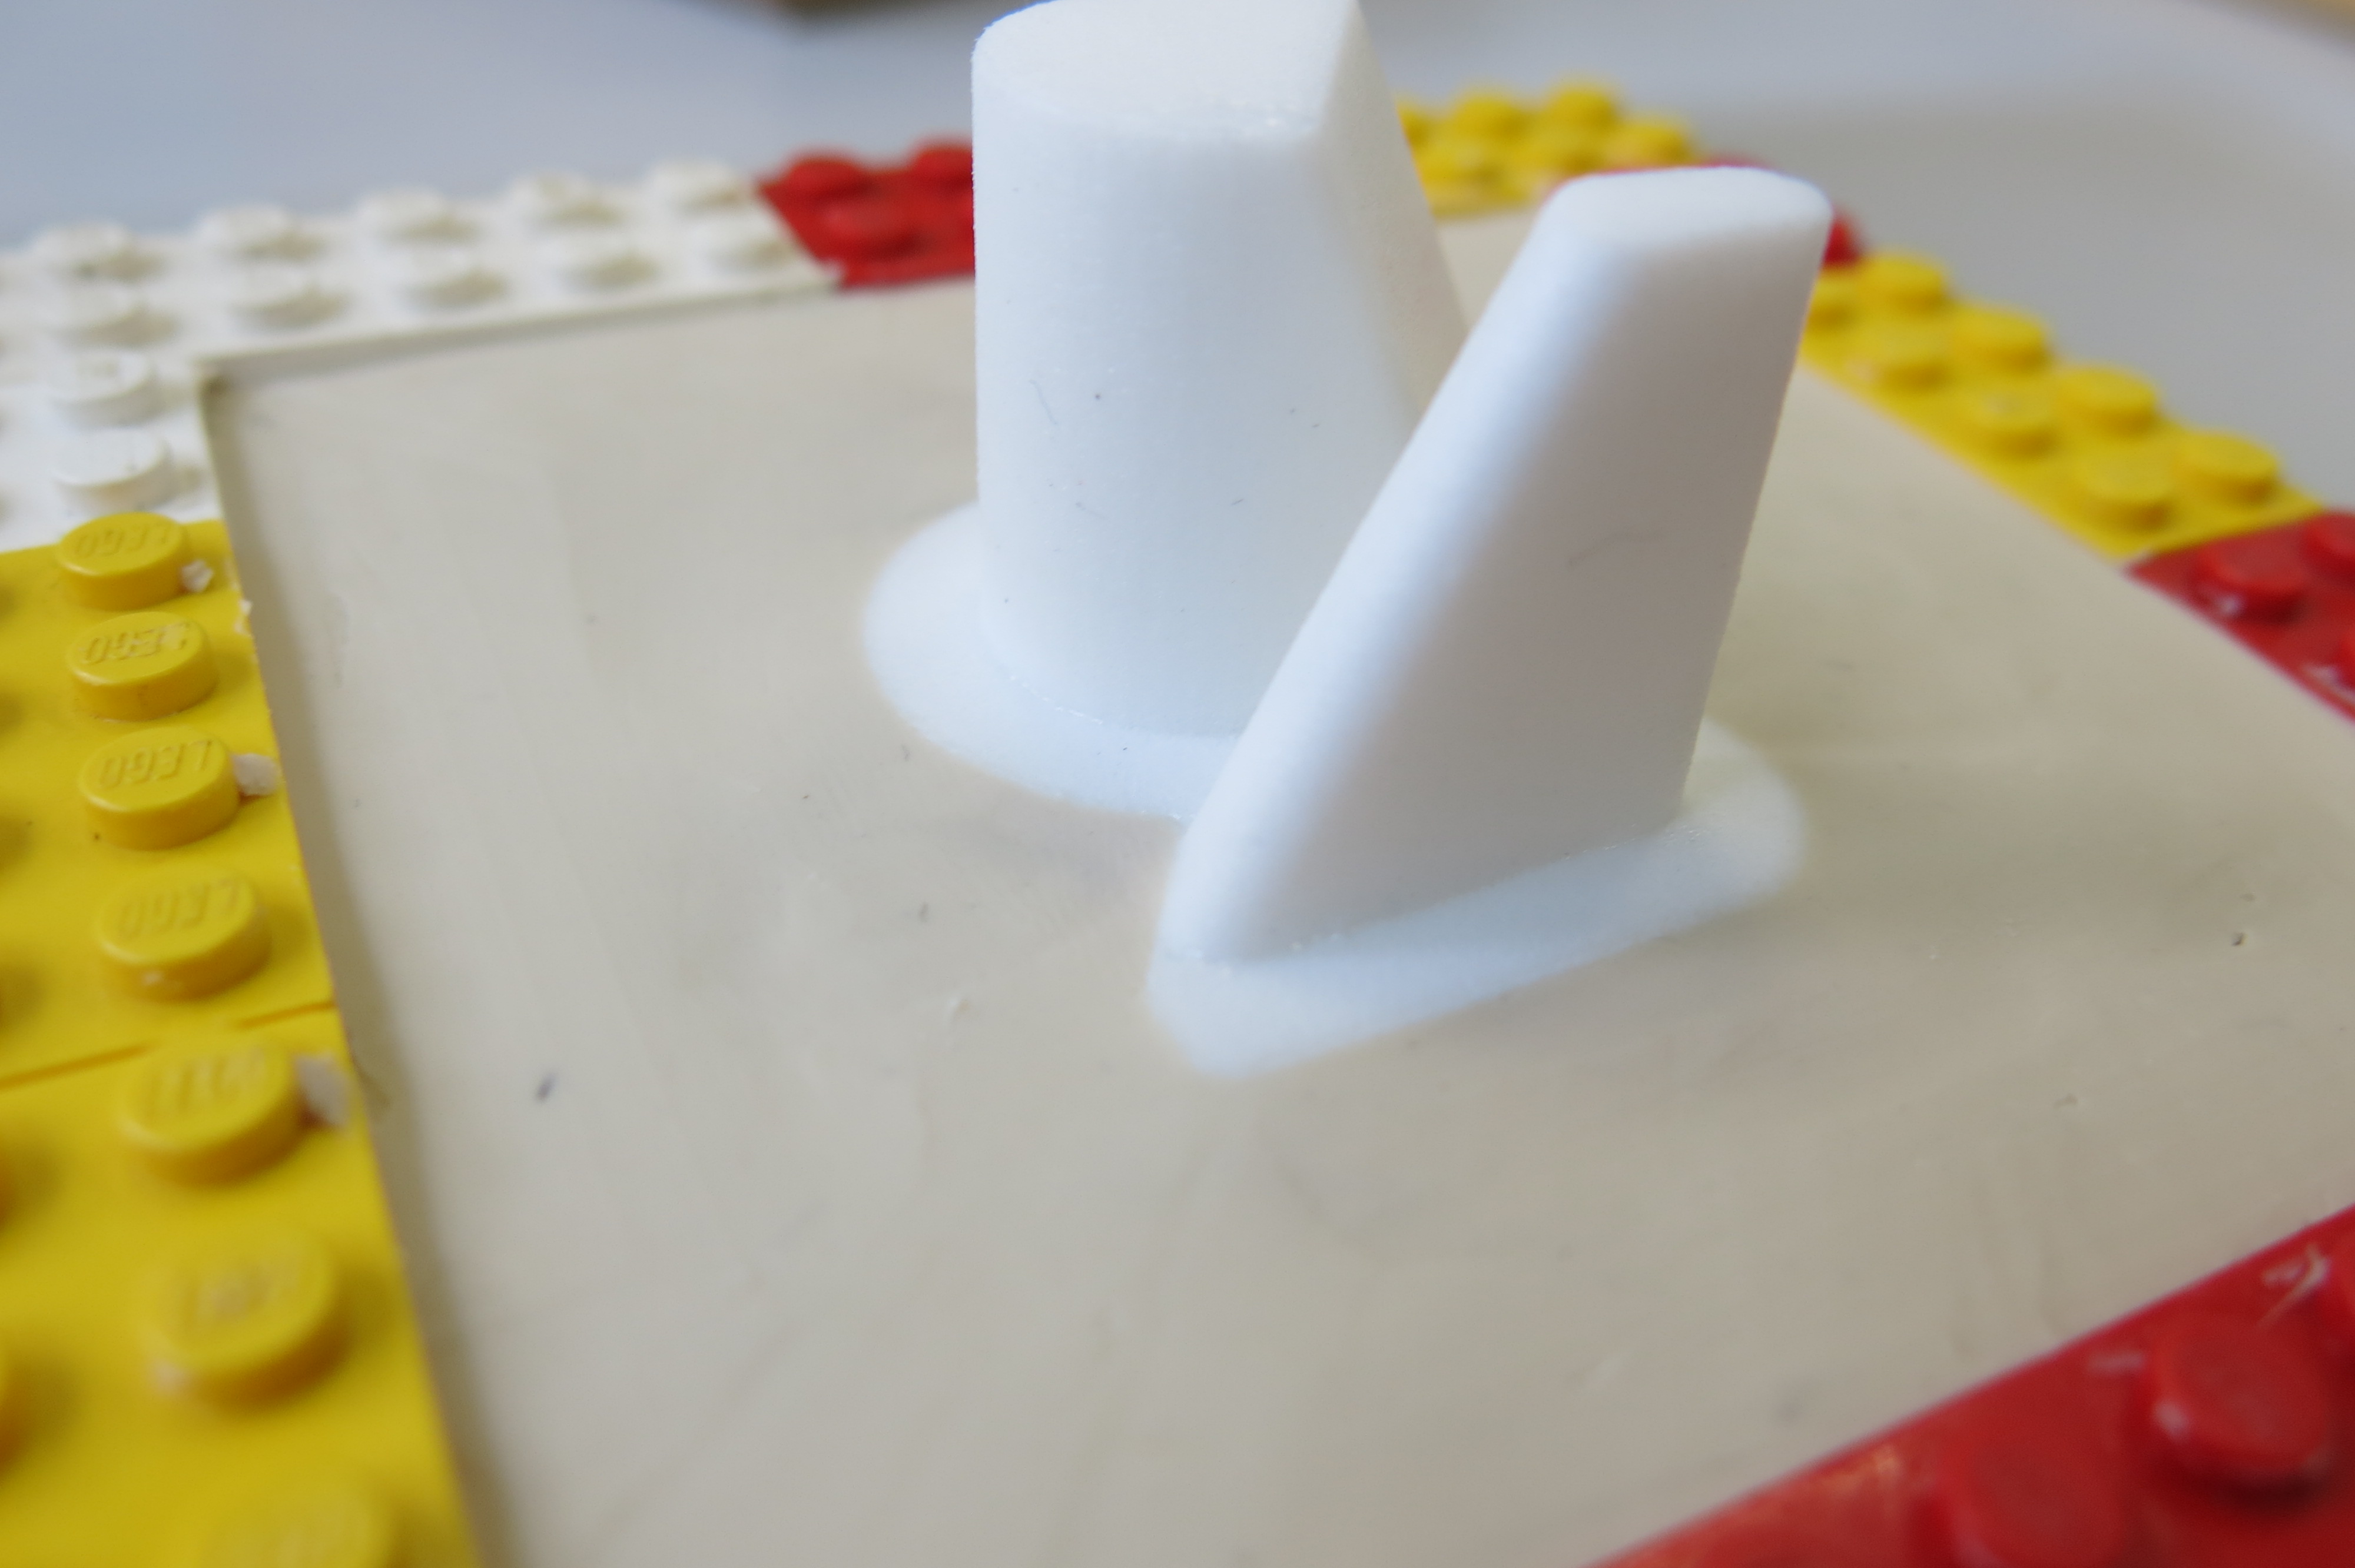
Now that the Plasticine is flat inside our Lego frame, it’s time to sink our master into it. Right before that, you can add petroleum jelly all around the 3D printed master. Coating your master with petroleum jelly will ensure that the silicone or the Plasticine don’t stick to add to even bridge with it. It’s especially important in our case since we 3D printed the part using Sculpteo’s SLS 3D printer. This technology creates a slightly porous part in polyamide.
After this, you just sink the master into the Plasticine. The right move, at this point, is to find a “virtual” section on the design that makes sense to create the two different parts of the mold. In our example, we push the 3D printed part up the first platform.
The crucial step here is to level up the Plasticine and the master perfectly . You can do it using your fingers, but since you want to be really precise using a wood or metal stick can useful. By pushing the master into the Plasticine, it will inevitably create a rounded edge in the Plasticine. This needs to be leveled up so that you have a sharp contact between your master and the Plasticine.
It’s important to make sure that the part and the Plasticine are joining perfectly. Otherwise, you can end up with small excrescences on your final molded part
With the wood stick or anything else (a pen would work), create not too profound holes on the four edges of the square. The silicone will take this shape and this will allow us to make the two parts of the mold fit together and adjust when casting the urethane material.
As this moment, we’re almost done with the preparation to pour our first part of the mold. We need one thing: build your Lego wall up. We’re done with this step.
Making the first part of the mold
Everything is ready for us to pour the liquid silicone into our Lego frame and on the Plasticine that contains the 3D printer master. So we need to prepare the Silicone.
We need some calculations to know the volume of silicone that you’ll need to pour into the frame. To know this information, you need to know how big a Lego block is.

Source Wikipedia: https://commons.wikimedia.org/wiki/File:Lego_dimensions.svg
If you want to have a rough value, just multiplying height, width, and depth will be enough once you know how many Lego you used.
If you want to be really precise (this is useful for big parts as Silicone can be expensive), you’ll want to go back to your CAD software and subtract the volume of the master. In our example, here are the dimensions and volumes of the two different sections:
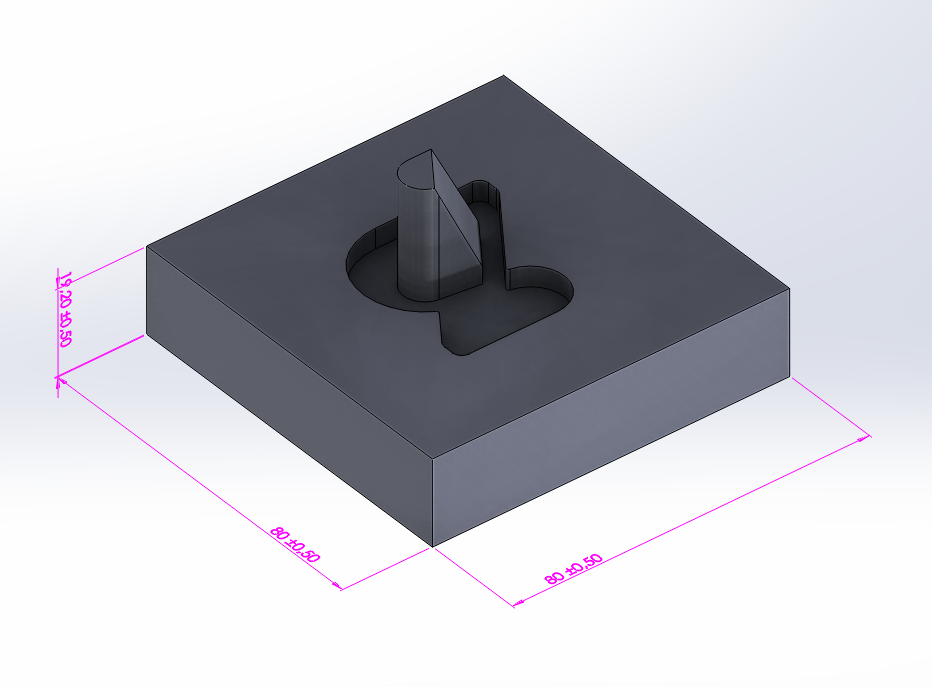
Volume of the upper mold part calculated through Solidworks

Volume of the upper mold part calculated through Solidworks
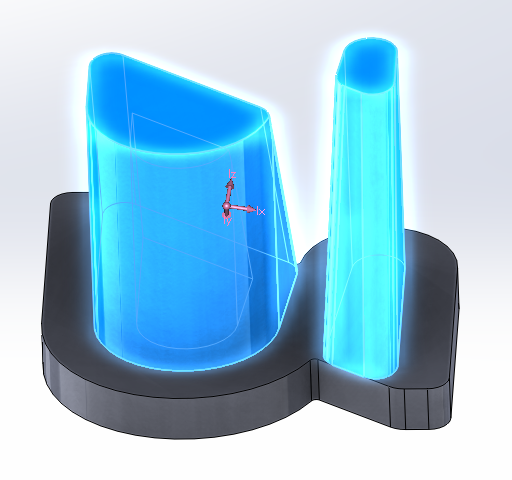
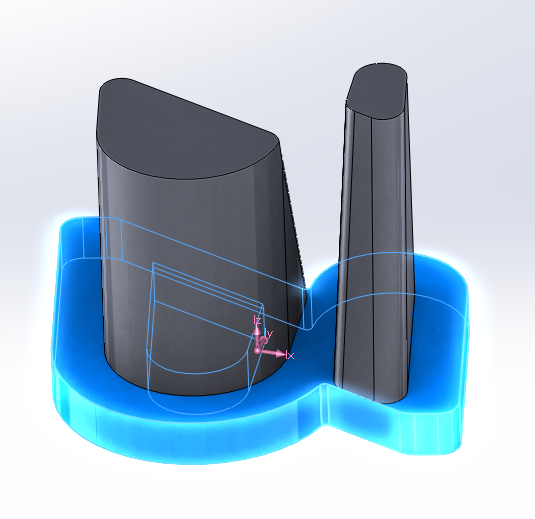
And the volume of the two sections of our 3D printed master. (Once you selected them in Solidworks, you’ll be able to have the volume information for those):
The silicone that you buy is liquid and becomes solid when you add a catalyst to it. Depending on the silicone you’re ordering, it will be delivered to you with the catalyst and also indications on how much of it you should use. In our case, we need to use 5% of catalyst for the volume of silicone.
The first thing is to energetically stir your liquid silicone to create a homogenous liquid. Once you’ve done that, fill a cup (with graduation it’s even easier to make your calculations) with the right amount of liquid silicone and add your catalyst into the cup. Stir it again vigorously to mix it correctly to your silicone. You have 12 hours before it solidifies, so no rush.
The secret to casting the silicone is to pour it gently. Our number one enemy here are bubbles. It is not especially an issue if they trapped right in to middle a the silicone but air bubbles that are trapped between the master and silicone with created urethane protuberance on our final casted part.
To prevent this, it’s easier to use rather liquid silicone (Smooth-on is selling extra liquid silicone or even silicone liquefier that you can add to your silicone). Also pouring it carefully will help, as well as creating small vibrations by shaking the mold to remove bubbles that you see. In the video, you can see that we’re adding the silicone carefully using the wood stick at the beginning to fill all the holes and the critical sections. When all the critical details have been immersed in silicone, you can pour it with less caution.
With those instructions in head. Start pouring. Let it solidify for 12 hours.
Making the second part of the mold
Twelve hours later, the silicone should be solid and you have your Lego frame that contains one part of the silicone mold on one side, Plasticine on the other side and the 3D printed master trapped in the middle.
The first operation is to make sure that your silicone mold is solid. Just push it with your finger, you’ll know.
Verify the solidity of your silicone using your finger
You can then start removing the Plasticine. If it’s easier you can unbuild some Lego floors. Once the Plasticine is removed, you can see the first part of the mold. Clean the surface so that you don’t have Plasticine on it anymore. Build your Lego walls up.
You’re almost ready to pour your second part of the mold. However, YOU NEED TO COAT both the first mold’s part and the 3D printed master with petroleum jelly again. Otherwise, you simply can’t distinguish the different part of the mold after this step, as the silicone part 1 and silicone part 2 will “merge” together and trap your master. Don’t overuse petroleum jelly. If you use too much as it, there is a chance that it will change the geometry of the master of the mold, but adding a thin layer everywhere is the way to go.
Now repeat the pouring process, the same way we did the first time.

View if the Lego frame while making the second part of the silicon mold

The second part of the mold is completed. Now we let it dry for 12 hours.
Wait for 12 hours.
Casting the mold with urethane
At this step, you have your Lego frame that contains one part of the silicone mold on one side, the other mold’s part on the other side and the 3D printed master trapped in the middle.
You can now remove all the Lego blocks and separate the two parts of the mold. Depending on the design of your master, you’ll need to be more or less cautious, if you don’t want to damage the mold. On the design we picked, for instance, the deep holes are creating a part that can be stuck when you separate the mold parts or remove the master.
You should end up with two different mold parts that fit perfectly together thanks to the holes we added in the Plasticine at the beginning. If you want you can clean the different silicone fringes that were created by the silicone that infiltrated the space between the Lego blocks.
It’s time to prepare our urethane to cast the mold. In our example, we picked a urethane with a medium hardness (Shore hardness 70A). But it’s up to you to decide which shore you should use. When buying urethane, you’re in fact buying two different liquids that need to be mixed in order to create solid urethane. Often you have bottle A and bottle B. Unless told differently in your instructions, you need to mix the same amount of the A product and the B product. Don’t forget to wear latex gloves for this step as you’ll probably end up with some of the product on your hands.
For the casting, we’ll proceed in two separate steps. Since we didn’t create a chimney to “inject” urethane (this is a viable option, but to my opinion far more risky when it comes to trapping air bubbles), we’ll make two separate casts a few minutes away. The first one to fill the first mold’s part. We’ll let it solidify a little bit to be able to turn it upside down without it dripping, and then sticking it to the second mold’s part.
To be efficient in this step and as the urethane solidifies quickly (the working time given by Smooth-on is 4 minutes), we recommend that you use 2 sets of 2 cups to create your A and B mixes.
Once again based on the calculations of your 3D printed master’s volume (see above), you’ll prepare the right amount of A material and B material for the first cast. In our case, 2cl of A and 2cl of B in our first set of cups.
4cl of A and 4cl of B in our second set of cups.
Mix the A and B material of your first set of cups. Mix it vigorously until it heats a bit due to the chemical reaction. The heat will indicate that it’s reacting and ready to be poured.
Clean the mold quickly to remove any dust and pour the solution. Let it solidify two minutes. Prepare the second mix during that time.
Test the solidity of the mix that has already been poured into the first mold by putting pressure on the sides. It will tell you if you can flip it without any trouble. If yes, then you can start casting the second mold. Fill it to the top and then stick the two mold parts together. This step is important as you don’t want to enclose any air, so you should NOT do it in one quick go but rather gently and smoothly.
Once the two parts are touching, make sure they’re fitting perfectly together and put a little pressure on the palm of your hand on top of the mold. The pressure needs to be really low as you don’t want to constraint your mold. You can release it after a few seconds. You can repeat the operation with your thumb going from the center to the exterior of the mold. It will help chase the air away if some is trapped. You’re done.
Wait for 20 minutes (or see indications).
You can remove your part from the mold. There is probably some urethane excess in a really thin form. You’ll be able to remove it with your hand or using a cutter.

Our final silicone mold in two parts realized from a 3D printed master and the part casted in urethane

Our final silicone mold in two parts realized from a 3D printed master and the part casted in urethane
Congratulations, you got a urethane cast part from your silicone mold.

On the left, the part we casted in urethane. On the right, the 3D printed master.