 Connect with Google
 Connect with Facebook
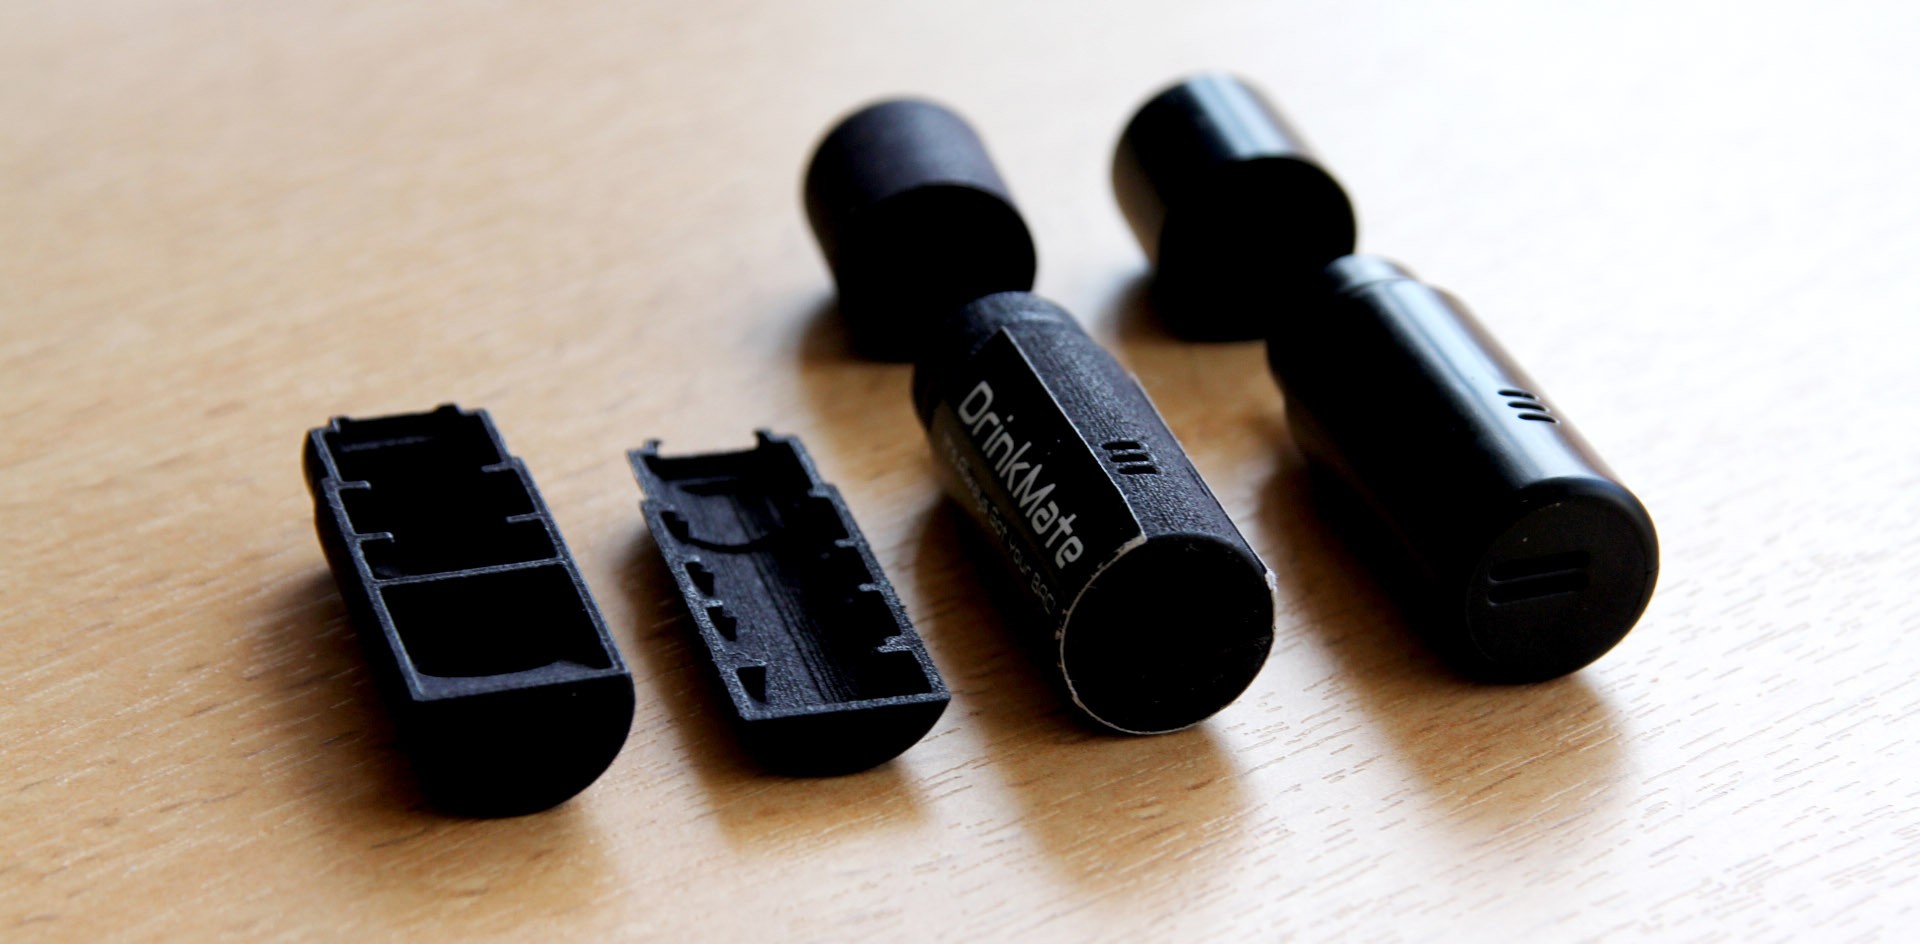
The 3D printing uses : Proof of Concept
Posted By Arthur Cassaignau on Jun 25, 2015 | 0 comments
If you’re building a product with the goal to start a hardware company. Then, you should have one thing in mind and one thing only: build a product your users will love. That’s where being able to manage the way you’re using 3D printing in the different phases of your product development is the key to success. You should know exactly what you must do at every step to ensure that you’ll end up with a better product, and that it will take you less time and less resources (time, money, patience) to build it. This is the reason why I’m starting this Summer Series on our blog. The goal is to introduce you to the different kind of 3D prints you should be aiming for, depending on where you are in your hardware product development. For this first post, it’s fairly natural to start with what we, at Sculpteo, call the Proof of Concept.
The Proof of concept is a very rough version of your future product. It is used to test just some aspects of the intended design. The aim is not to simulate the overall visual appearance (form factor), neither to qualify the different part for the manufacturing process (fit factor) or to build an actual prototype that works (function factor) – this is what I’ll cover next week with prototyping. Instead, the proofs of concept are used to “prove out” a potential design approach such as range of motion, mechanics, sensors, architecture, etc.
If you’re making a proof of concept. It simply means that you have a very early stage product. This phase is useful to identify which design options will not work, or what are the key factors for the success of your product. Having said that, it’s rather difficult to know exactly how many iteration you should make and how you should make them. However there are two criteria that, from my point of view, you should focus on: SPEED and FEATURES.
First about the SPEED:
As for every other phase of product development, speed is of the essence. However, if there is one step where you can completely oversee the so-to-speak “quality of execution” it’s the proof of concept. At this stage, there is no reason to focus on one way to make things happen. A proof of concept includes lots of different elements either for the structure or for the features. They can be achieved with plastics, wood, cardboard and metals. The good way is (i) your way and (ii) the quickest way.
What’s interesting to see is that if 3D printing was overlooked before in this ‘Proof of Concept” phase, it’s less and less the case. In the State of 3D Printing study we conducted at Sculpteo, participants are declaring that they use 3D printing more and more in their Proof of concept phase. Almost as much as for their prototyping needs. I believe the reason for that is that 3D printing is moving both up and down at the same time in the product development phase. While it was mostly used for prototyping only five years ago, 3D printing nows impact proof of concept and production.

In our State of 3D Printing study, we compared how users and “power users” are using 3D printing. 21% of them are using additive manufacturing to build a “proof of concept”
There are several reasons for that:
- Accessibility to a 3D printer is really easy today. You can find one in almost every city around the world on online platforms, at a maker-space close-by or by hiring an online service like Sculpteo.
- The required skills to create basic 3D models are dropping thanks to software like 123D Design, Sketch Up or Blender
- The price of 3D prints has dropped either if you have your own 3D printer or if you use an online 3D printing service.
I can think of plenty examples to illustrate this idea, but I’ll just take one. Last year, I spent some time exchanging with Shaun Masavage, the creator of DrinkMate and one of Sculpteo’s clients. Shaun explained me that that 3D printing solved almost every issue he encountered at each step. Thanks to 3D printing, he was able to have a quick proof of concept (a casing in which he could integrate the electronics) to display and talk about and a working prototype that just needed to be industrialized.

From the left to the right: the 3D printed casing of the proof of concept, the first 3D printed prototype and finally the injection molded part.
As a consequence, you shouldn’t overlook the potential of 3D printing to bring you lots of the elements of your Proof of concept, from casing to multiple small parts. The right solution is probably a mix of all the “building techniques” you know you can easily work with: 3D printing, cardboard mock-ups, laser-cutting, etc. This will give you some flexibility to put your electronic parts you’re willing to add those elements.
About the FEATURES:
The Proof of concept is not necessarily about integration all the different features and making sure they all work. Rather, It’s a step somewhere between the rough idea on paper and the final prototypes. As such, it should include the idea of a form (size, basic forms, etc) and simple features, or at least the representation of the features.
For instance, you could use a laser-cutted vinyl casing in which you add all the electronics and use a 3D printer to print the buttons that the final user should push. In such a case, all the buttons don’t necessarily have a feature working with them, but they’re already here because you want to display the idea of the feature.
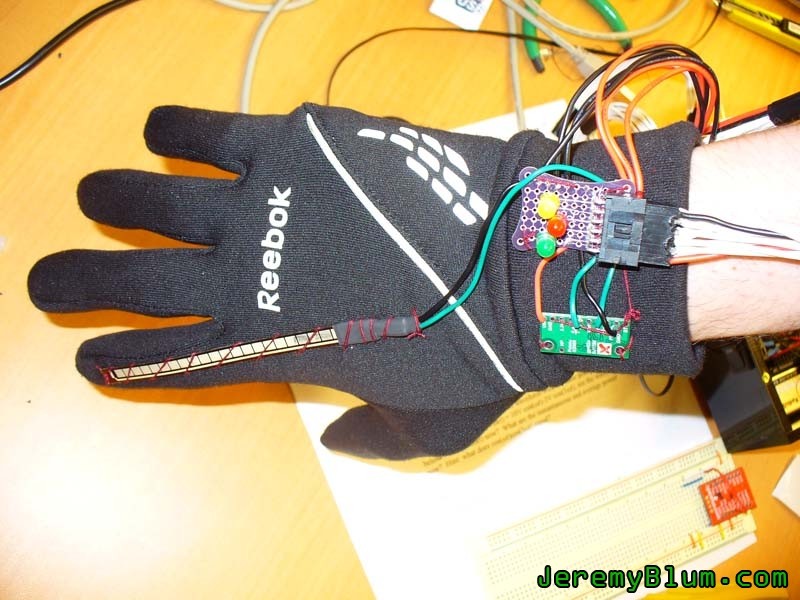
This is an exemple of a proof of concept for an hardware project called the SudoGlove. It’s been developed by four students Jeremy Blum, Joe Ballerini, Alex Garcia, and Tiffany Ng. You can find more info on jeremy’s website.
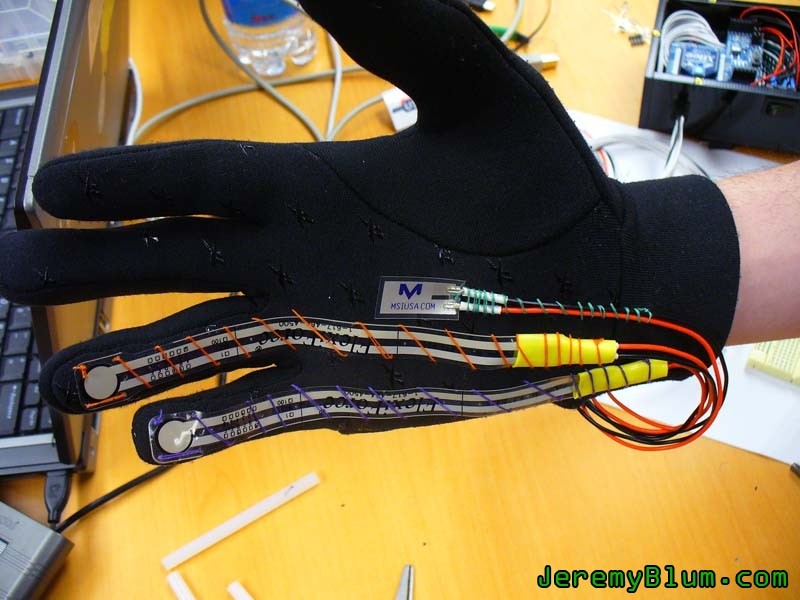
Sensors are sewed to the glove. It validates the form and the function.
At this stage, what you’ll need to have is what Benjamin Carlu, cofounder at Usine.io (a hardware project accelerator), calls a Functional Validation. As stated in his presentation about the life of a hardware startup, the Functional Validation is the second of the 6 phases of the life of a hardware product. This is the moment when you start working on OR with those elements:
- Form factor analysis
- Mock-up modeling
- On-the-shelf function
- Lego , cardboard
- Rapid prototyping (CNC, 3D printing)
- Electronic prototyping kits
What you should have at the end is an overall validation of the technical specs and be able to display your fist proof of concept to experts of the field. At this stage, you will know if it’s technically possible to create your product and if you need external helps.
A final word that I’d like to add is that is that the Proof of concept is closely related to the global life of your hardware product. As already mentionned, Benjamin’s presentation emphasizes the fact that there are 6 key steps to develop a hardware product. The methodology, he and his team developed, is one of the framework to follow when going down your hardware journey. The proof of concept making should begin just after the Exploration phase where ideation, brainstorming and real life exchanges are crucial. For this particular phase, I recommand two simple things:
- The first one is to use the canvas given by Alexander Osterwalder and his team in their best-seller book Business Model Generation. It’s definitely a go to for all wanna-be entrepreneur. Their canvas is free to download here.
- The second one is to go out there and start spreading your idea with a “tweet-long product pitch” and see how people reacts. For that, you’ll find many many events from big international conferences like Solidcon (happening this week) to smaller (and yet they’re getting bigger and bigger) IoT meetups (like that one in SF or that one in Paris).
That’s all for this week. As usual, feel free to contact me if you have any question. Either by mail arthur_at_sculpteo_dot_com or on twitter @Cassaignau_A / @Sculpteo.