 Connect with Google
 Connect with Facebook
Experiencing errors uploading your 3D file for 3D printing?
Posted By Jess Hedstrom on Sep 30, 2015 | 0 comments
Tired of receiving error messages when you upload your 3D model to Sculpteo for 3D printing? Well, follow these 10 tips to insure that your model is ready for 3D printing.
How do you check your models for 3D printing? We have compiled a list of 10 items that will help you decrease the amount of errors you experience when you upload your 3D files. Read below to see what you may be missing and learn more about the tools on the website that can save you time and money!
Materials
1. Check every tiny detail for solidity and print-ability
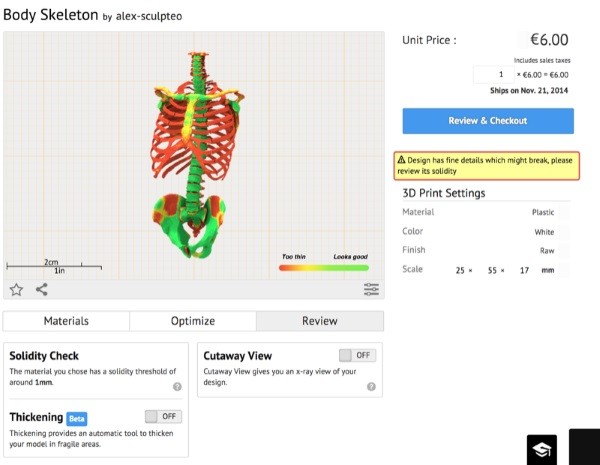
Each 3D model uploaded is checked for print-ability and one of the most common errors that you can face is that your object has parts that are too thin for 3D printing. If you look at the item above you can see that parts of the object are green and other parts of the object are red, the red sections are too thin to print and this directly translates into details that will be missed in the printing process. The easiest way to fix this issue is to turn on the thickening tool provided on the Sculpteo site. Utilizing the thickening too will automatically thicken the thin areas so that they can be printed. Or another option to fix the issue is to tweak your model in your choice of modeling software. To see a demonstration of our thickening tool please view this guided tour which walks you through the process.
2. Make sure that all interlocking parts & hinges have the correct clearances
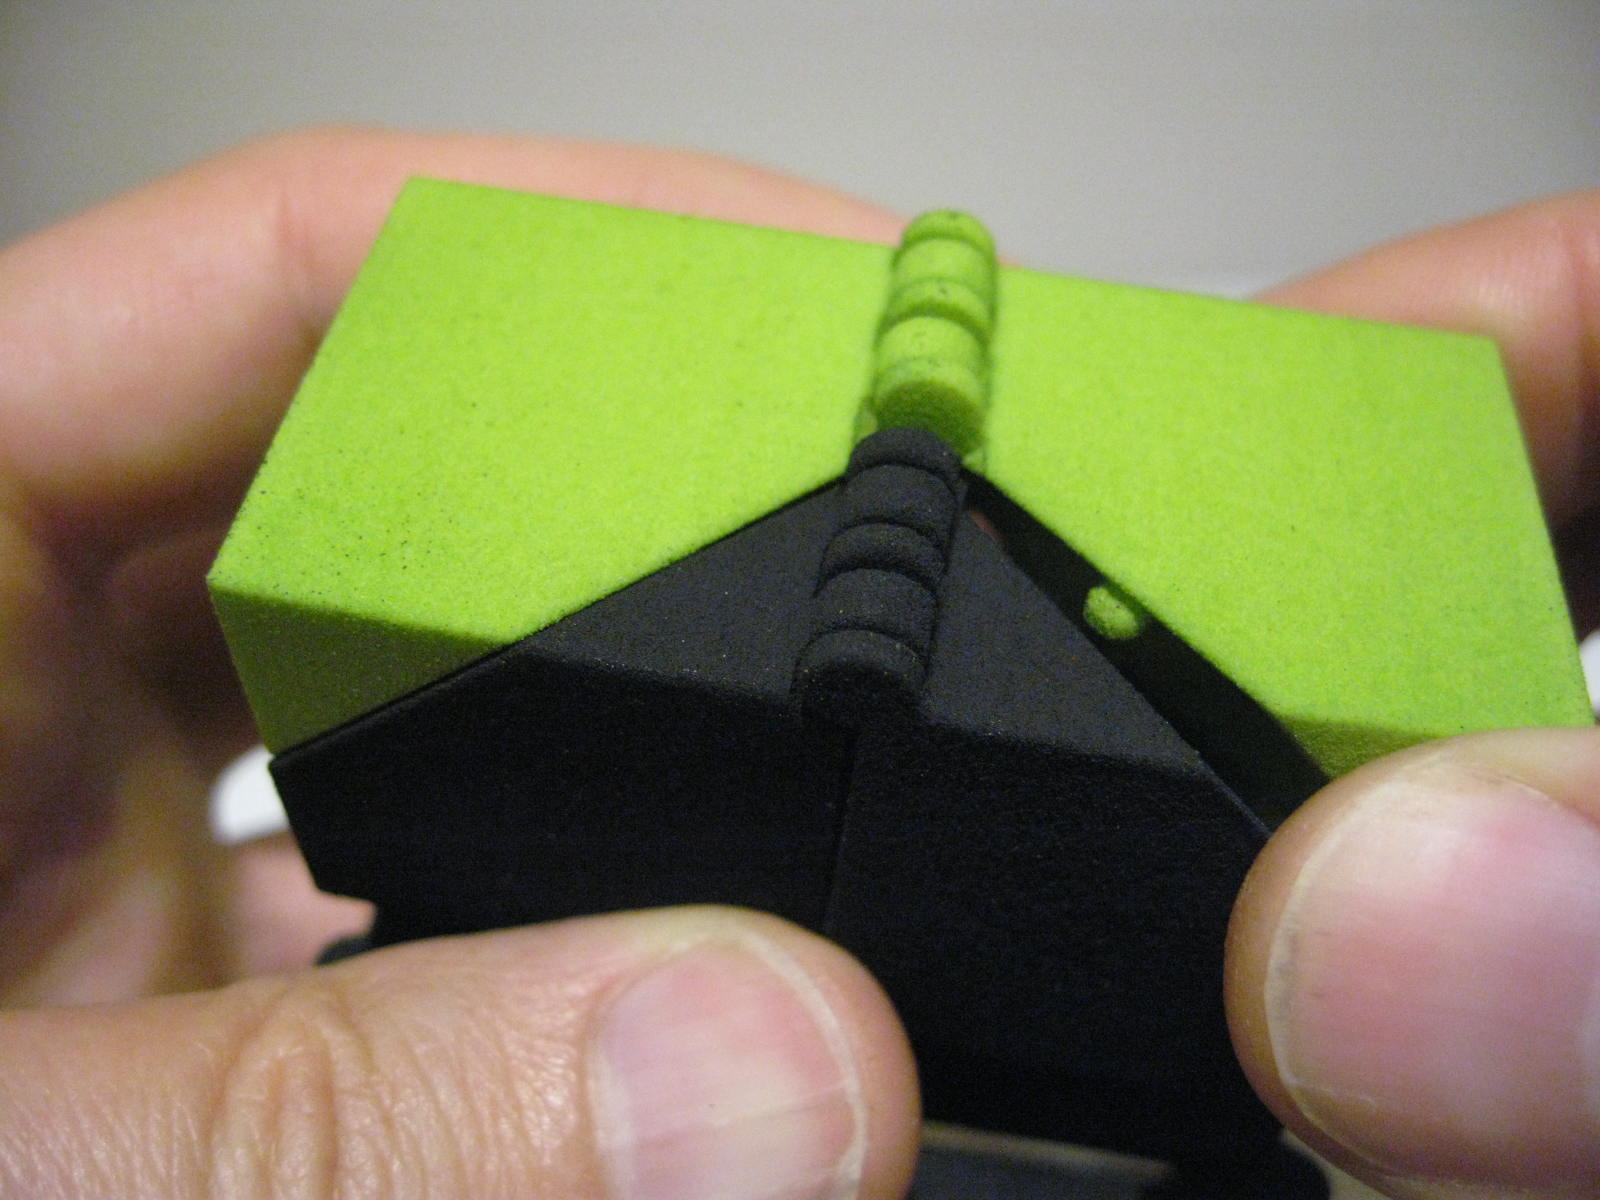
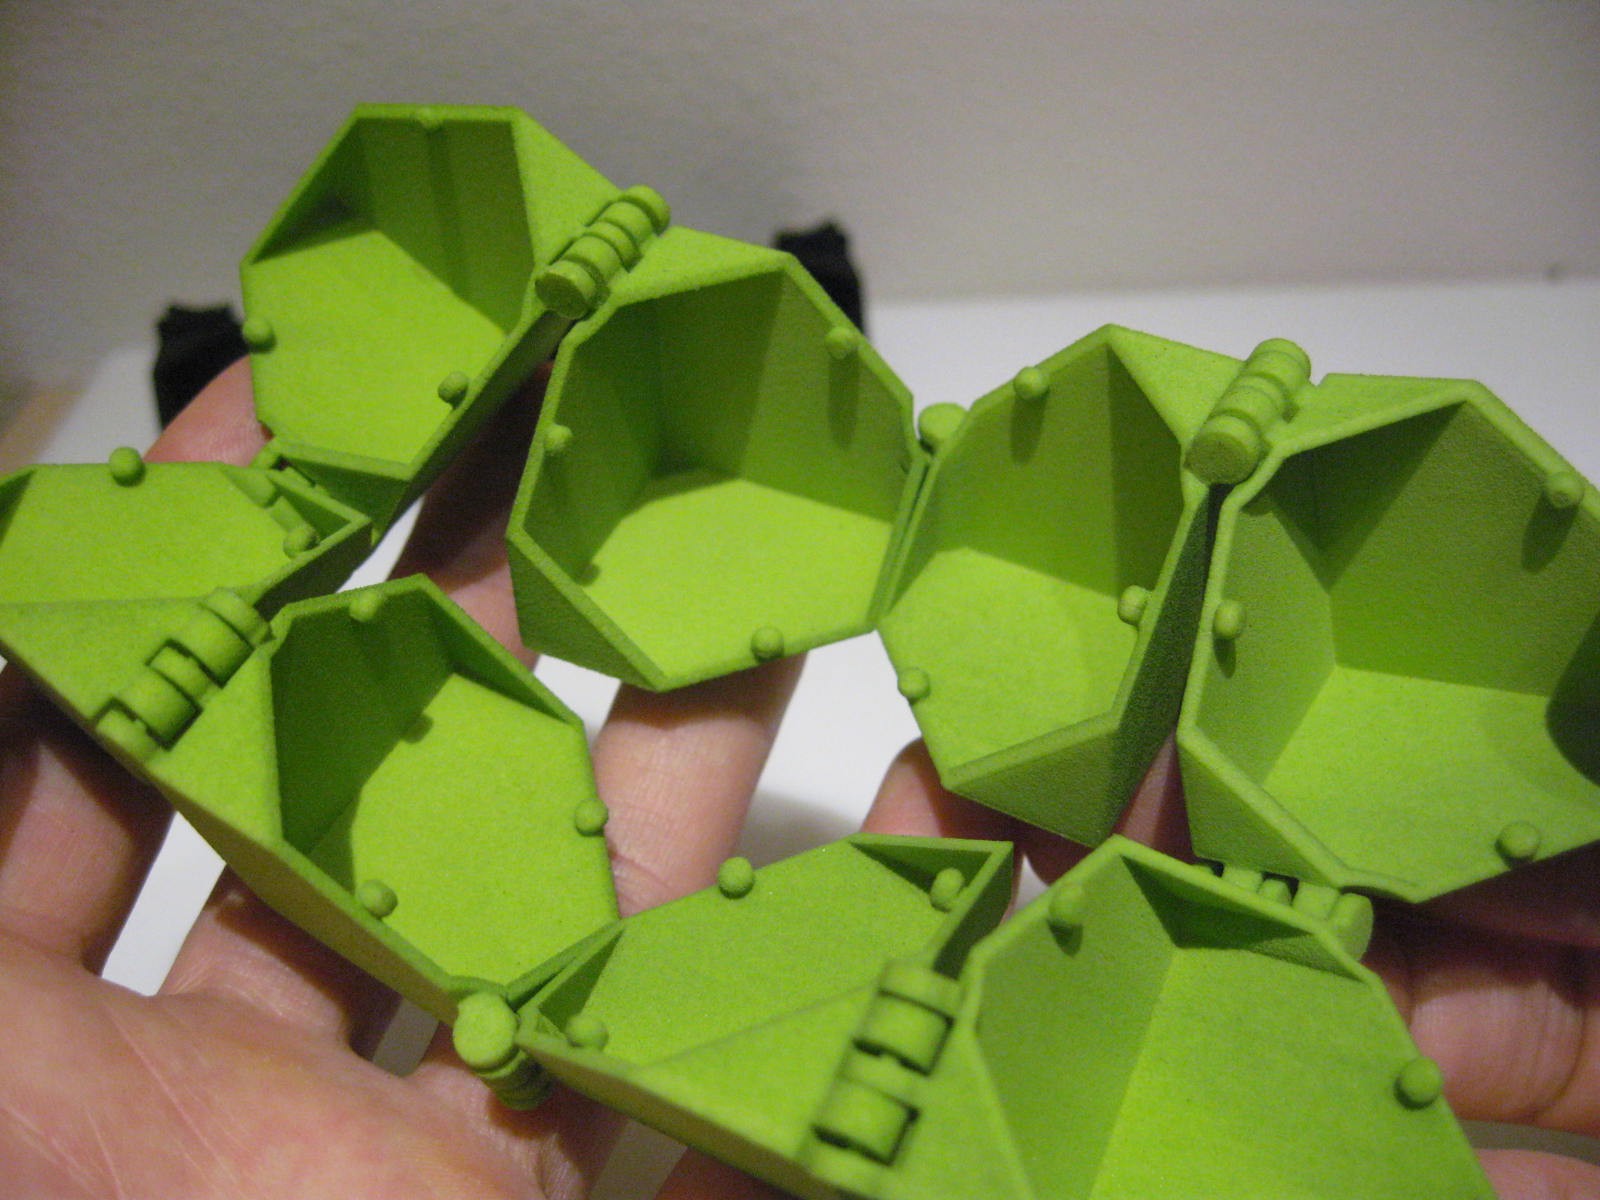
One of the best elements of 3D printing is that you can print objects with hinges included, like the items pictured above. These are items listed on the Sculpteo site and you can find more information on them here. Printing with integrated assembly (which includes hinges) decreases assembly time; the key to taking advantage of printing with integrated assembly is to make sure that you have correct clearances. Check your measurements and upload your model only after you’re certain that the measurements are correct.
3. Assembly required? Make sure you check the tolerances
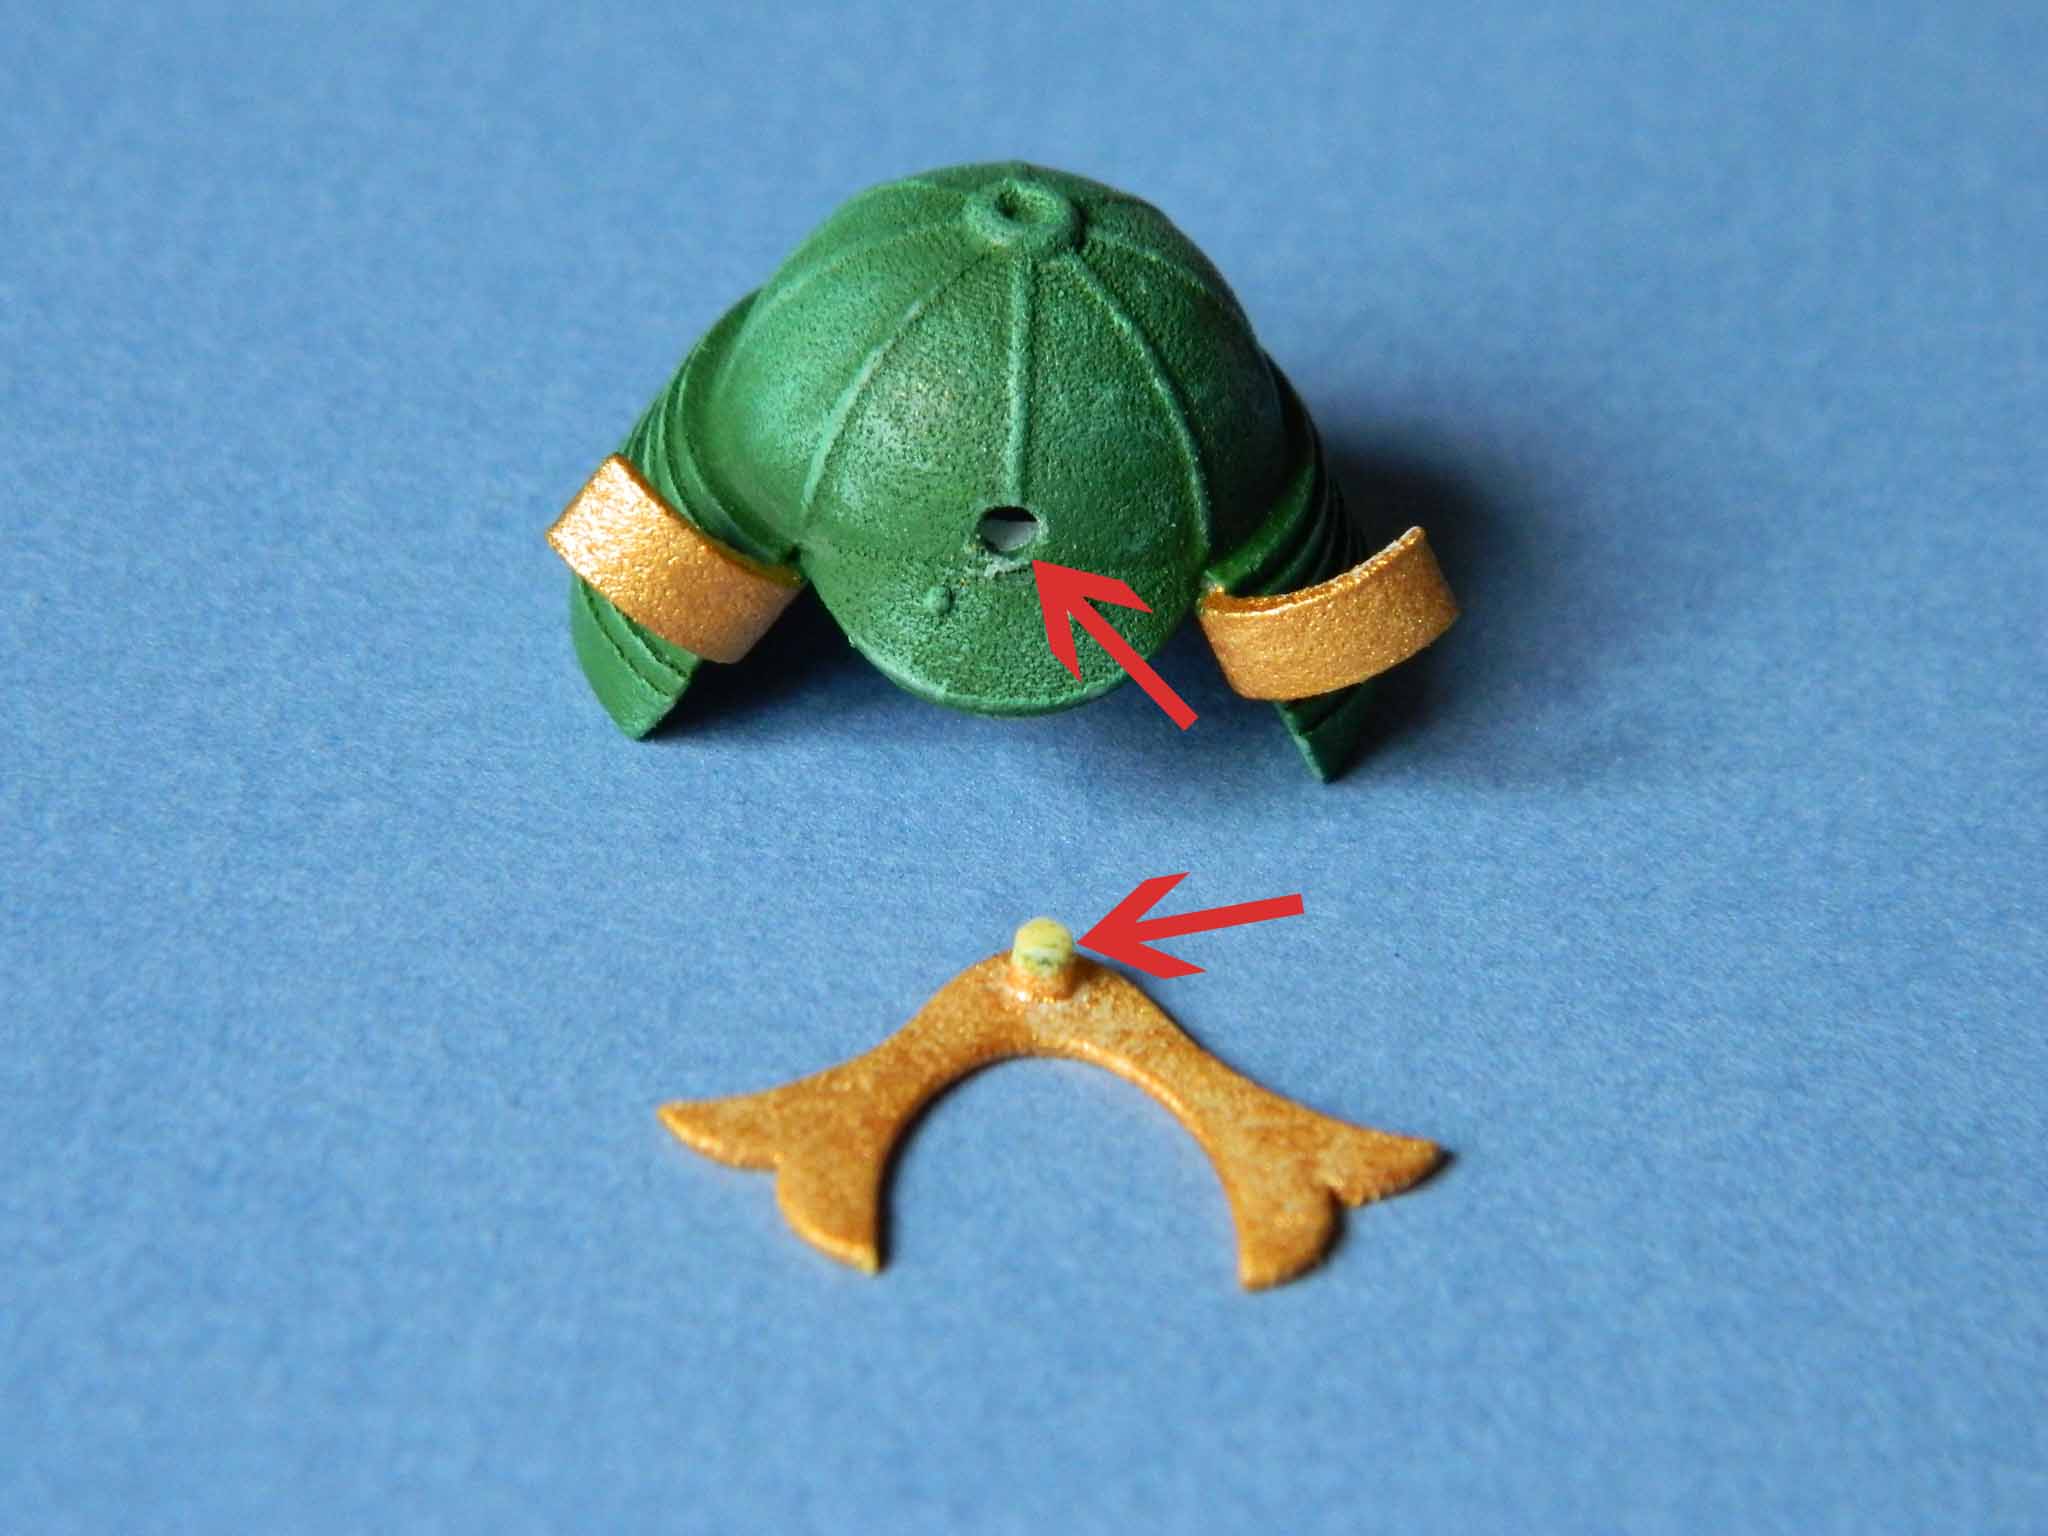
For any of your parts that need to be assembled make sure that the tolerances are correct, this is similar to checking your clearances, you wan to make sure that any interlocking parts are not too tight (which would cause your pieces not to fit), or too loose (which would cause the pieces to separate or move too freely).
Optimization
4. Check to see if your model can benefit from hollowing
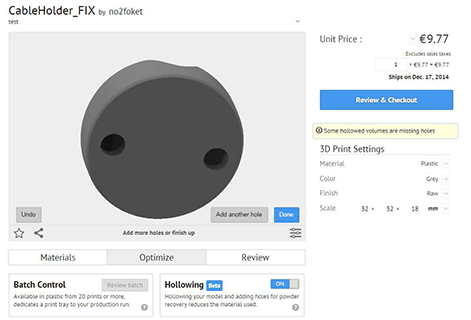
Hollowing is a great way to save money on your 3D print. The idea is to print your item using as little material as possible (because you are charged for the amount of material used and not the complexity of the item you are 3D printing). There is a very simple tool on the Sculpteo site that allows you to add hollowing holes on your model. The process for hollowing includes two holes place in a discrete location on your model so that the material can be removed from the interior of the object after printing. This process doesn’t affect the integrity of the item however it does save money due to the decrease of material used. For a detailed tutorial on this tool please click here.
5. Save material by resizing
Another way to save money on your 3D prints and also a great way to limit any errors is to keep an eye on the sizing of your print. All 3D printers have a maximum size that can be printed on the print bed, so to avoid errors, make sure you don’t exceed the volume allowed in the print bed.
6. Batch Control can help save you money
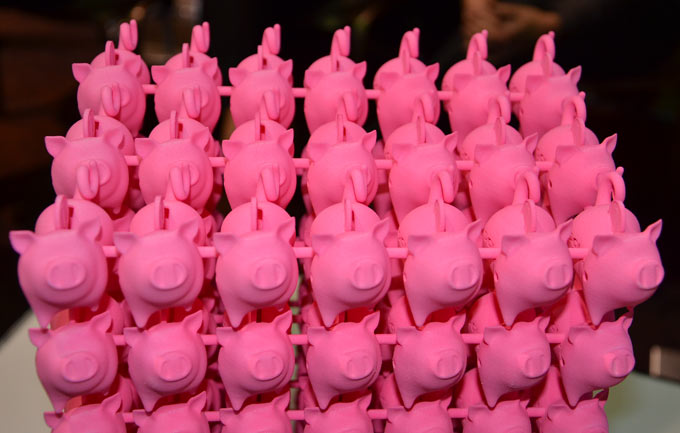
If you have an item that needs to be printed multiple times, make sure that you select the batch control option. Currently Sculpteo is the only 3D printing service that provides discounts for items printed in batches of 20 or more. You can select how many items you’d like to have printed and as long as it’s the same item you’ll see a per item price discount instantly applied. This is a great option for short series manufacturing. To learn more about short series manufacturing take a look at this free eBook today.
Review
7. Ensure that the walls are not too thin

Each material has specific thickness and geometry requirements and you can find these listed under each individual material listed under the material here. The image above is the requirements for Sculpteo’s plastic material, however each material and printer require different guidelines so make sure to check those items before printing to insure that you do not run into any errors.
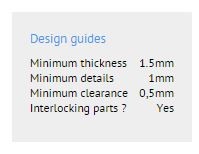
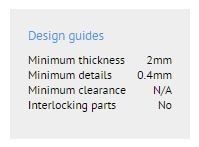
8. Make sure that you check the requirements of the material

Wall thickness is not the only requirement that you’ll want to watch out for, for example the images above show the design guidelines for Alumide vs. Full Color Sandstone with Sculpteo.
Alumide guidelines indicate that the item can be used for interlocking parts, while full color sandstone does not allow interlocking parts, it’s little details like this that are missed and can cause your 3D print to receive errors.
9. Make sure the model is the correct size
This is a very important item that you’ll want to be aware of, make sure that the size you’ve selected for your model is in the correct unit of measurement. Converting the correct unit of measurement is essential, most sites will not covert your item for you. So if you want to go from inches to centimeters make sure to convert and plug in the values.
10. Check your polygon count
Your polygon count is very important for many reasons; when you’re uploading your 3D file to any 3D printing servicer the higher your polygon count the longer your item will take to load. But the benefit of a high polygon count means that your object has more details. Smooth features require a high poly count however there is a middle ground and it’s important to find that for your model. To find out more about polygon count watch our “Ask a 3D Designer” webinar it will include everything that you need to know regarding how to properly determine the right poly count.