 Connect with Google
 Connect with Facebook
Design, iterations, production: How a Sculpteo intern 3D printed a drone from scratch
Posted By Hannah Bensoussan on Aug 23, 2016 | 0 comments
During his mechanical engineering studies, Alexis Massol was in charge of his school’s Fablab. That’s when he first started to imagine building his own drone. He looked up plans, materials, electrical components on the internet… and, over the course of five months he built a 1.5 kg fully functioning drone, using his school’s FDM 3D printer. Then he started an internship at Sculpteo, and revised his drone’s model to 3D Print a lighter, more efficient version using our 3D printing service.
We thought this story was interesting, not only because it’s an achievement of one of our young talents, but also because it illustrates the power of digital manufacturing, which enables anyone to go from a concept to a product, with a professional quality, at a limited cost, and with reduced steps and lead time. This is the mission we, at Sculpteo, give ourselves: to make production as easy as 1, 2, 3 (you upload a design on our platform, we print, you receive the finished product).
Step 1: Idea and 3D design on Solidworks
Sculpteo: Why did you decide to create a 3D printed drone?
Alexis: I wanted to use one to make videos. Ideally, in the future, I want to have several drones that will automatically fly around the house and serve as a surveillance system. I had bought a drone before, and wasn’t satisfied with it: it wasn’t stable enough, and I needed to connect it to my phone to pilot it. It lost connection frequently, which wasn’t safe.
That’s why I decided to build my own drone, that I could pilot with a controller and my laptop, for doubled safety.
Thanks to 3D printing, I can also choose the components and options that I want, and customize the drone at will. I just have to design emplacements that fit the components in the frame of the drone. This gives me the opportunity to make my drone evolve in the future without having to pay for everything every time: I’ll pay for the modified 3D printed frame only, and I won’t need to buy an injection mold, which would be too much for my budget.
S: Once you’d had the idea for 3D printed drone, where did you start?
A: I looked up plans on the internet, documented myself on what a drone needed and could do, then I started learning how to design. I had no experience at all: I taught myself how to use SolidWorks, thanks to online 3D design tutorials, like the ones you can find on Sculpteo’s website. It took me a few months to design the first version, and three weeks for the second version.

Simulation of the 3D Printed drone’s appearance
Step 2: Choice of materials, technical properties, and 3D printing technique
S: Which 3D printing techniques and materials did you choose?
A: For the first drone, I used my school’s FDM (Fused Deposition Modeling) machine. I chose a PLA (polylactic acid) filament, made from corn: I liked the idea of 3D printing a fully biodegradable frame for my drone. It was good, but the finish didn’t match my expectations. I had in mind a very professional looking drone, like the Phantom 4 drone, to give an example.
That’s why I decided to try a different design and a different material, using Sculpteo’s service and the SLS (Selective Laser Sintering) machines. This time, I chose Sculpteo’s white polyamide (PA 12), which is strong and light. I added the polished finish, to make it smoother.
S: Did you test the mechanical properties of the drone before 3D printing it?
A: Yes. When I 3D printed the first frame, I had almost no experience, so the test was literally a crash test: I hadn’t checked the landing forces, and at first landing, the landing gears broke.
But then I learned to use the SolidWorks tools for simulations. It allows me to make sure the design is right for the material I chose and the applications I’ll want, by simulating the application of various forces on the parts.
With these tools, I could also take the weight into account. There were three versions of the drone frame (I printed the first one in PLA twice, to improve it). The third one, printed with SLS and in polyamide, is the lightest one: it weights 367g. The rest of the drone’s weight is due to the electric components, the gimbals, and the camera. In total, it’s 1.5kg.
Thanks to these tools, I made sure before printing the second PLA frame, and the latest PA frame, that the drone won’t break at landing, or if it falls from a few meters.
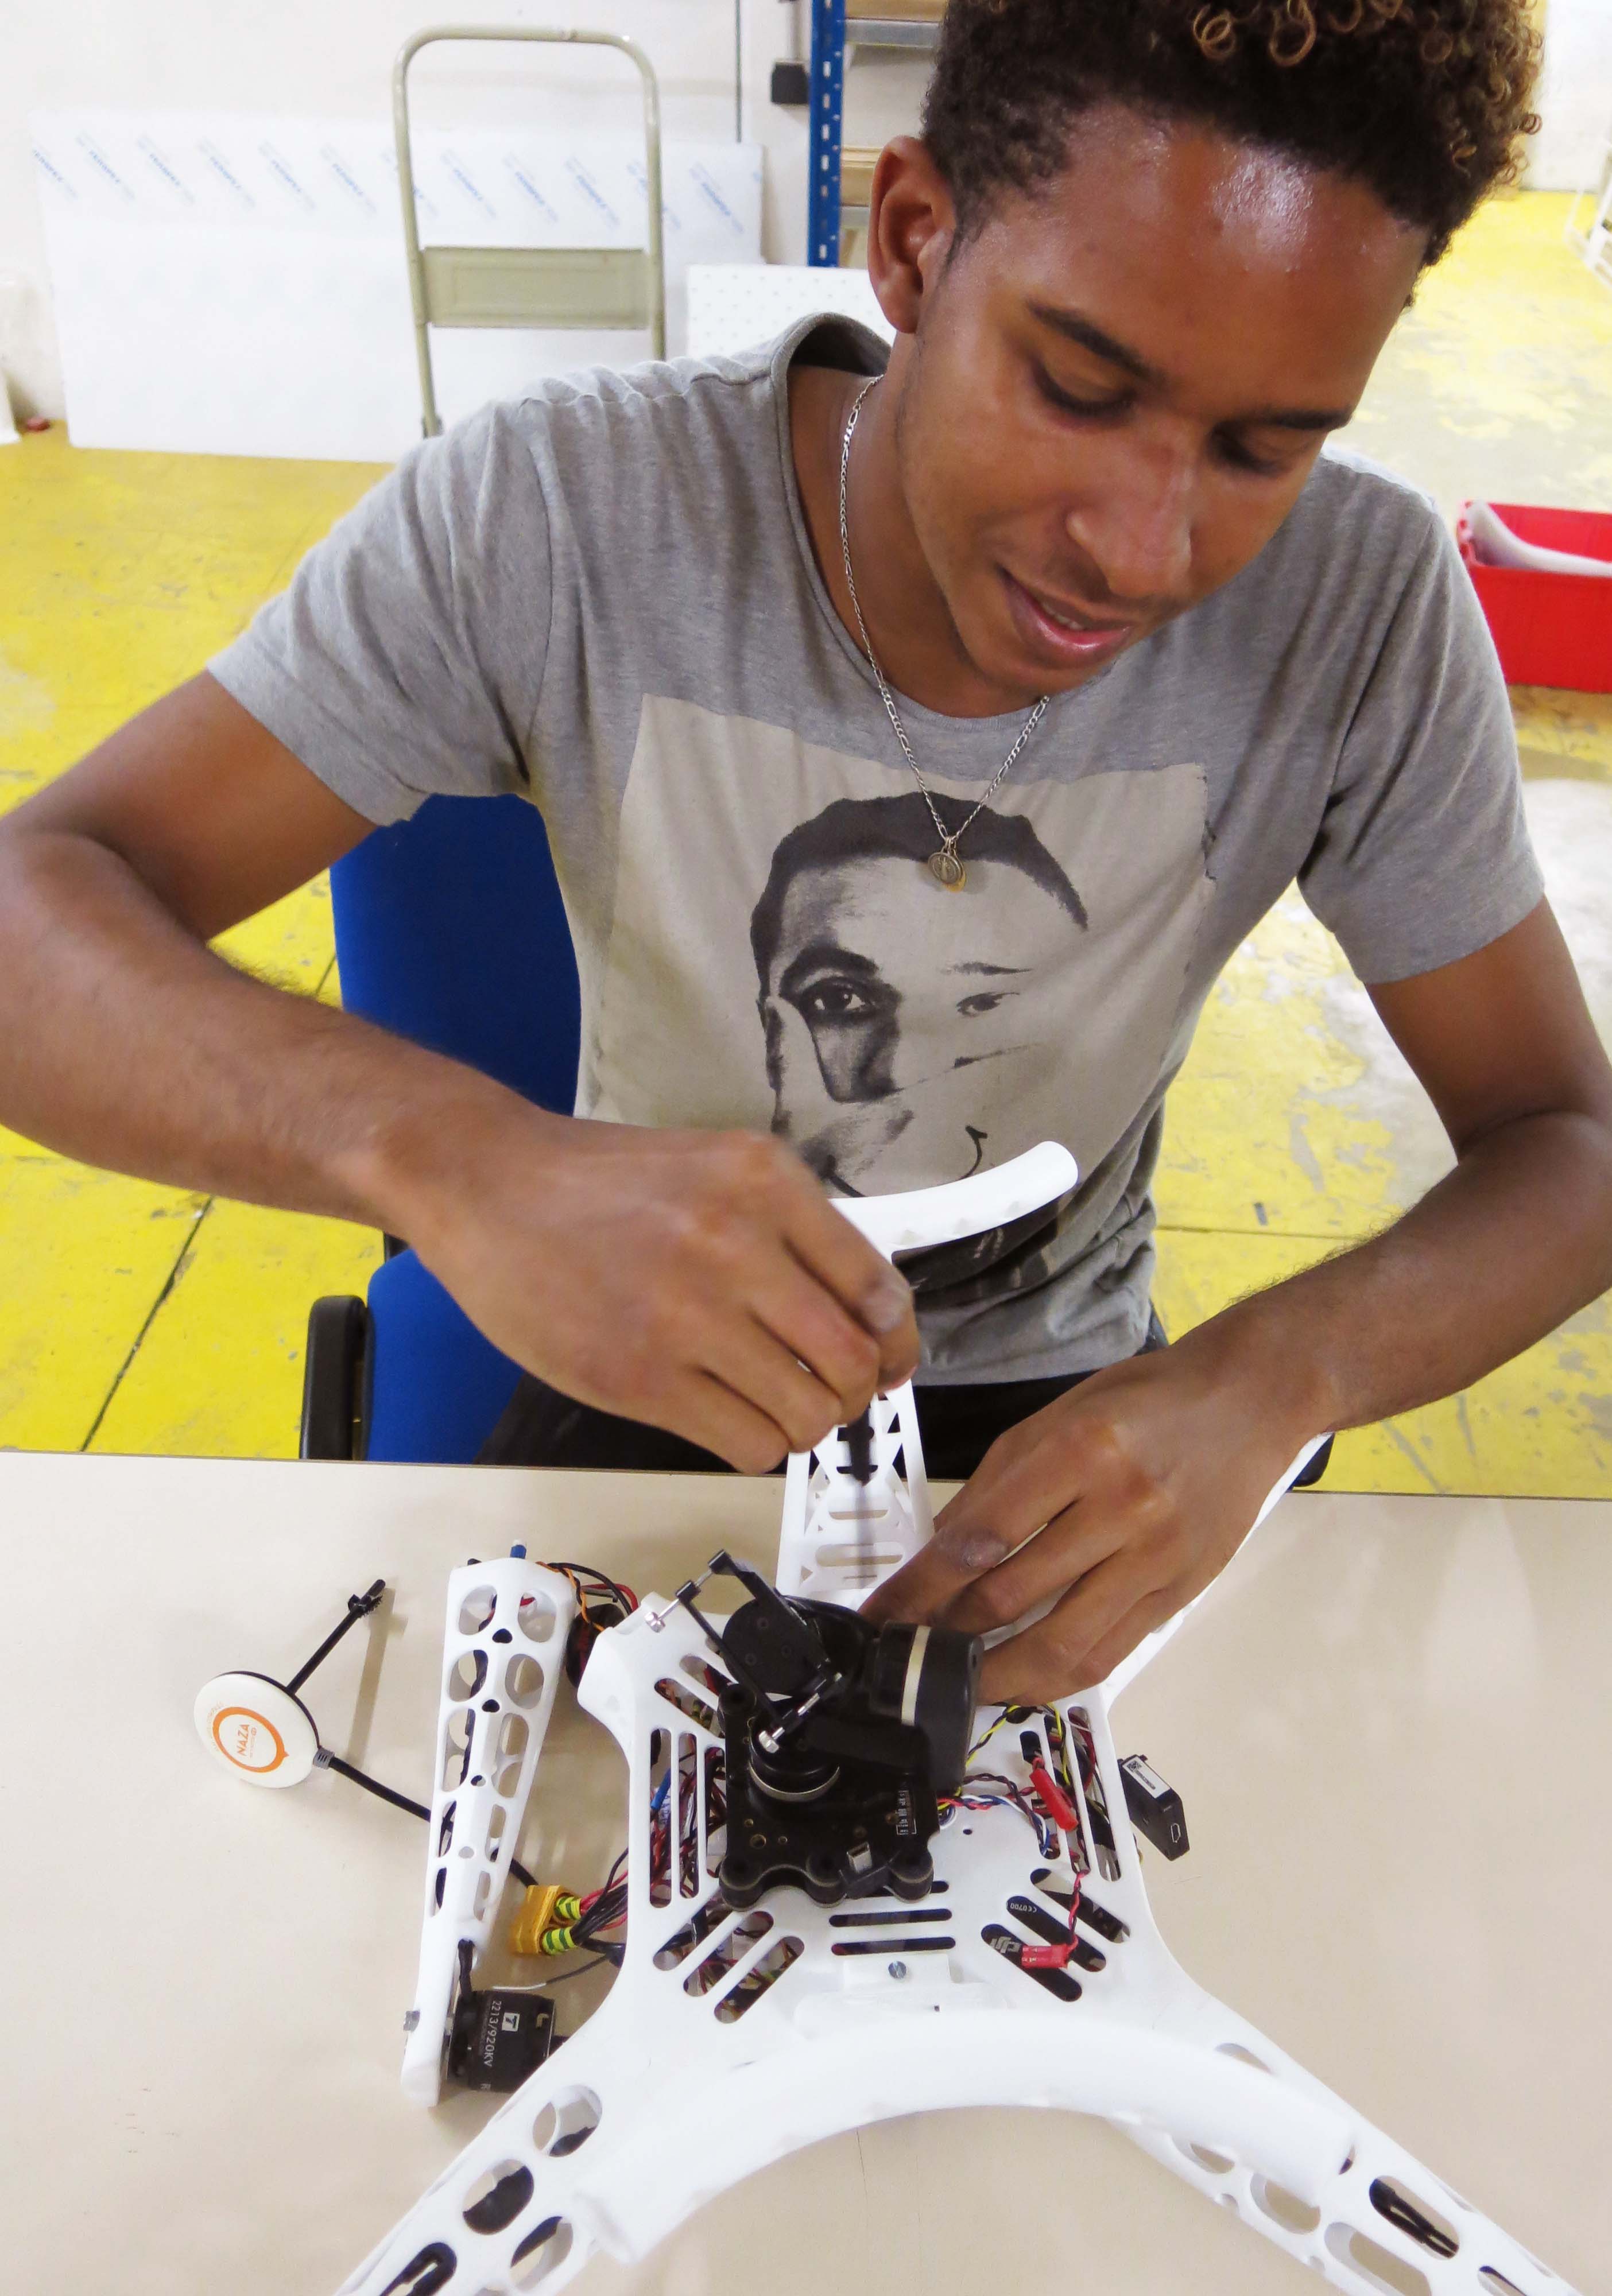
Alexis and his drone
Step 3: Enjoying the final product, and making it evolve
S: Are you satisfied with your drone?
A: Yes, very satisfied! The drone functions well, it is equipped with an object detecting system, a compass, GPS, and a GoPro camera, and has a wide range: it can move as far as 1km from the command. I know the components are of high quality because I ordered them from the same company as the model drone I had in mind when designing (still the Phantom 4).
Altogether, the drone cost me 1,600€, which is the price of a retail drone.
S: What are the future evolutions you imagine?
A: I’m thinking of adding a screen, maybe create glasses for first person vision, maybe increase the range even more with an amplifier, and make it run automatically. I’ll see! The drone should be patented soon.
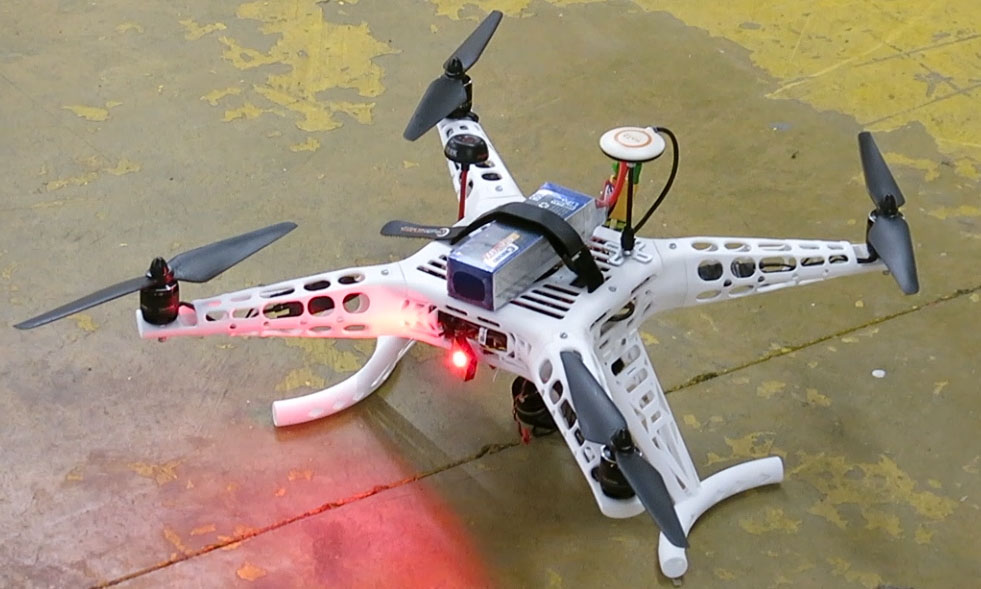
Alexis’ 3D printed drone
We were very happy to accompany Alexis’s project, and to tell his story to you. We hope it inspired you to push your projects to standards as high!
At Sculpteo, we also made a 3D printed and laser cut drone. To read about it, click here. You can also start or continue your 3D printing experience by uploading a file on our platform, or discover our new laser cutting service, currently in beta.