Suitable File Sizes for Sculpteo
Posted By Arthur Cassaignau on May 6, 2015 | 1 comment
As for other more traditional services, the size of the data you’re using comes into play. At Sculpteo, we’ve based our whole process on two rules: the files you’re using needs to weigh a maximum of 50MB and each single 3D file shoudn’t exceed 1 million polygons. If your file is heavier or its polygons counts larger, we’ll give you some tips to get your object online and printed!
As we’ve always been saying here and there, resolution doesn’t do it all when it comes to 3D printing. And a larger file size doesn’t mean a better printing quality. At best your object will be printed with no visible difference, at worse our system won’t be able to handle your too voluminous files. So even if you’re making the most gorgeous 3D file and push the resolution to its maximum, it won’t necessarily bring you a lot. To keep it under control, we’ve established two strong rules and a set of good practices to follow.
The first rule is that your 3D file needs to be less than 50MB. No matter what keep your file under 50MB. Your file can be an .stl, an .obj, any other file format or even a zip (to reduce its size), the data you’re adding to your Sculpteo account should not be above this theoretical limit.
Since we’re also accepting multiple file uploads at the same time, the same rule applies. All your zip or files needs to be under 50MB. You can of course add several 50MB zips to the mix. The more you’re reaching for the theoretical limit the slower it’ll be for us to process the files.
Why is this limit theoretical? Because, our system can easily accept bigger file, but operations on those file will be too long to garantee you a navigation as seamless as possible. Flirting with the size limit will slow down any operation you’re making on your 3D file. For instance, if you know that your file will need a serious repair, or that you’ll need to optimize production using the Batch Control, or even that you want to hollow it, we even recommend that you keep your file around 20MB. Operations on our servers will still be possible if your 3D file is larger than that, but it will take more time and sometimes transforms into page errors.
The second rule is that your 3D file needs to contain less than 1 million polygons.
Both those rules have to be respected.
How can you be sure that respecting those two rules won’t affect your prints quality? There are a few things that should make you feel confortable. First of all, as for every data processed by a machine (sound, photo, video), there are technical limitations to what the 3D printer can achieve. And these limits are not the same depending on the technology you’re using. SLS, SLA or Binder Jetting won’t have the same printing resolution. So the printing technology has an impact on the overall quality of your print.
The size does also matter. Same as for regular (2D) printing, the polygons count can be increased or reduced depending on the size of the object your printing. Exporting a 3D file with millions of polygons to print it as a five centimeter object is not worth it. Now if you plan to print an object as big as possible. It might be useful to increase the resolution of the file. In all cases, it should fit into the theoretical limit we gave above. Zipping the file will give you some extra room if you have to make a very big print (above 25cm)
In case, you’re planing on having your file printed in our multicolor material (with a texture), you’ll need to pay extra attention to the texture size. In a previous post, we talked about ways to optimize the texture size you are using without loosing any details. You can find it here.
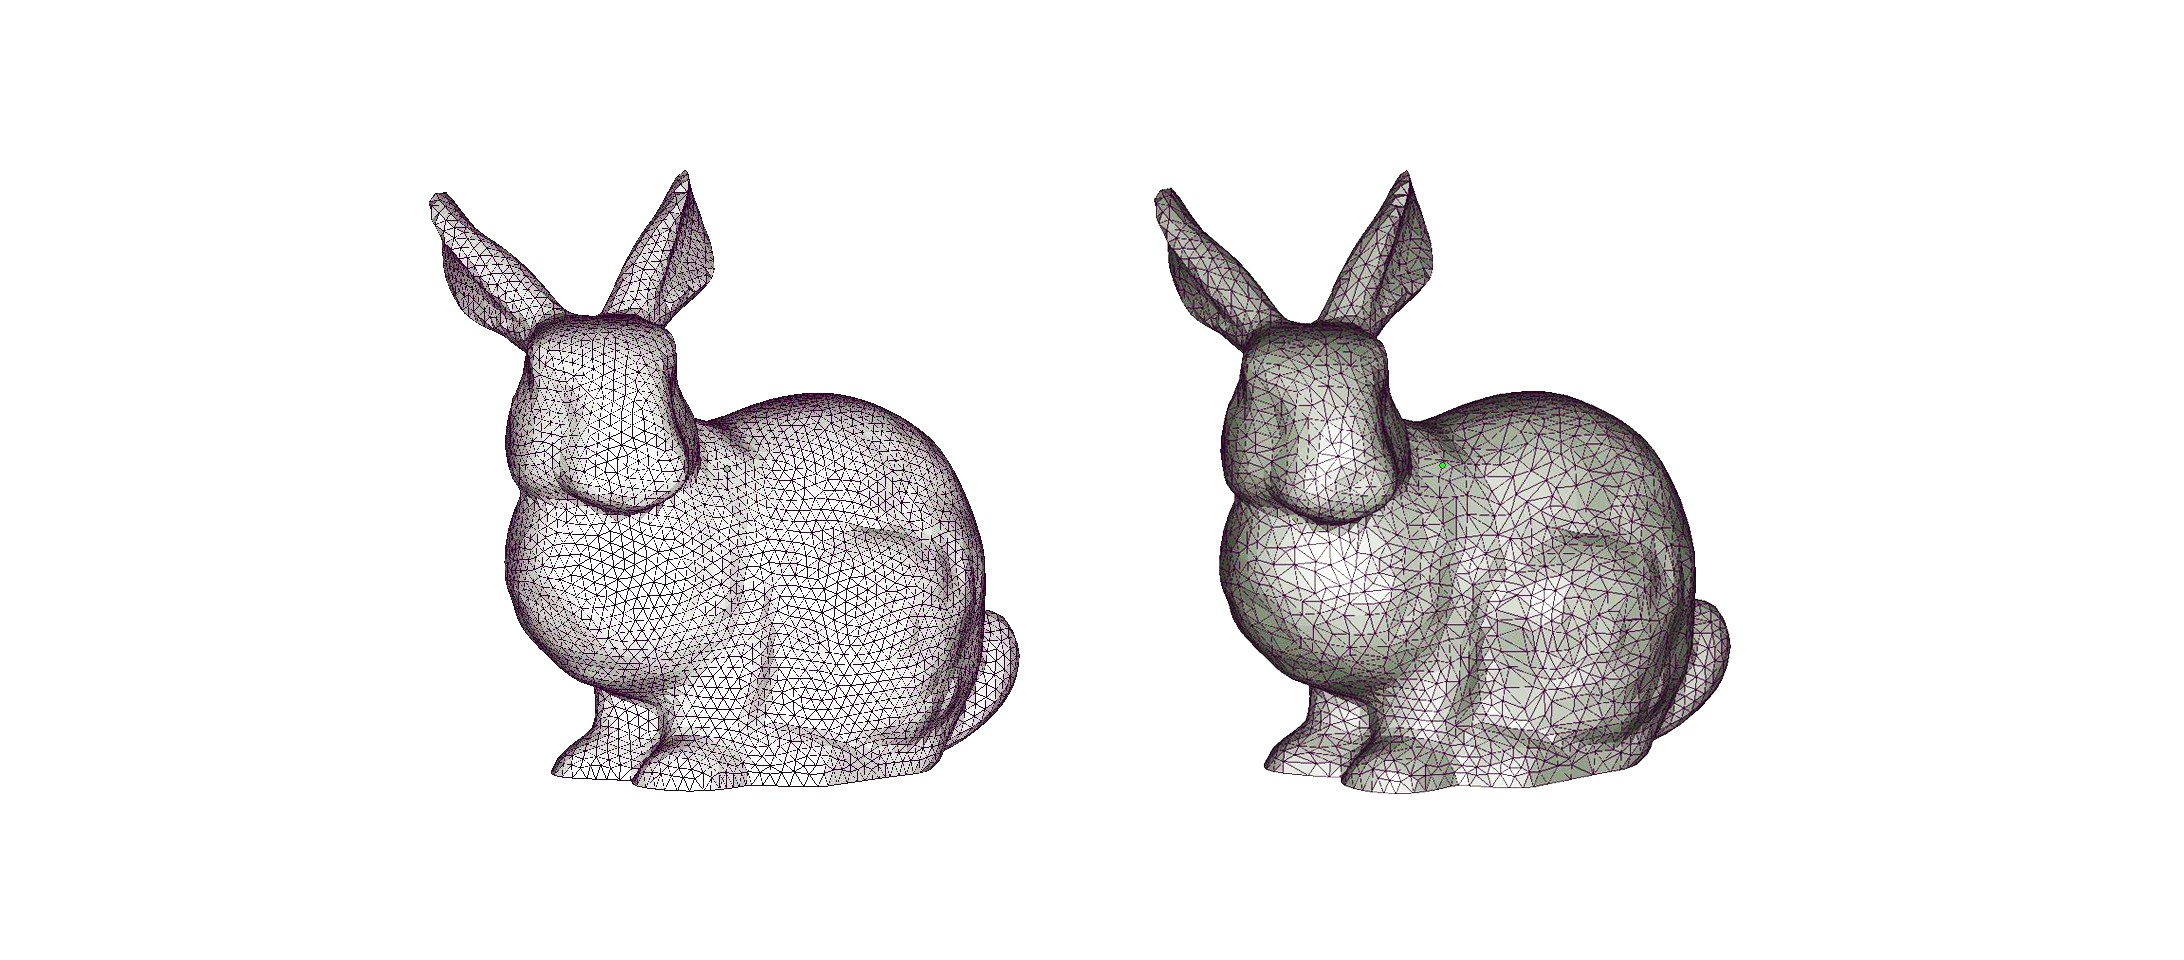
How do you reduce the number of polygons? Without getting overly technical, 3D models are often interpreted as a series of surface faces. This method is simple for cubes and pyramids, but introduce a curve and the file size is greatly increased, as that curve will be made up of hundreds of small polygons. The greater the number of polygons, the smoother the object will look, but the larger the file will be. The trick is finding a healthy balance between the surface smoothness and file size. Most every program has a polygon reduction tool – for specifics on your particular program feel free to Google “reduce polygons in [Blender, Sketchup, SolidWorks, etc.]”.
Or you can go on and edit your .stl file directly with Mehsmixer or Meshlab, as shown here.
Another aspect that can greatly increase the size of an object are logos and and complex text. Often when importing a vector file or another type of text file into your modeling program you have the ability to change the number of points that will be considered to create the object. Keeping that at a healthy medium is also recommended.
If you’re able to reign in your mesh rendering, you should have no issue getting your file to a size that can be uploaded to Sculpteo’s site!


 Connect with Google
 Connect with Facebook