How many holes and what size should they be?
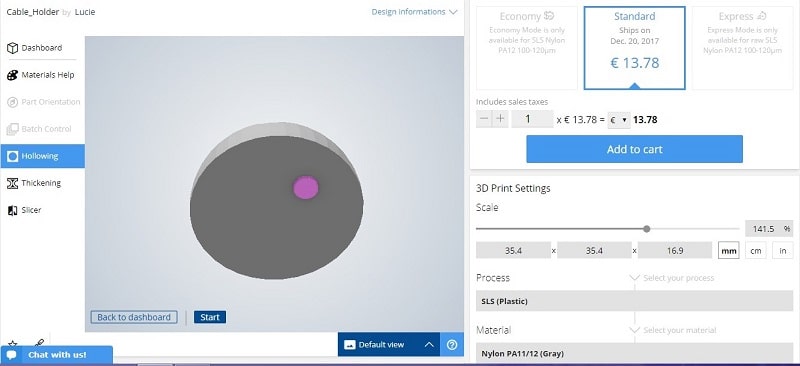
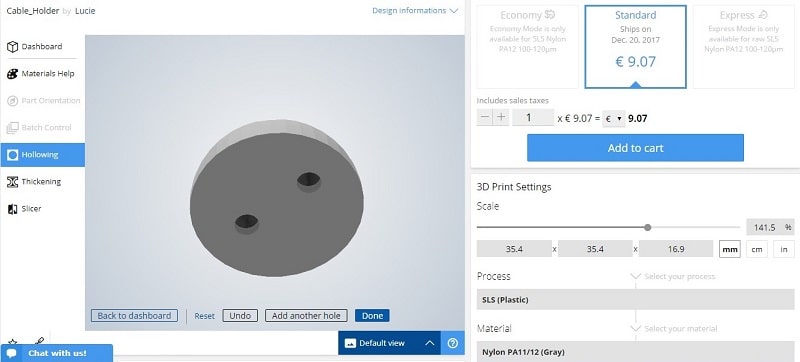
To hollow your part correctly, you need to put a minimum of two holes on your 3D model. In order to remove the excess powder trapped inside your part during the cleaning process you can’t forget these holes
If you are using Sculpteo’s hollowing tool, you will automatically be prompted to add these holes and can directly select where they should appear. If you are hollowing your part manually, you must ensure that the holes are at least 5mm in diameter and there needs to be a minimum of 2 holes. If you upload a 3D model that is already hollowed on our website, please check the diameter of the holes.
Indeed, if holes aren’t large enough our technicians can’t remove the excess of powder. Parts that can’t have the excess of powder removed will be refused. That is why it is really important to check if the dimater of the holes you placed on your part are the right size.
Where should you place the holes on your parts?
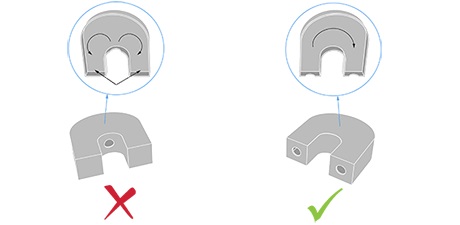
If you want your 3D printed part to be perfectly hollowed, you have to put the holes at the right place, otherwise, you will receive a part with holes on it, but only partially hollowed.
The position of the holes will depend on the shape of the object, but it will also depend on the use of this object. If it is a decorative object or a visible object, holes cannot be placed on a surface that affects its aesthetic.
A tip that applies to most of the cases is to place the holes on surfaces that will not be visible, such as at the bottom of the 3D models. Placing two holes one next to each other is pointless, the powder will not be removed correctly. There should be quite some distance between the two (or more) holes, letting the powder circulate inside the part. Preferably, place your holes near edges or zones that are far from each other, at least, there should be one hole on one flat surface and the other hole on the opposite side.