Fusion 360 Laser Cutting Tutorial: Avoid errors
Summary
- 1.1. Use the “Sketch Tool”
- 1.2. Apply constraints
- 1.3. Add dimensions
- 1.4. Exit the sketch area
- 1.5. Add parameters to your sketch
- 1.6. Extrude the sketch
- 2.1. Double Check the parameters
- 2.2. Coincident faces
2.1. Double Check the parameters
Before saving the file for Laser Cutting, make sure that the constraints are the proper ones and that the sketch is fully parametric. If the file contains more than one sketch that areconnected to each other, make sure not to miss the following step:
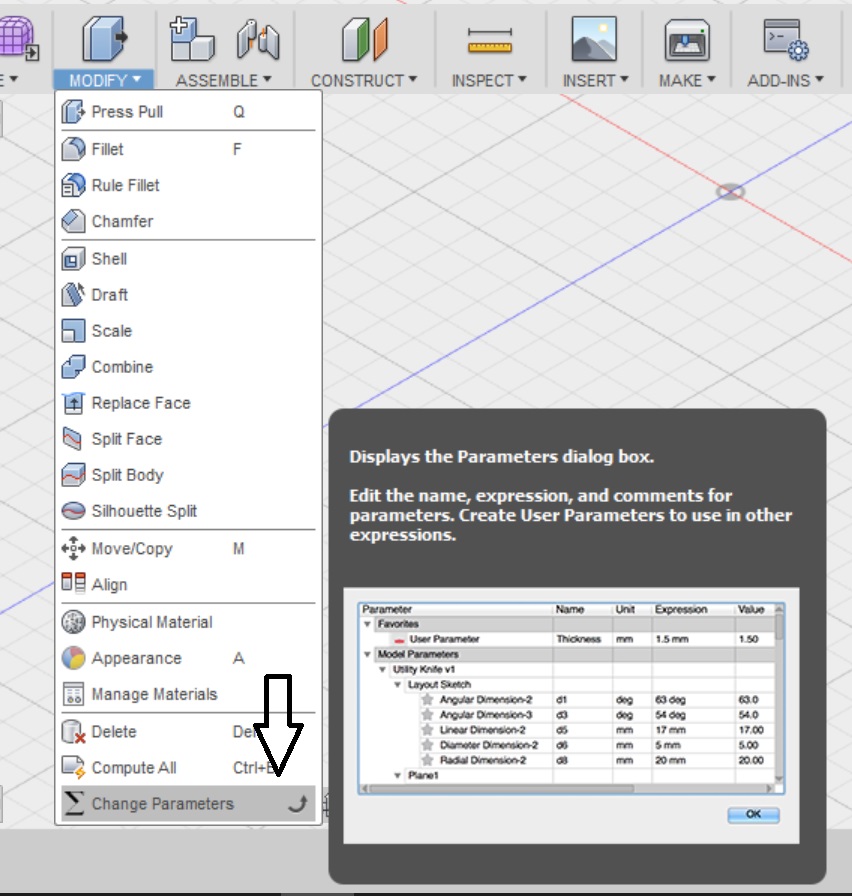
All you have to do is go to the “Modify” tool and then “Change Parameters”.

There you can edit the value of the parameters you had set during the sketching process.
_ie8D5jU.jpg)
If the thickness of your sketch is modified accordingly to the different value you set, it means that the parameter option is set correctly. If there is no difference in the thickness of the sketch, then you should go back to the drawing and check out which constraints are preventing the parameters from working.
_OvC9Thy.jpg)
2.2. Coincident faces
This is a crucial step to pay attention to, if your file contains multiple sketches.
You have to do this step in order to detect unwanted interferences of parts of the sketch and make sure that everything is coincident.
To do that, go to the “Inspect” tool and select “Coincident faces”.
_ik7IHm0.jpg)
Once you select the whole sketch, a box appears on the right side of your screen.
_quj5Ove.jpg)
Deselect the option of “Include Coincident Faces” and select the option “Compute”.
If everything is aligned in your sketch there will appear a notification saying that “No interferences detected”. This means that there are no geometries sharing the same 3D space. So your 3D sketch doesn’t contain any errors and thus it is ready to be exported for Laser Cutting.
_XPOMZmn.jpg)


 Connect with Google
 Connect with Facebook