 Connect with Google
 Connect with Facebook
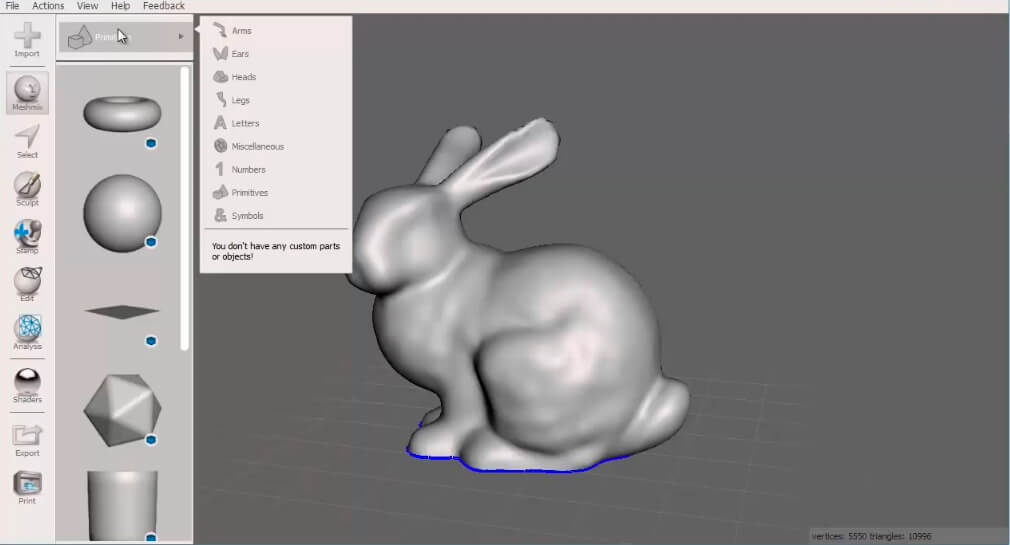 The “Meshmix” tab on the left contains a library of 3D models that you can integrate into your base 3D model. MeshMixer has two kinds of parts: “Open Parts” and “Solid Parts”. A Solid Part integrates with the Main Part, whereas an Open Part attaches to the Main Part. There is continuity between the Open Part and the Main Part. We will explain to you a little later how to detect this difference in order to ensure the printability of your model.
Attach an Open Parts to your base model
Attaching an Open Part to an Existing Volume is very simple with MeshMixer. Just click on the element to add and place it at the desired location. Open Parts are identified by the white hemisphere icon accompanying them in the “Meshmix” tab.
The “Meshmix” tab on the left contains a library of 3D models that you can integrate into your base 3D model. MeshMixer has two kinds of parts: “Open Parts” and “Solid Parts”. A Solid Part integrates with the Main Part, whereas an Open Part attaches to the Main Part. There is continuity between the Open Part and the Main Part. We will explain to you a little later how to detect this difference in order to ensure the printability of your model.
Attach an Open Parts to your base model
Attaching an Open Part to an Existing Volume is very simple with MeshMixer. Just click on the element to add and place it at the desired location. Open Parts are identified by the white hemisphere icon accompanying them in the “Meshmix” tab.
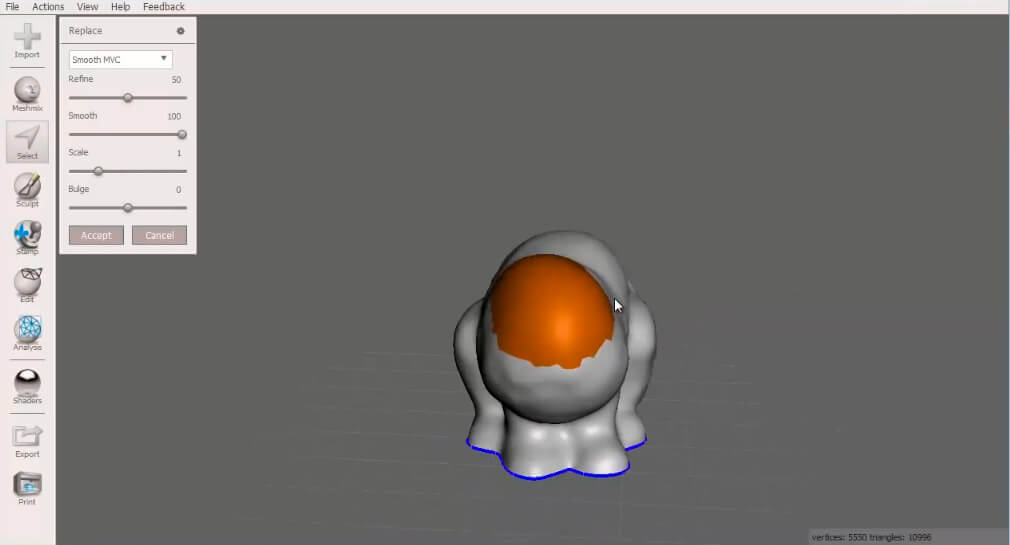
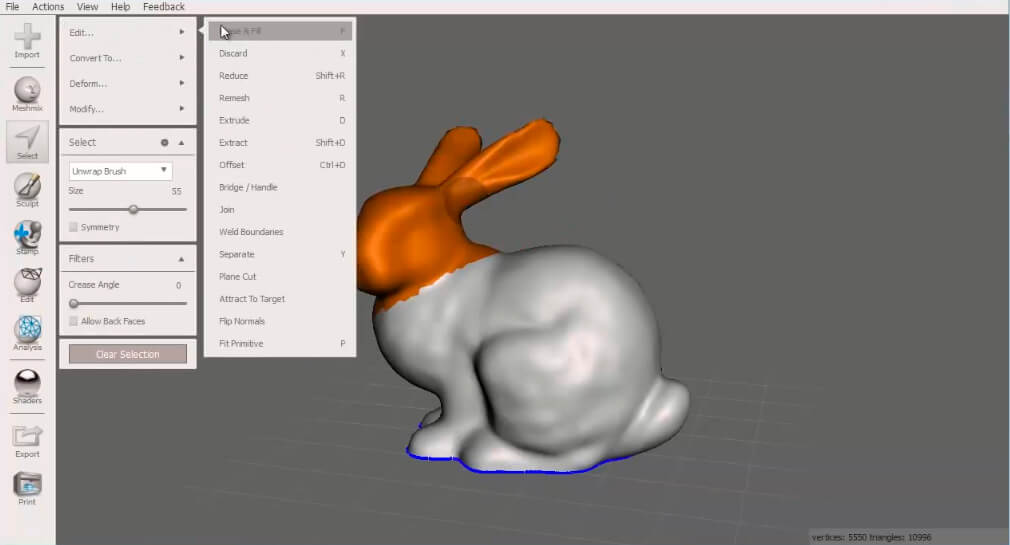 Before attaching a volume to your base 3D model, you might need to remove a part of it. To do so, click on the “Select” tab. Select the part of the model to remove, then erase it using “Erase and Fill”. MeshMixer will automatically delete the selected shape, while leaving a smooth surface without irregularities.
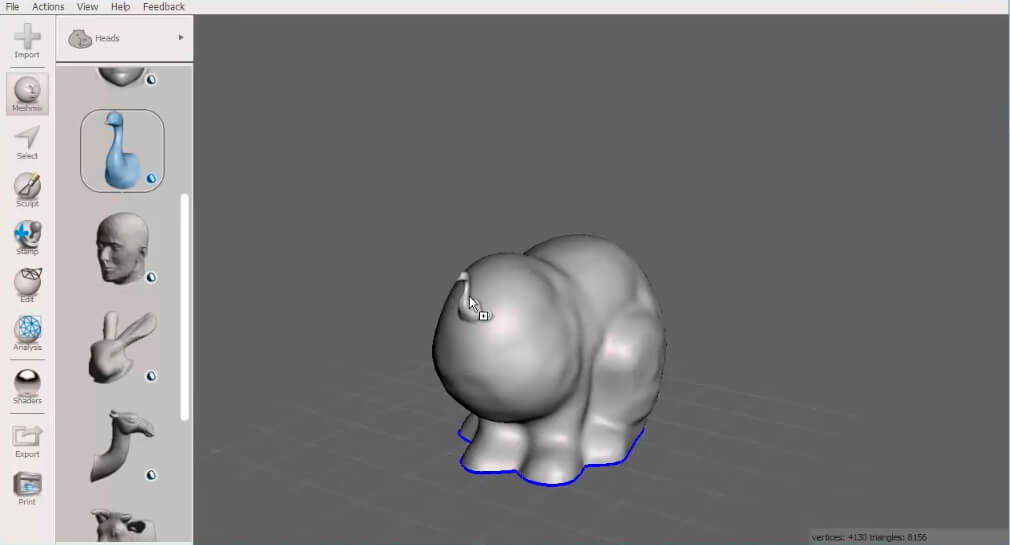
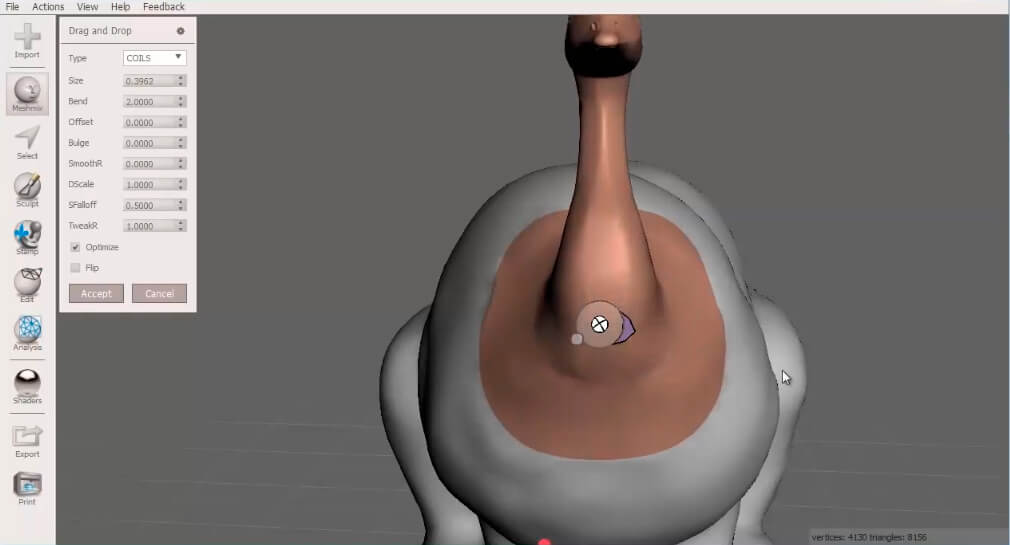
 You can now attach an Open Part to your base 3D model. Click on the Open Part to attach using the Meshmix icon, and place it on your base 3D model. MeshMixer will automatically attach the Open Part to 3D base model.
 You can then easily move, adjust, rotate or magnify the Open Part, without detaching it from your 3D model.
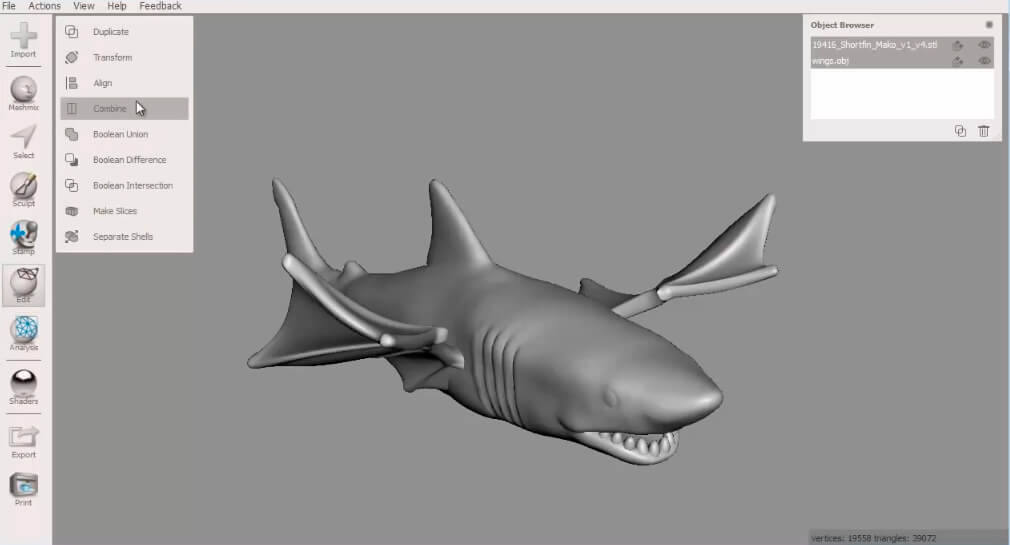
 Attach a Solid Part to your base model
Solid Parts are identified by the blue cube icon accompanying them in the Meshmix tab.
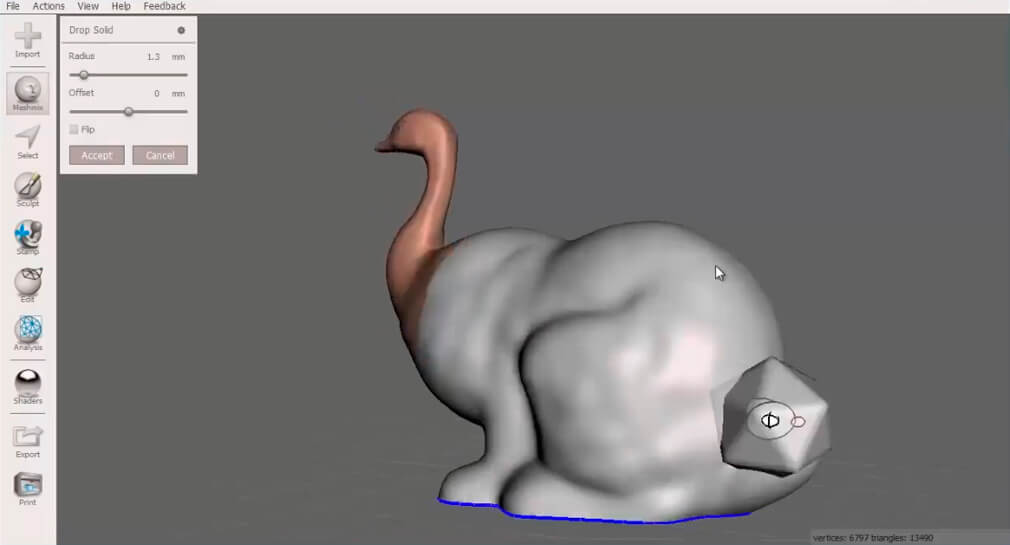
Navigation is identical to that for the Open Parts. However, MeshMixer will not attach the Closed Volume to the Main Part as it does for the Open Part. This results in two intersecting volumes. The intersection of two volumes creates a problem for 3D printing.
Attach a Solid Part to your base model
Solid Parts are identified by the blue cube icon accompanying them in the Meshmix tab.
Navigation is identical to that for the Open Parts. However, MeshMixer will not attach the Closed Volume to the Main Part as it does for the Open Part. This results in two intersecting volumes. The intersection of two volumes creates a problem for 3D printing.
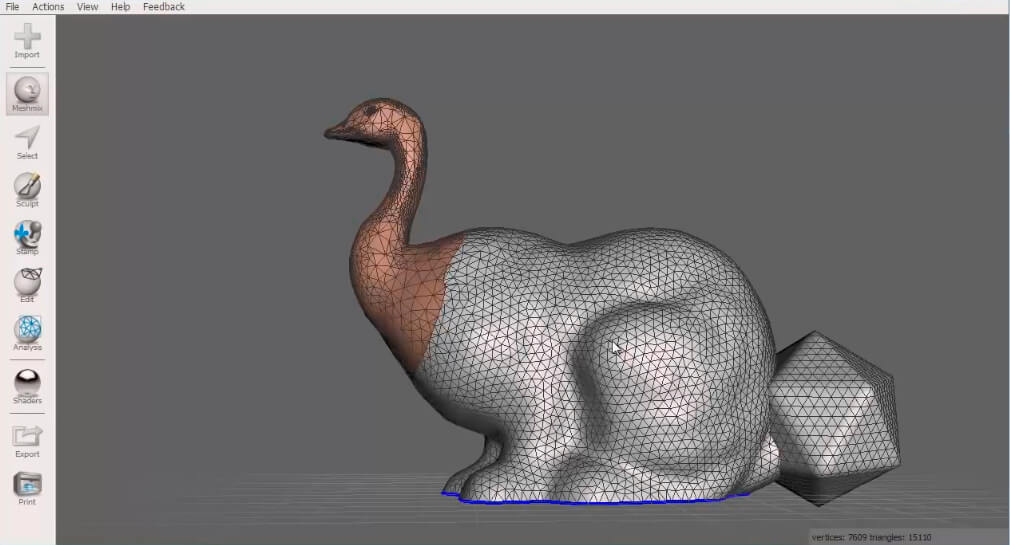
 Below we see that there is mesh continuity between the Open Part (the swan’s head) and the base 3D model, which is not the case between the Solid Part (the polygonal shape) and the base 3D model.
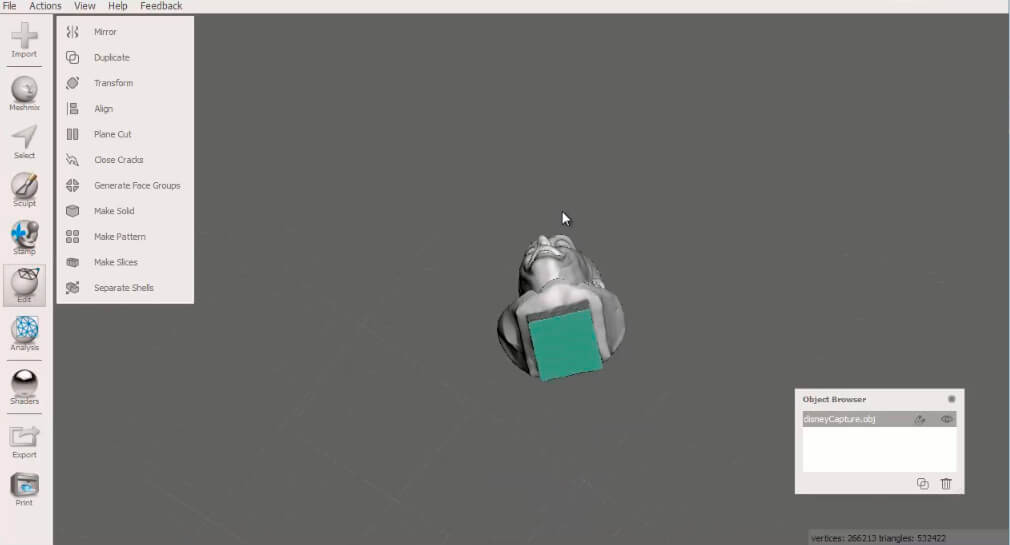
The volume intersection must be removed in order to make your 3D model printable. To do so, use the “Make Solid” tool found in the “Edit” tab.
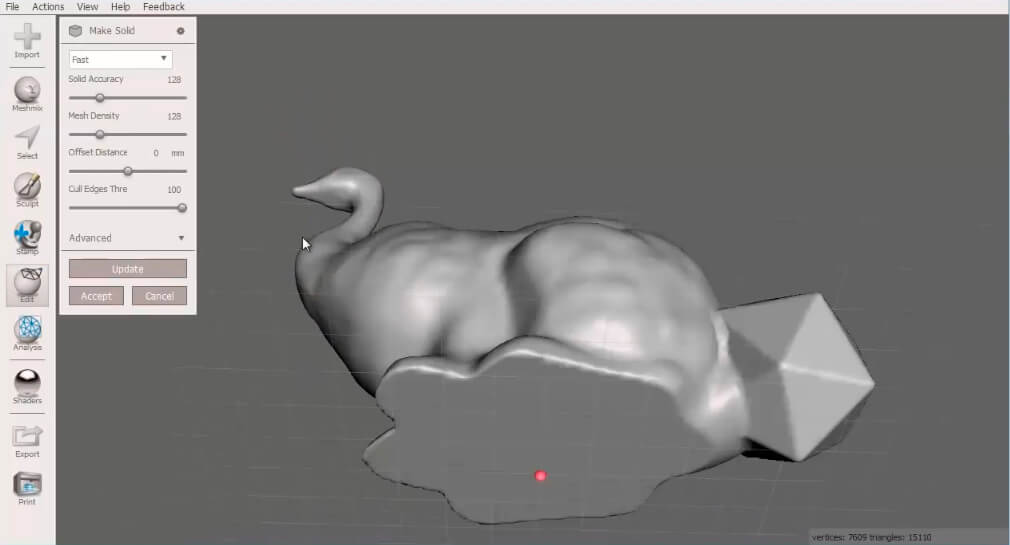
The “Make Solid” tool creates a clean, filled volume without internal geometry. It allows you to adjust the mesh resolution and your 3D model’s resolution quality to get a smooth, clean surface. You can also adjust the thickness of your 3D model. Do not forget to click “Update” in order to view these adjustments on your 3D model.
To learn more about the specific features of materials (minimal thicknesses, maximum sizes, etc.), please consult our materials pages and their modeling guides.
Before resizing your model, you must ensure that the component elements of your 3D model are combined. In the “Object Browser” window, select the different elements then click on “Combine” in the “Edit” tab.
 You can now resize your 3D model: on the “Analysis” tab, click on “Units/Dimensions”.

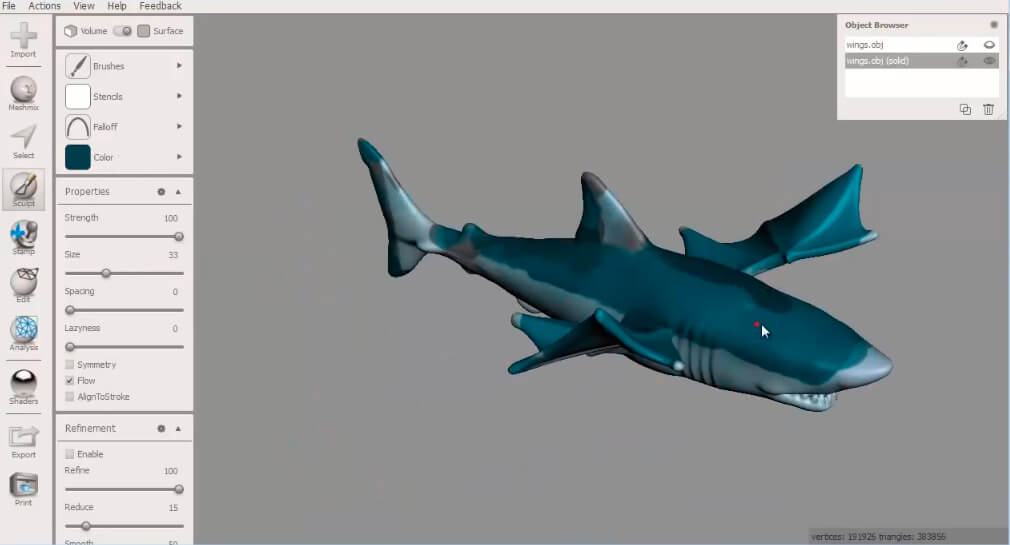
Applying color
The “Sculpt” tab lets you add color to your 3D model. If you do not see the color applied, hold down the space bar to make it appear.
For color gradients, first apply the different shades of color to your model. Then select the “SmoothColor” tool from the list of brushes available.
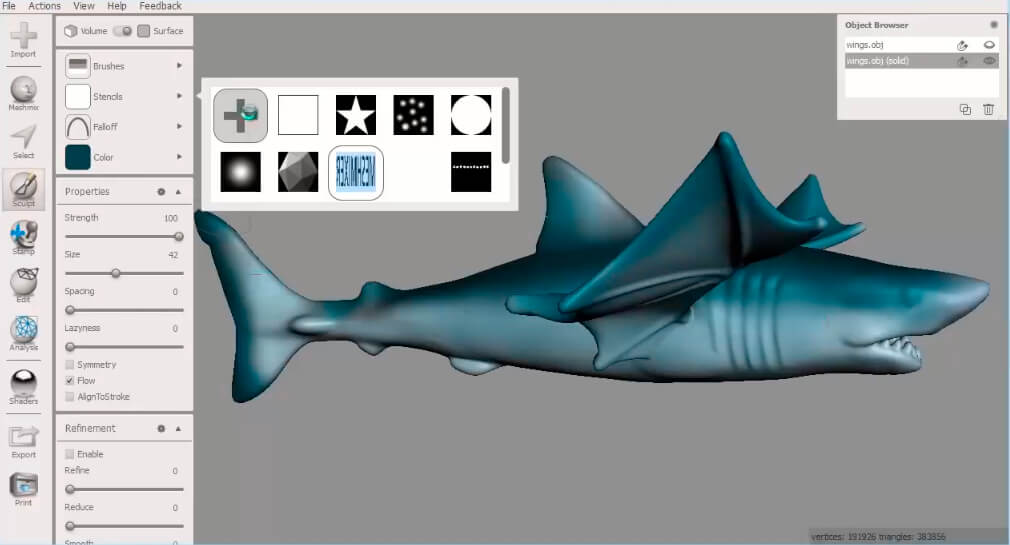
 Apply a textured effect
Use the “Stencil” tool to add details to your surface in order to give it a textured effect. To do so, import a black and white image into your “Stencil” tool. This will serve as a stamp – only the white parts of the image will appear on your 3D model.
Be careful, the quality of the texturing applied will correlate to your mesh’s resolution. If your mesh resolution is low, it will appear pixelated.
Apply a textured effect
Use the “Stencil” tool to add details to your surface in order to give it a textured effect. To do so, import a black and white image into your “Stencil” tool. This will serve as a stamp – only the white parts of the image will appear on your 3D model.
Be careful, the quality of the texturing applied will correlate to your mesh’s resolution. If your mesh resolution is low, it will appear pixelated.
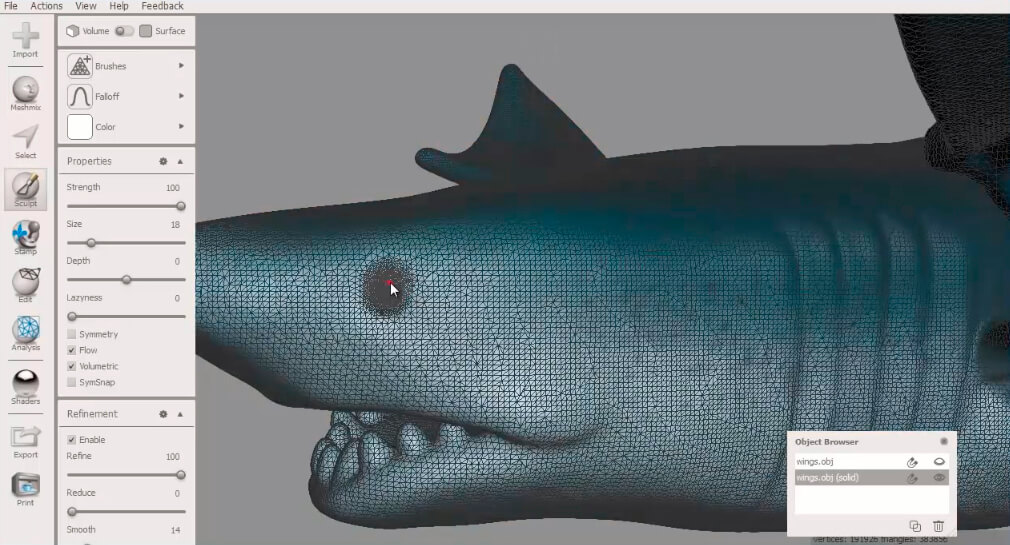
 Increase the mesh resolution
To increase the resolution, while still in the “Sculpt” tab, click on the “Volume” section then select the “Refine” tool. Apply the “Refine” tool to the desired surface to increase the mesh resolution, while holding down the [W] key to view the mesh’s component triangles.
Applying the “Refine” tool does not change the shape of the model but only refines its surface resolution. The benefit of this tool is that it enables you to increase the resolution of your mesh locally. You can therefore optimize your model’s resolution and avoid creating a large 3D file.
Increase the mesh resolution
To increase the resolution, while still in the “Sculpt” tab, click on the “Volume” section then select the “Refine” tool. Apply the “Refine” tool to the desired surface to increase the mesh resolution, while holding down the [W] key to view the mesh’s component triangles.
Applying the “Refine” tool does not change the shape of the model but only refines its surface resolution. The benefit of this tool is that it enables you to increase the resolution of your mesh locally. You can therefore optimize your model’s resolution and avoid creating a large 3D file.
Apply a textured effect
Use the “Stencil” tool to add details to your surface in order to give it a textured effect. To do so, import a black and white image into your “Stencil” tool. This will serve as a stamp – only the white parts of the image will appear on your 3D model.
Be careful, the quality of the texturing applied will correlate to your mesh’s resolution. If your mesh resolution is low, it will appear pixelated.
Increase the mesh resolution
To increase the resolution, while still in the “Sculpt” tab, click on the “Volume” section then select the “Refine” tool. Apply the “Refine” tool to the desired surface to increase the mesh resolution, while holding down the [W] key to view the mesh’s component triangles.
Applying the “Refine” tool does not change the shape of the model but only refines its surface resolution. The benefit of this tool is that it enables you to increase the resolution of your mesh locally. You can therefore optimize your model’s resolution and avoid creating a large 3D file.
Click on the “Print” tab: you will be redirected to the MeshMixer 3D printing interface.
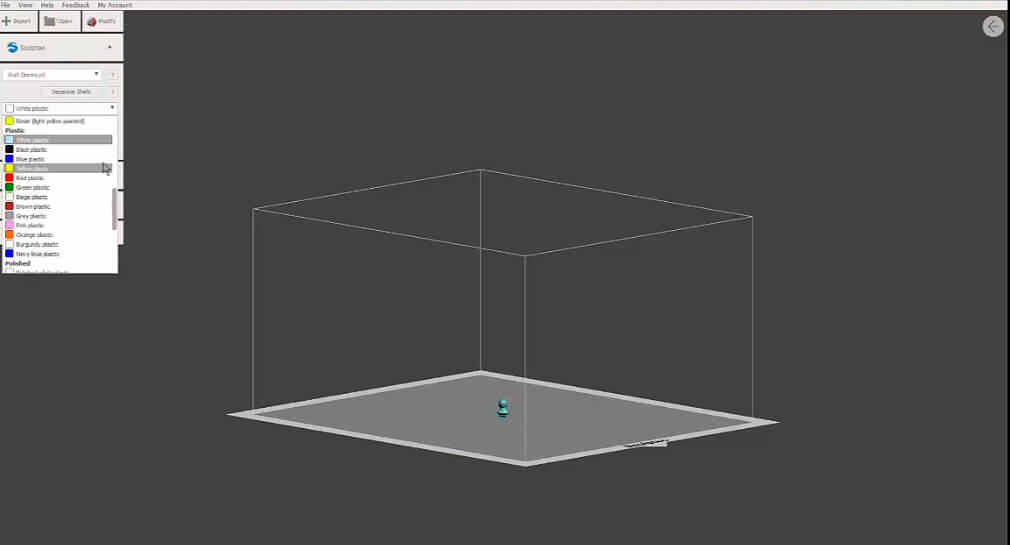
You can then select Sculpteo to print your 3D model. You can select the desired material and modify the size of your 3D model. When you have completed your choices, click on “Update” to update the price of the 3D printing.
 Then click on “View Cart”. A window will appear with a preview of the model that you are about to print. You can choose the amount required.
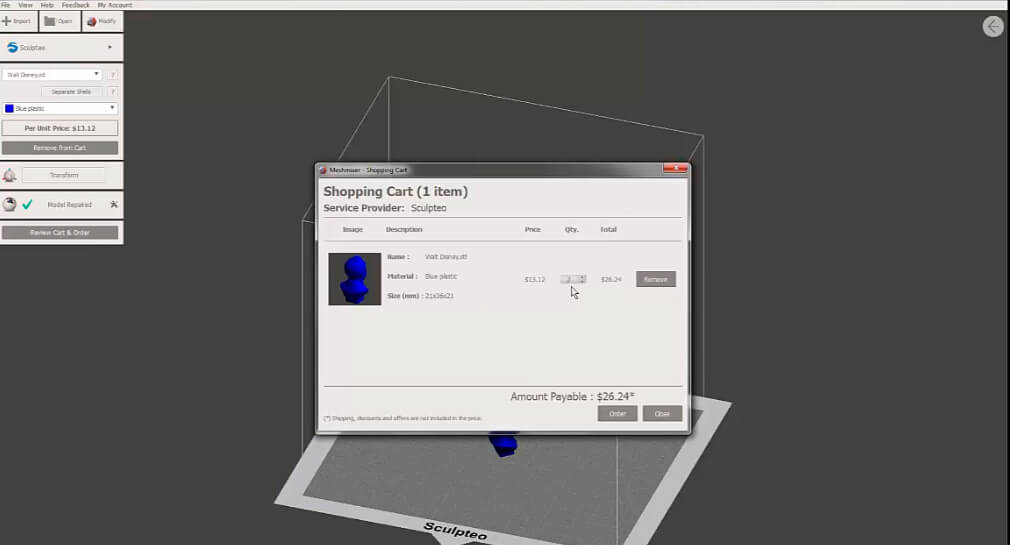 Click on “Order”: you will be redirected to the Sculpteo site.
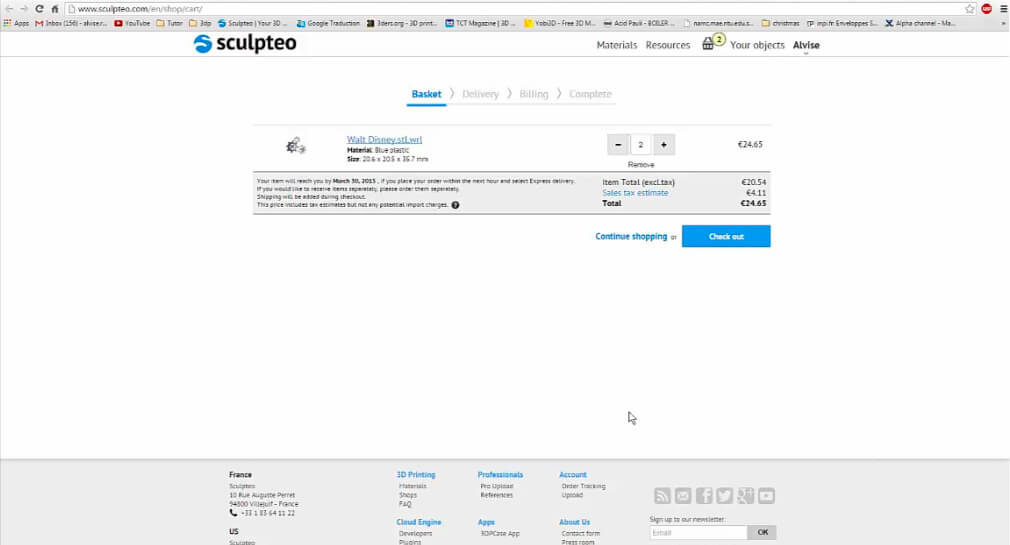 With one click, your model is immediately loaded into our 3D printing interface. All you need to do is continue with your shopping or complete checkout with your cart.
Then click on “View Cart”. A window will appear with a preview of the model that you are about to print. You can choose the amount required.
Click on “Order”: you will be redirected to the Sculpteo site.
With one click, your model is immediately loaded into our 3D printing interface. All you need to do is continue with your shopping or complete checkout with your cart.
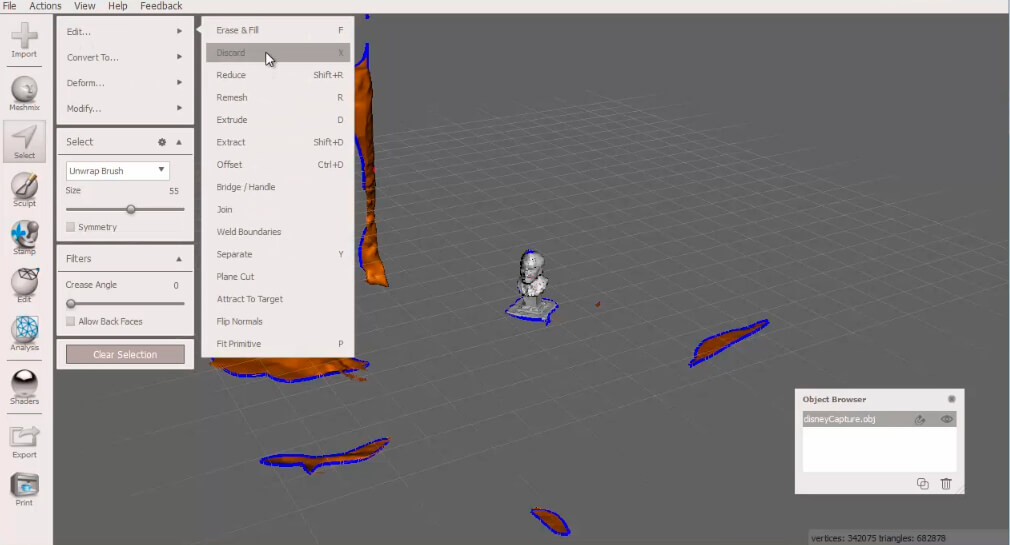
To remove singular elements, use the “Selection” tool, to draw a line separating the 3D model from the other singular elements.
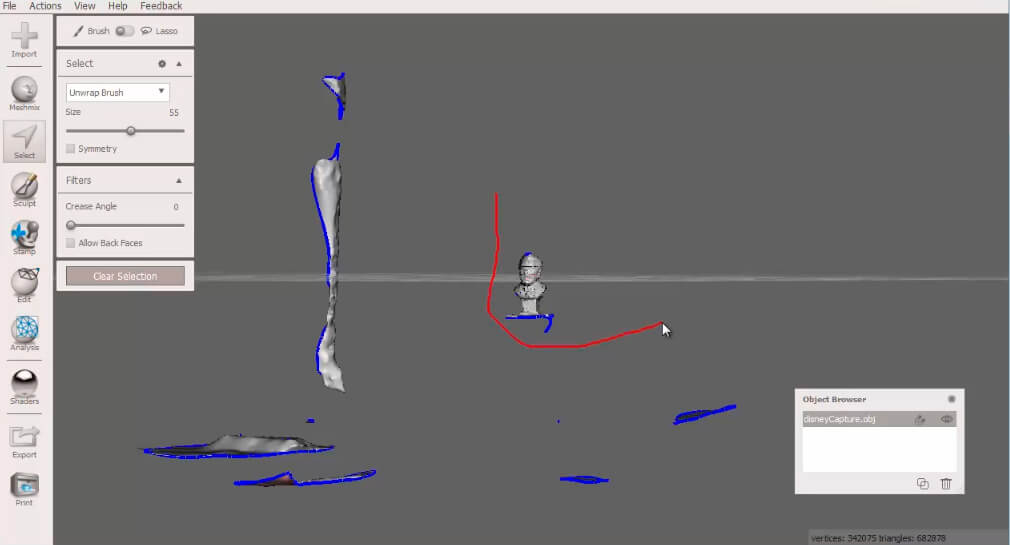 Draw a line to select the singular elements, and then simply delete them by clicking on “Discard”, found in the “Edit” tab.
Draw a line to select the singular elements, and then simply delete them by clicking on “Discard”, found in the “Edit” tab.
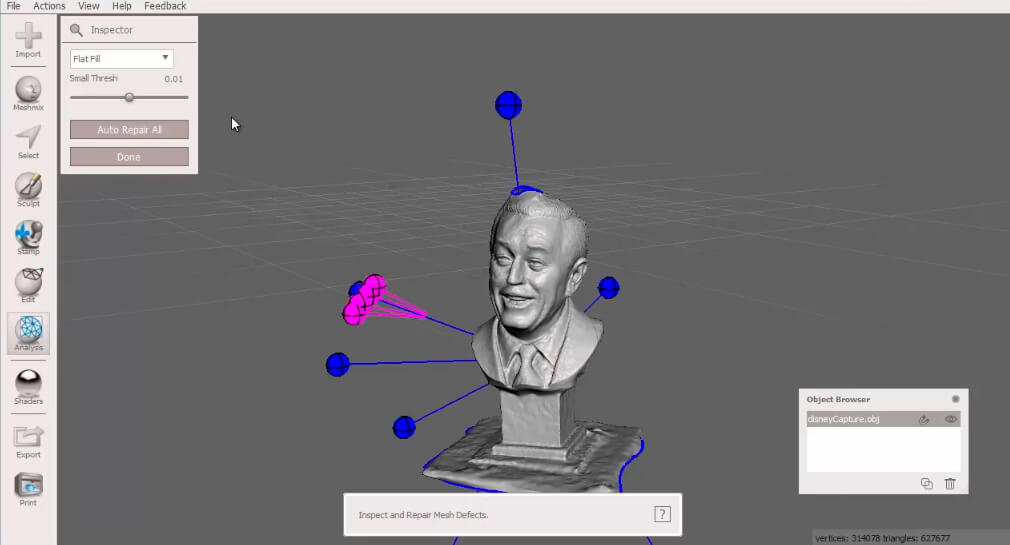
A 3D model must be closed in order to be printable. You must therefore ensure that there are no holes in the 3D model.
In the “Analysis” tab, click on “Inspector”. Many pins will appear: they indicate where there are problems in your model. Blue pins indicate the holes in your 3D model. You can click on the pins one by one to automatically resolve the problems indicated. You can also correct the entire model all at once by clicking on the “Auto Repair All” button.
The “Plane Cut” tool enables you to create a smooth, flat base for your 3D model, without irregularities.
In the “Edit” tab, click on “Plane Cut”. Click and pull the arrows to position your model according to the desired cutting plane. Then go to the “Plane Cut” window and click “Accept”.
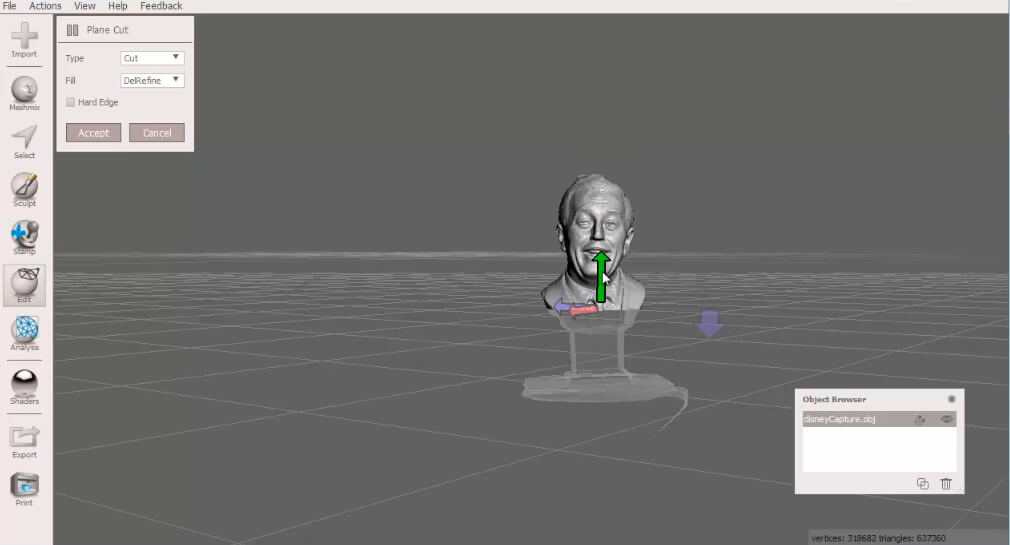
Your model will now have a smooth support surface.
For more information concerning errors to avoid and Sculpteo repair tools, please refer to our Repair Your File for 3D Printing page.