3D Printing Tutorial : 3D Builder
Introduction
- Create your own 3D object
- Convert a 2D image into a 3D object
- Prepare your 3D object for 3D printing
3D Builder software is a pre-installed application, provided by Microsoft. It is user friendly and simple to use, even if you don’t have any experience in design. Once you download the app, you automatically get some instructions to get started with the software. With the help of this tutorial, it will be even easier to handle the various features, and the whole design experience is pretty smooth.
3D Builder gives the possibility to create simple 3D objects from the beginning. In addition, it is possible to download some 3D models from the software’s library and modify them in order to personalize them according to your needs. One of the greatest features of the software is that enables the creation of 3D objects out of a 2D picture. This means that either you insert a 2D image or you take a camera shot, you can have any 2D object turned into 3D! In the same way you can work with the scanning option. You just scan the object, import the file to the software, edit it and send it for 3D printing.
With 3D builder, it is possible to open many different formats of 3D files, such as 3MF, STL, OBJ, PLY, WRL (VRML v2.0) and glTF(v2.0) files. With respect to the 2D files, it can open formats such as BMP, JPG, PNG, and TGA files. Moreover, you can export your files in 3MF, STL, PLY, or OBJ format.
The software doesn’t need any special requirements, but it only runs for Operating Systems Windows 10, Windows 8.1 and Windows 10 Mobile. And of course, it is for free. All you have to do is download the app here.
Create your own 3D object
Getting started and setting the units
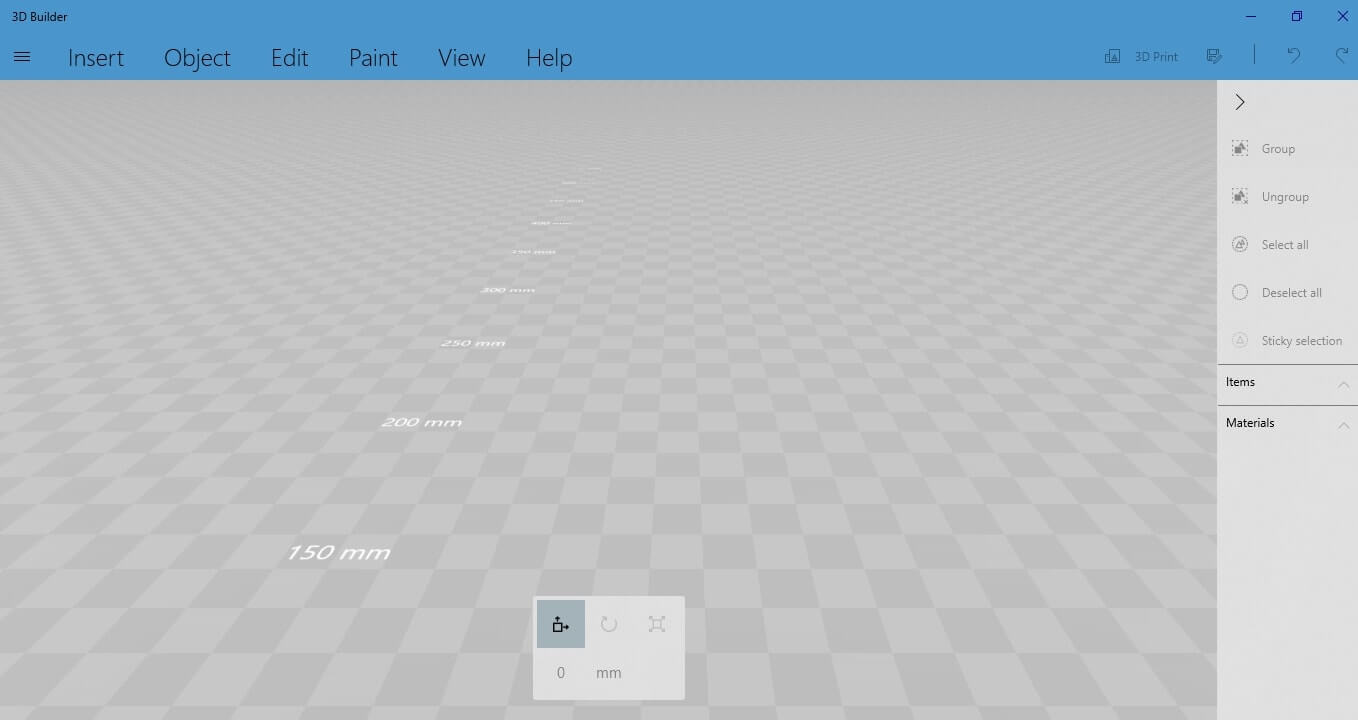
When you open the 3D Builder software, you get this screen. To get started, select ‘New Scene’.

Now you have an empty workspace where you will be working on what looks like this:
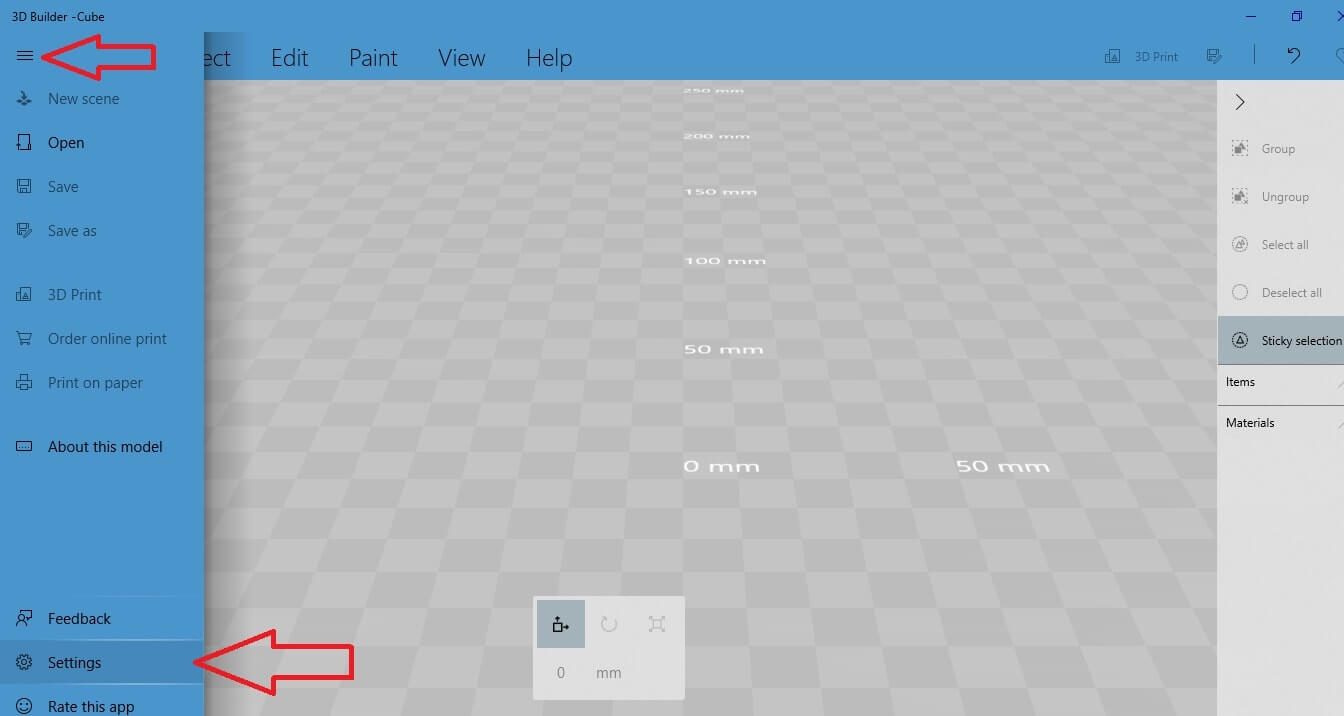
From the menu bar on the left side, select the “Settings” option.
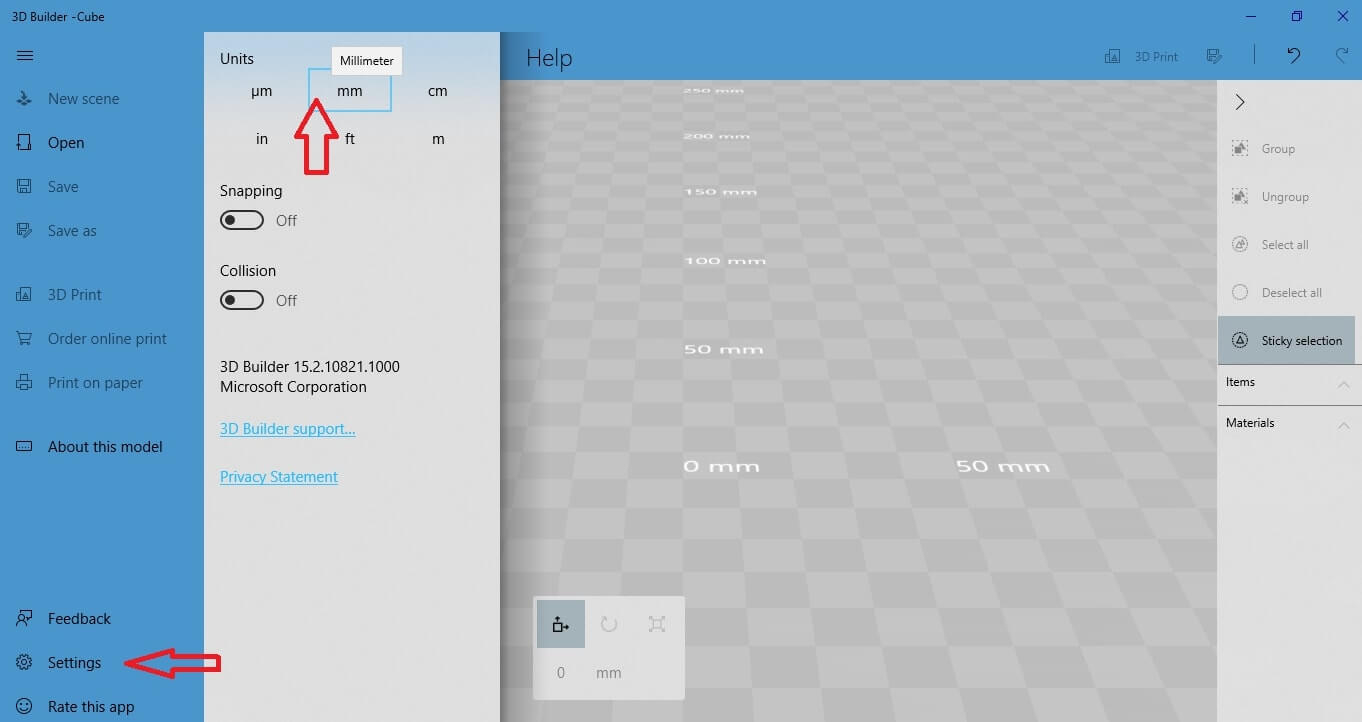
You can choose the units you want to use when designing. For example, to design a 3D object in
Insert a 3D shape
 The list of options you get are: “Load object”, “Load image”, “Camera”, “Scan”.
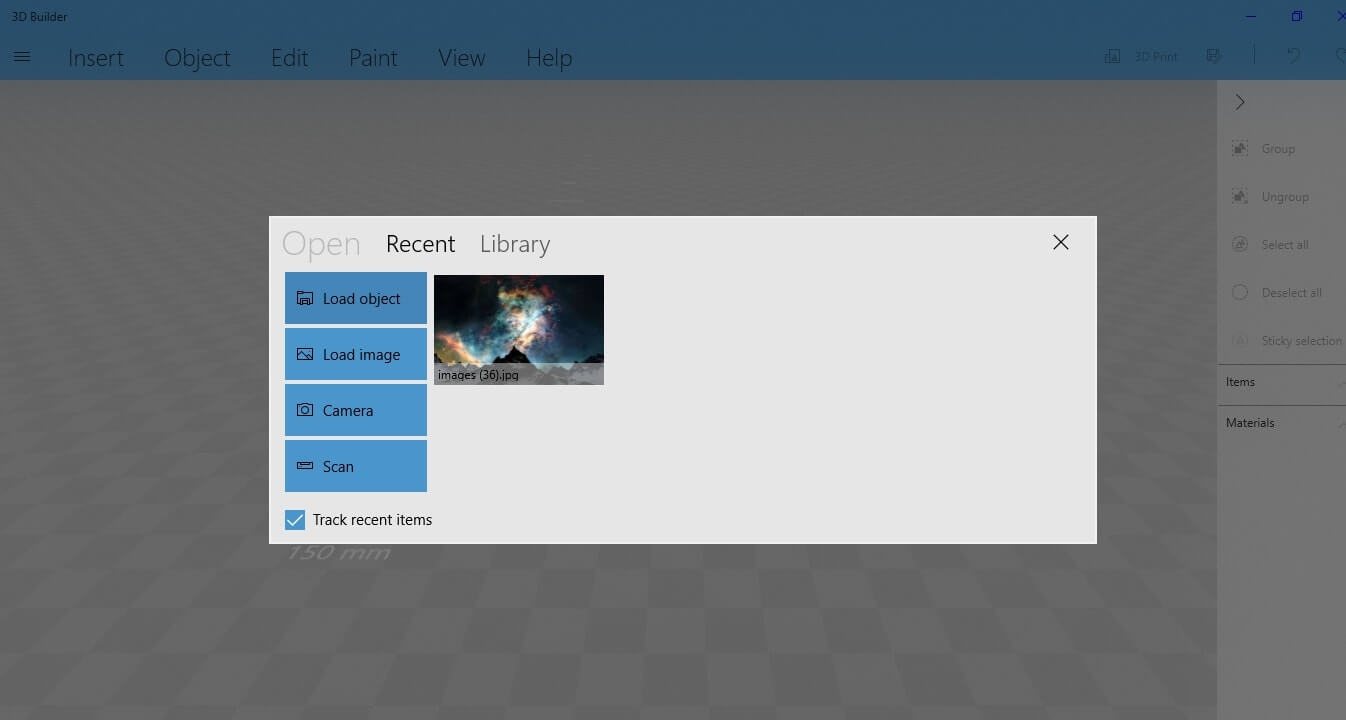 Let’s browse these options one by one to see
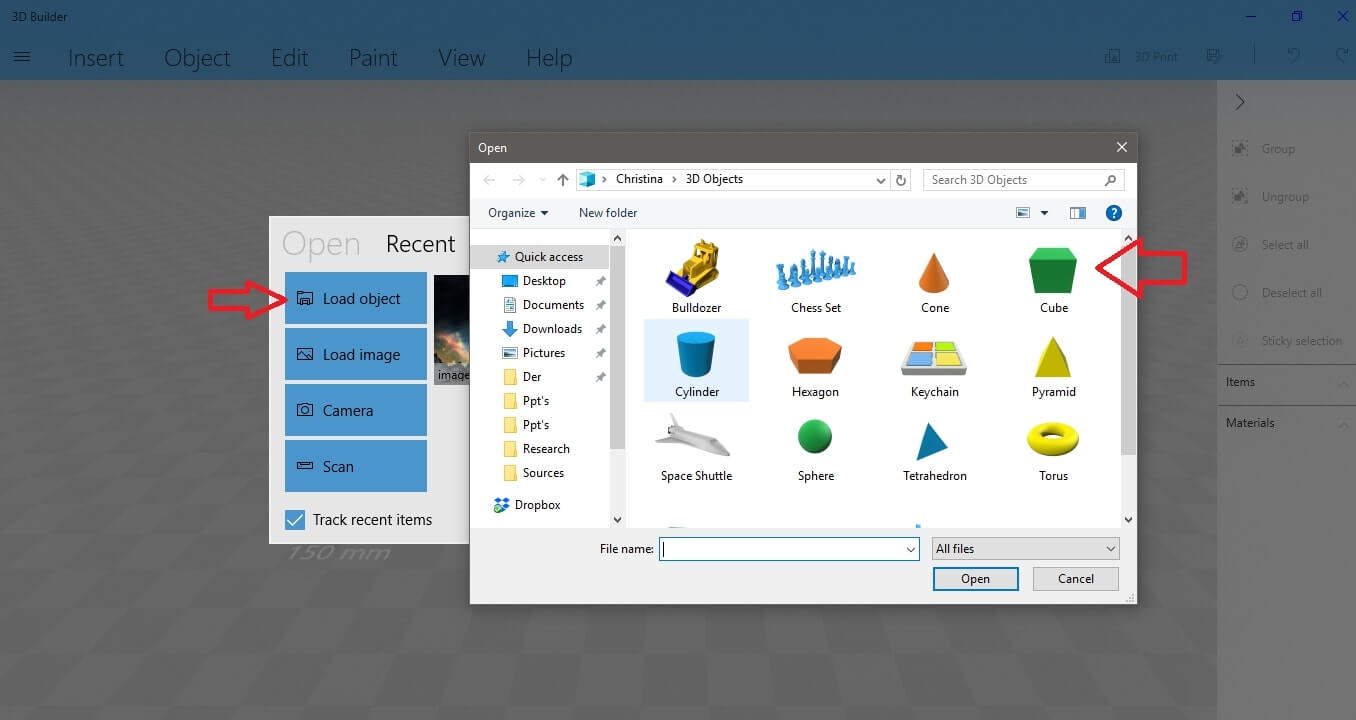
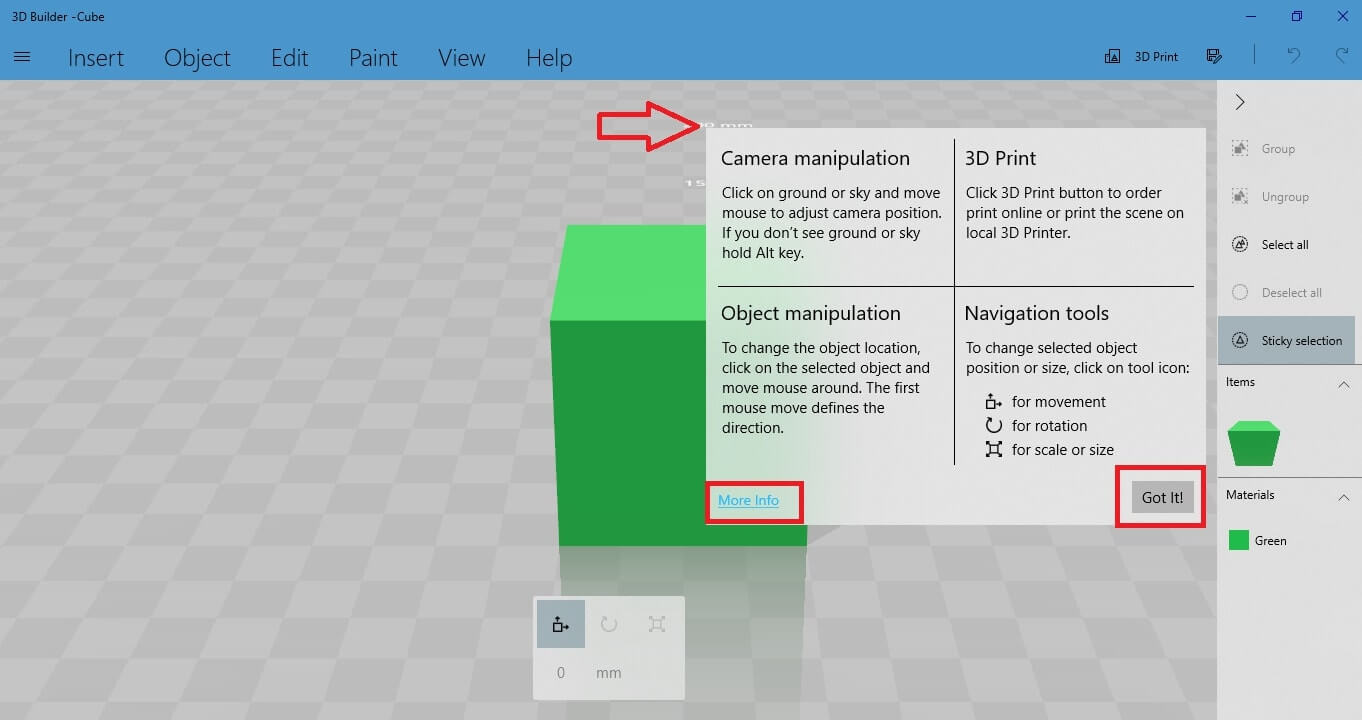
Activate the editing options for your 3D shape
To activate the editing of the 3D shape you will work on, you first have to select it by left-clicking on it. When you select the shape, you will notice it is highlighted with a blue stroke. It’s important to make sure that you always select your object,
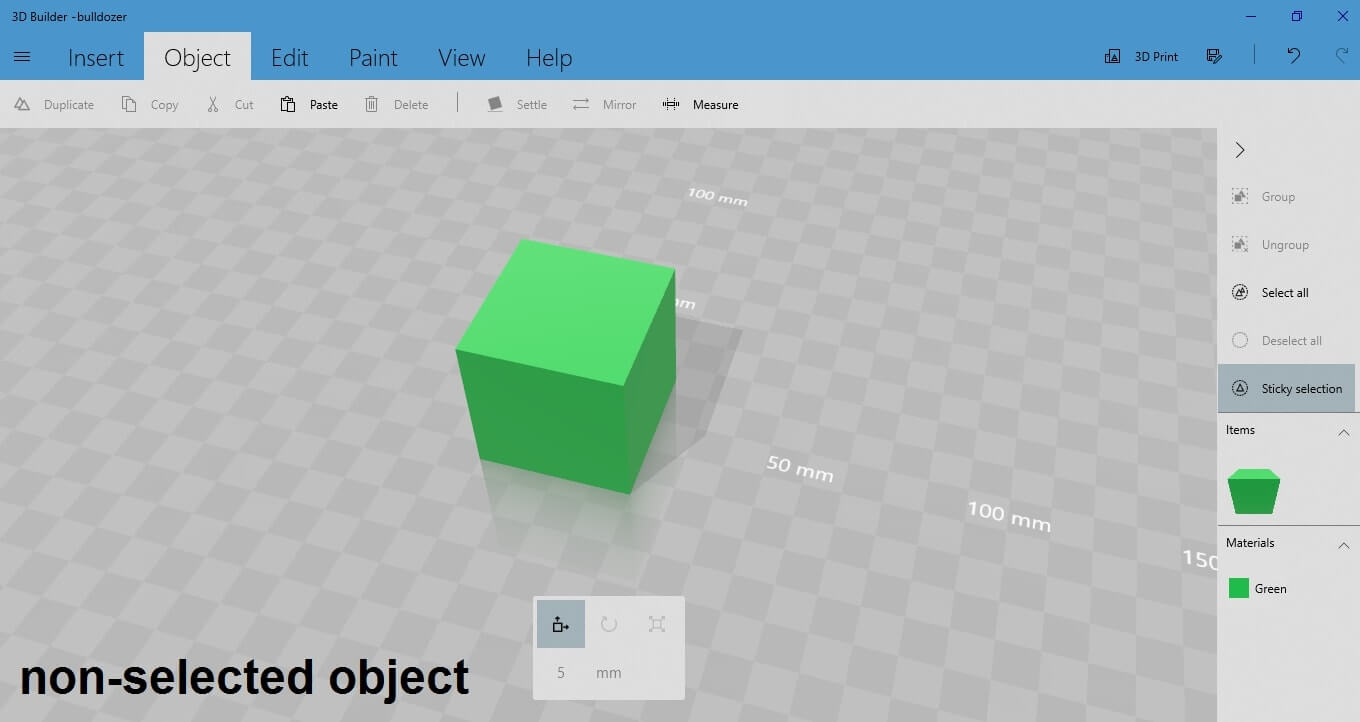
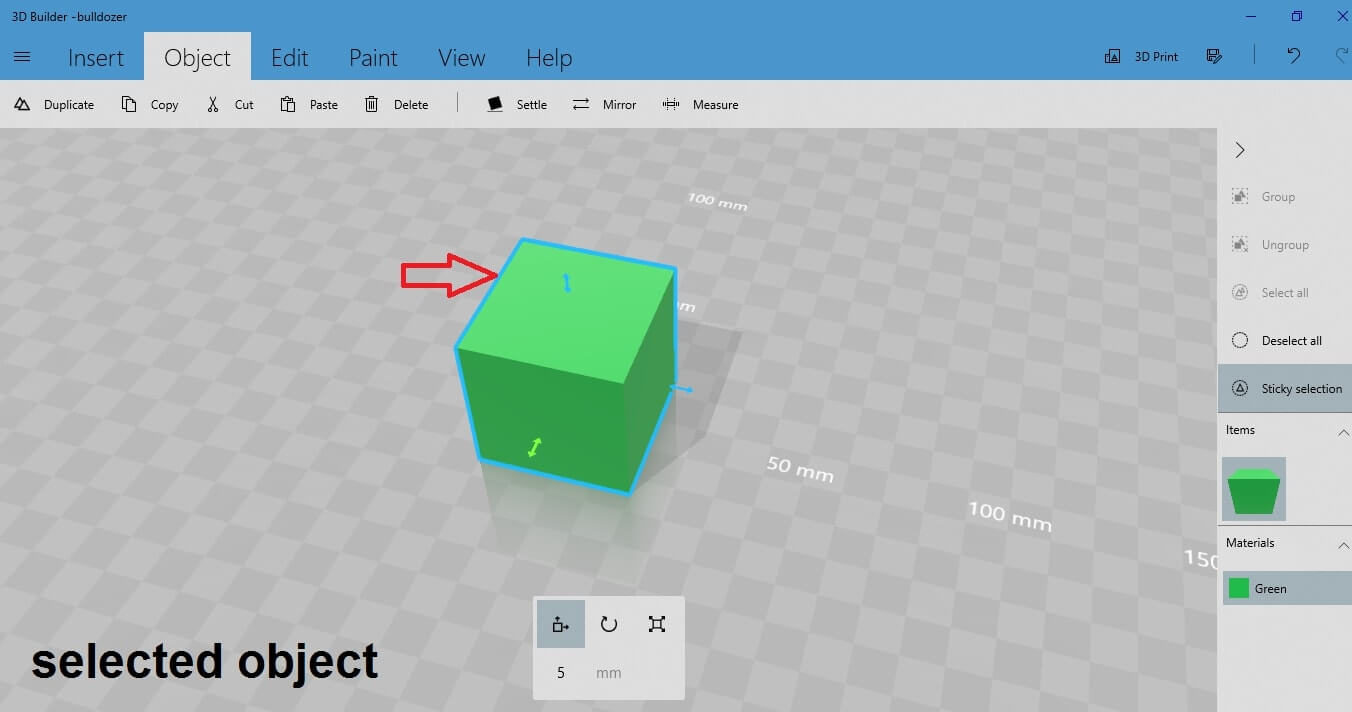
Notice that in the highlighted version of the 3D shape, there are some arrows around the object. These arrows indicate the 3 directions in which you can move your object around the workspace: up and down, left and right, back and forth.
At the bottom of your
The first option is about moving the 3D shape towards the selected direction.
You can select the direction by clicking on the arrow at the side of the cube.
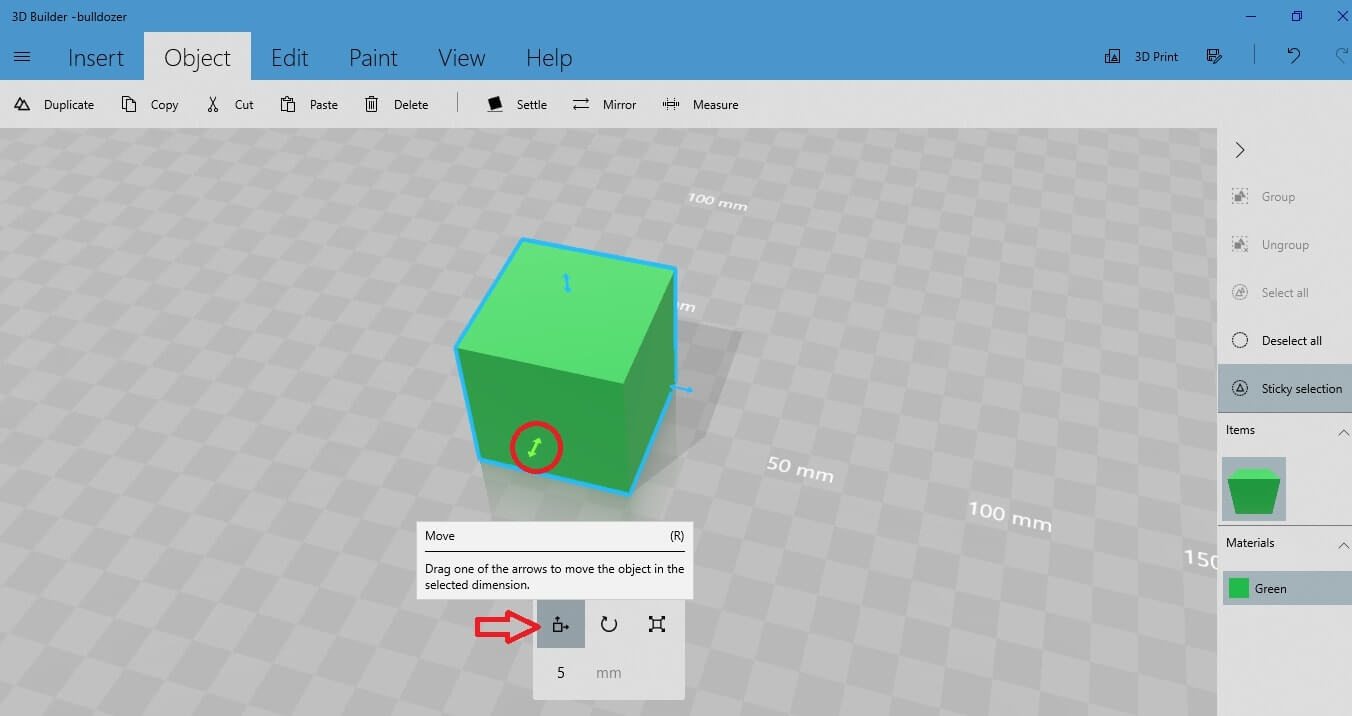
For example, if you want to move the cube back and forth in the workspace, click on the back and forth arrow to turn it green. Move the 3D shape by clicking and dragging the arrow with your mouse, or give a value to the relative field and press “enter”.
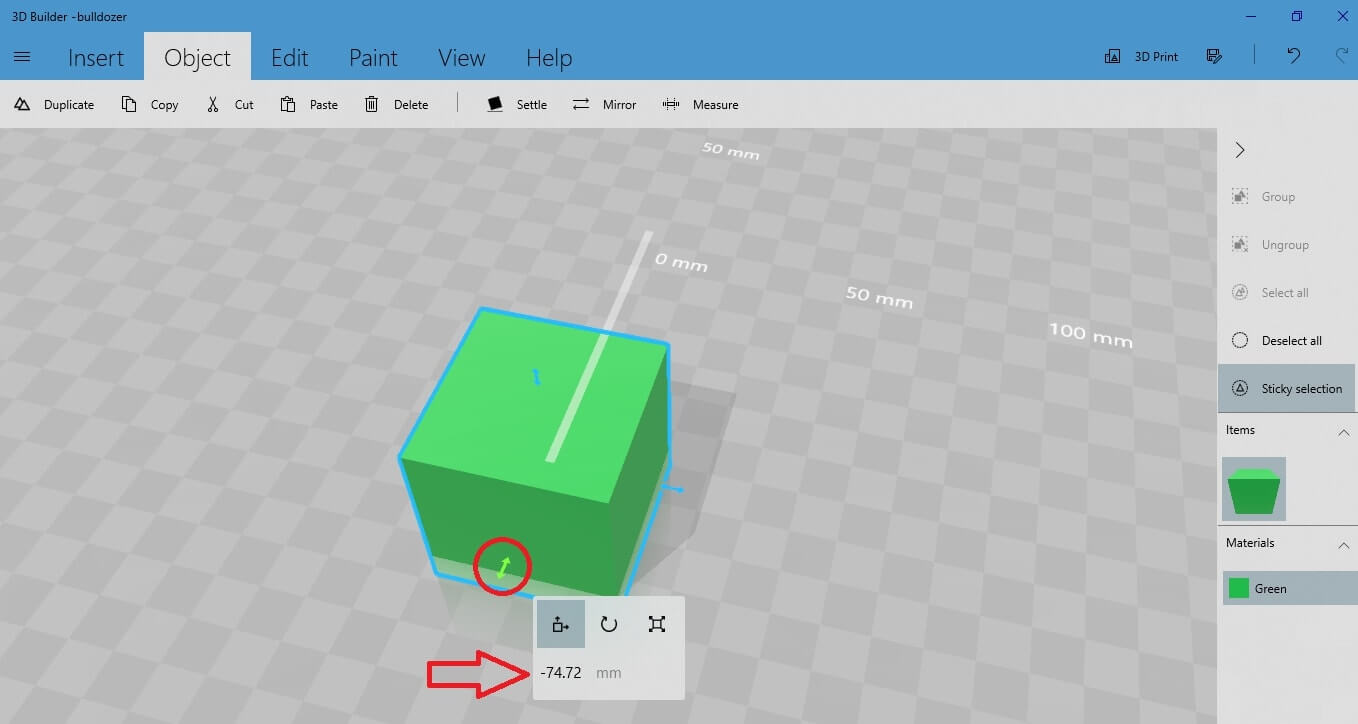
You can do that with all the three directions.
The second option is the ‘Rotate” option.
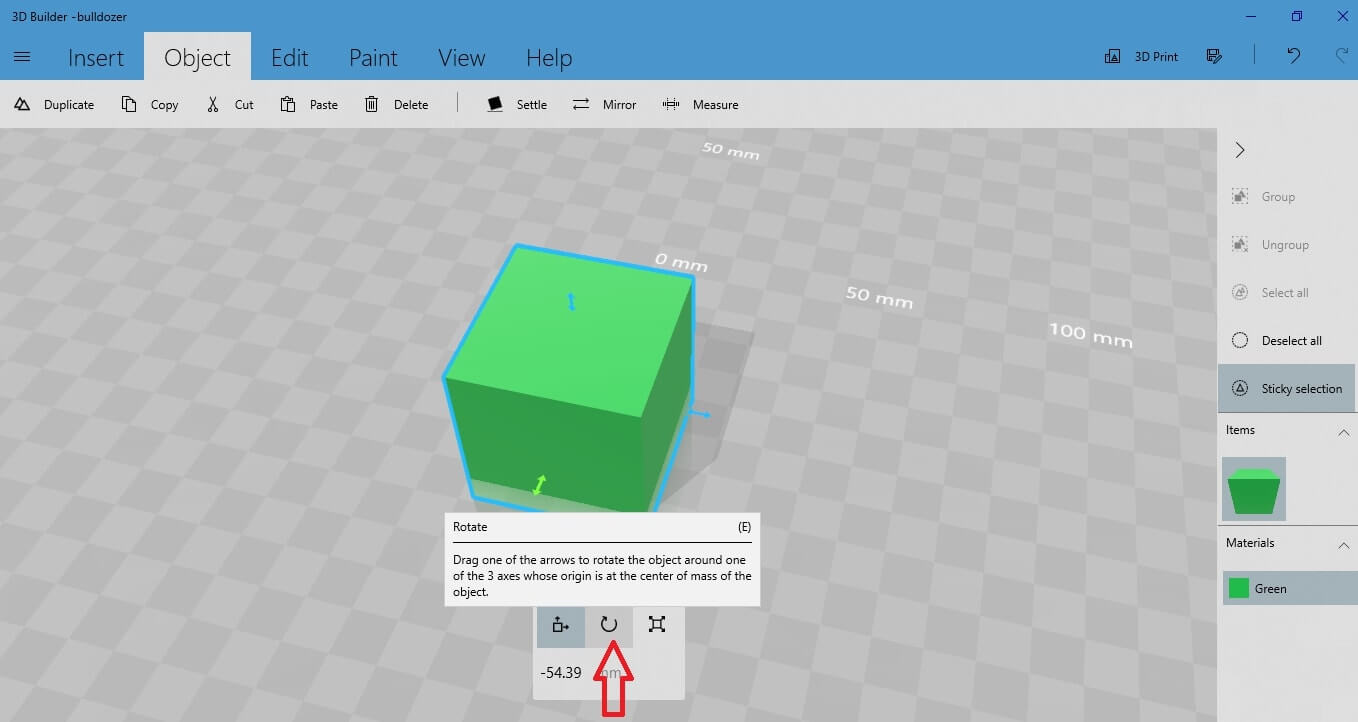
Select the “Rotate” option to activate the three rotating directions around the 3D shape.
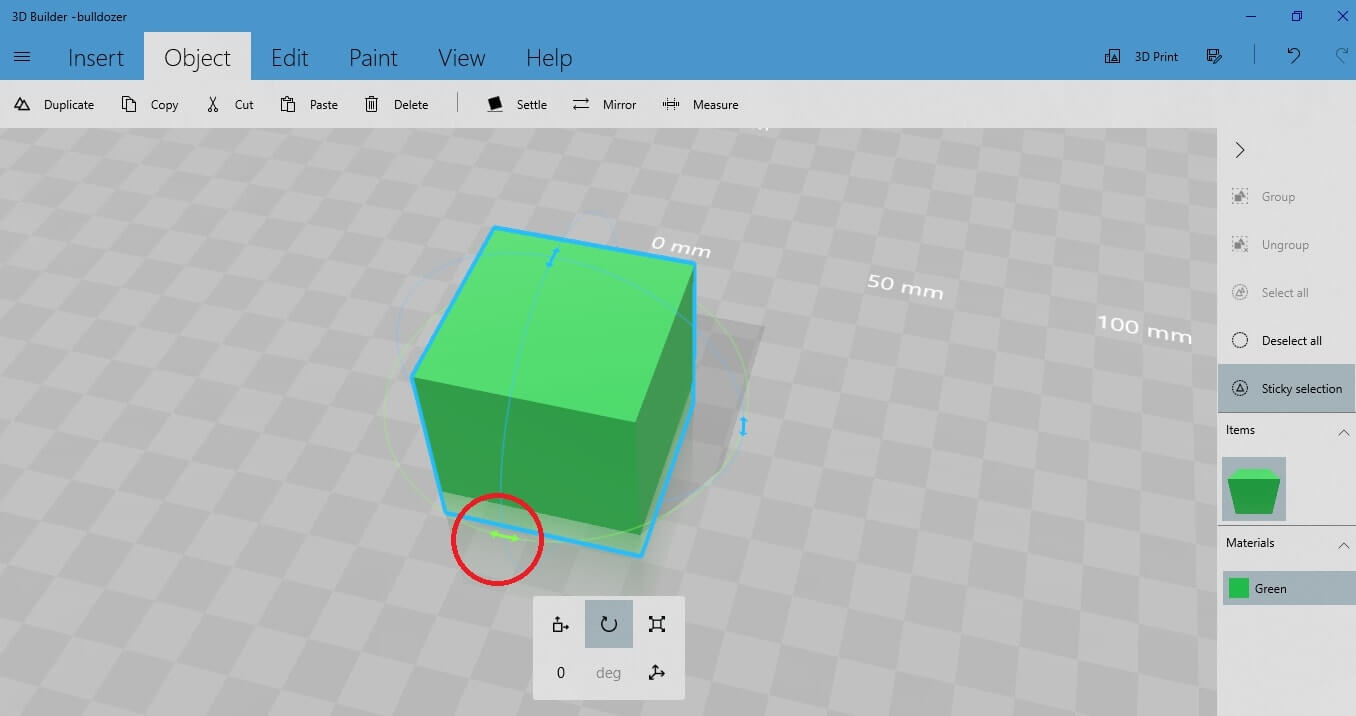
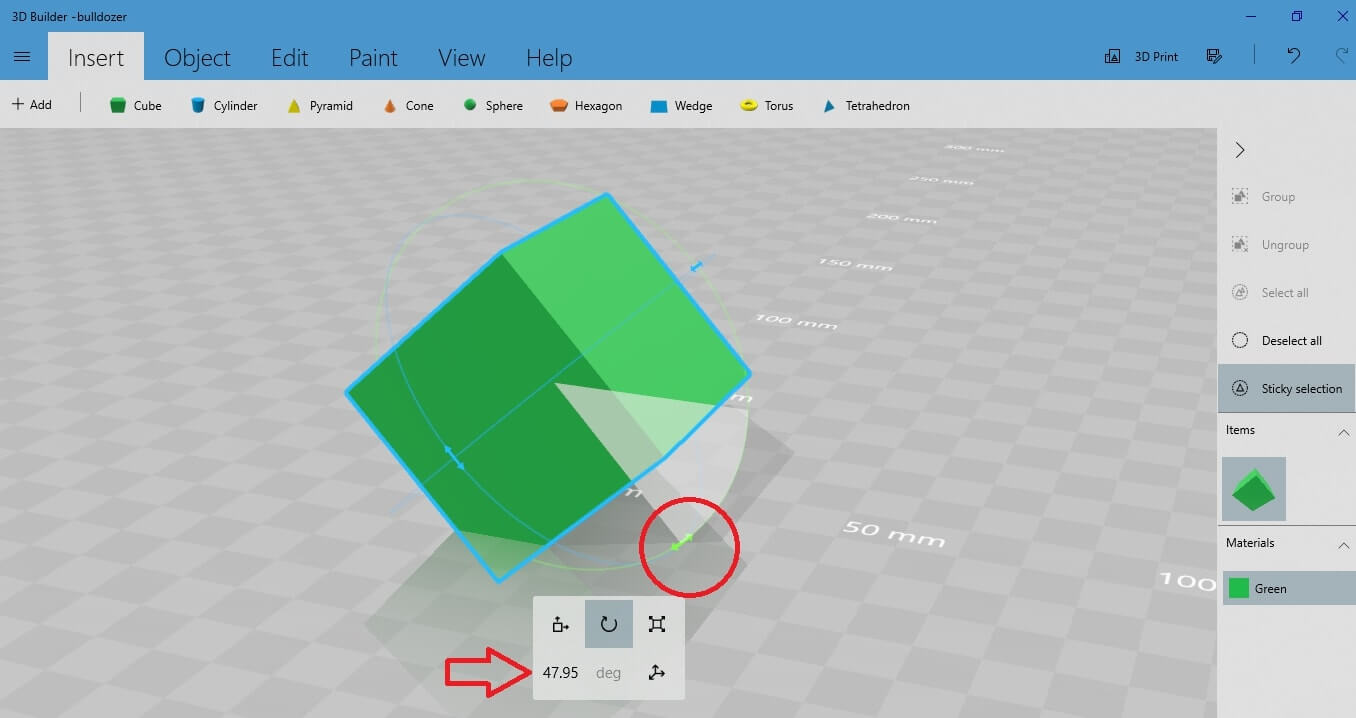
Select the direction you want to rotate your object around, by clicking on the arrow by the side of the cube. The selected arrow turns green so now you can drag it around. You can perform the same action by entering the precise value of the degrees you want to rotate your object around.
Give dimensions to your 3D shape
Moreover, you have the possibility to resize your object and give it the dimensions you want.
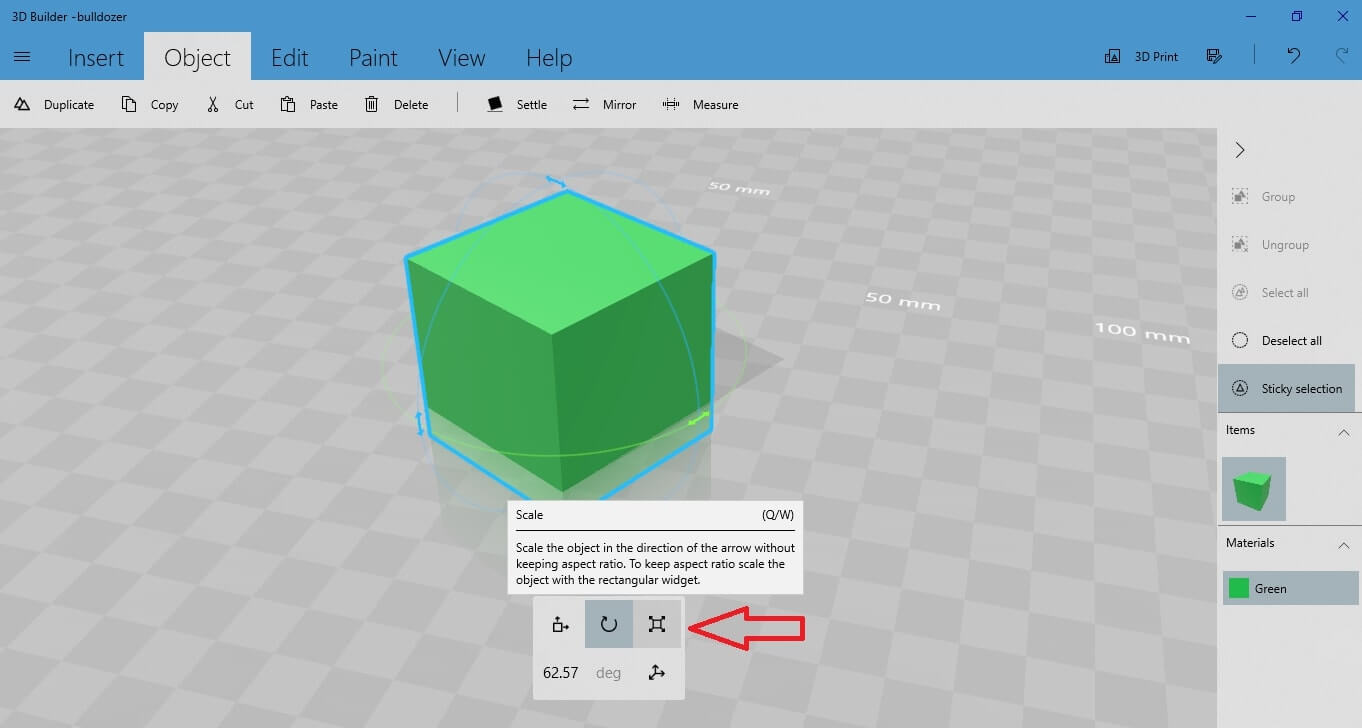
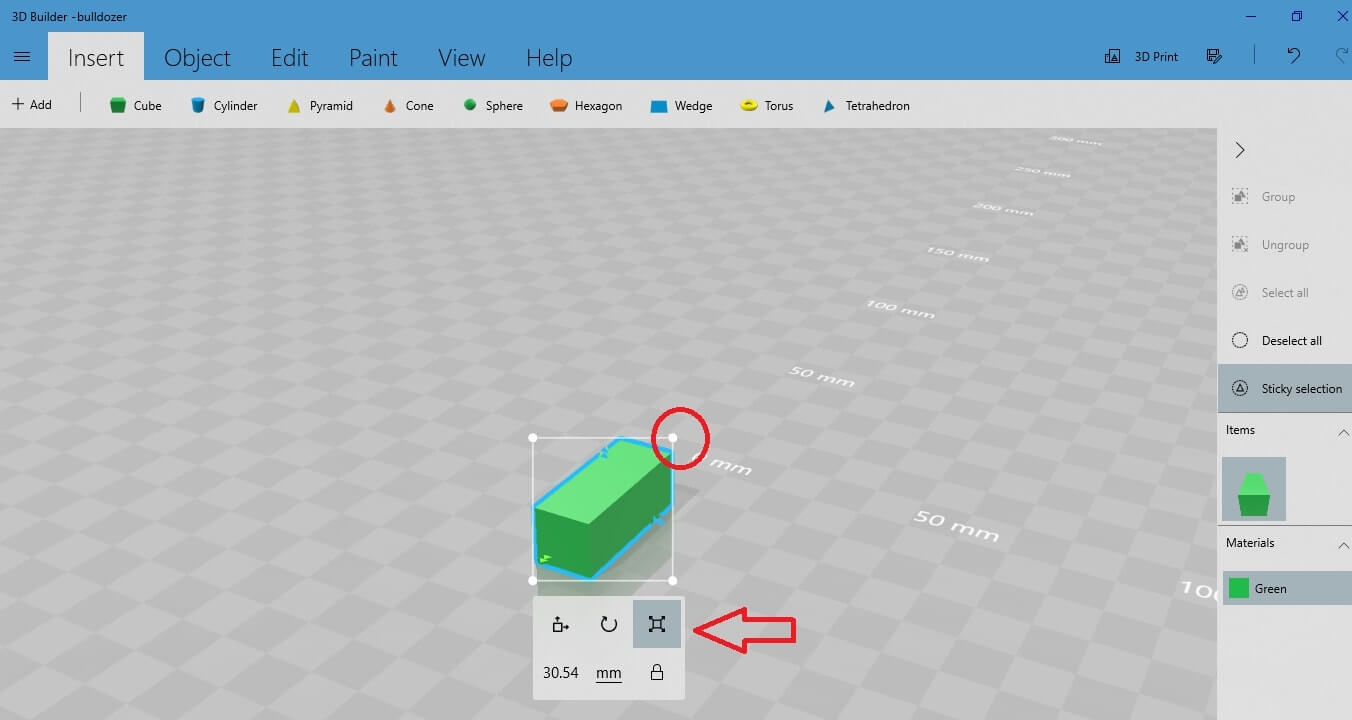
Let’s say for example that you want to edit the width of the cube. Select the scale button. Click on the arrow that corresponds to the dimension of the cube you want to edit. Drag the arrow towards the direction you want, to increase or decrease the width of the object.
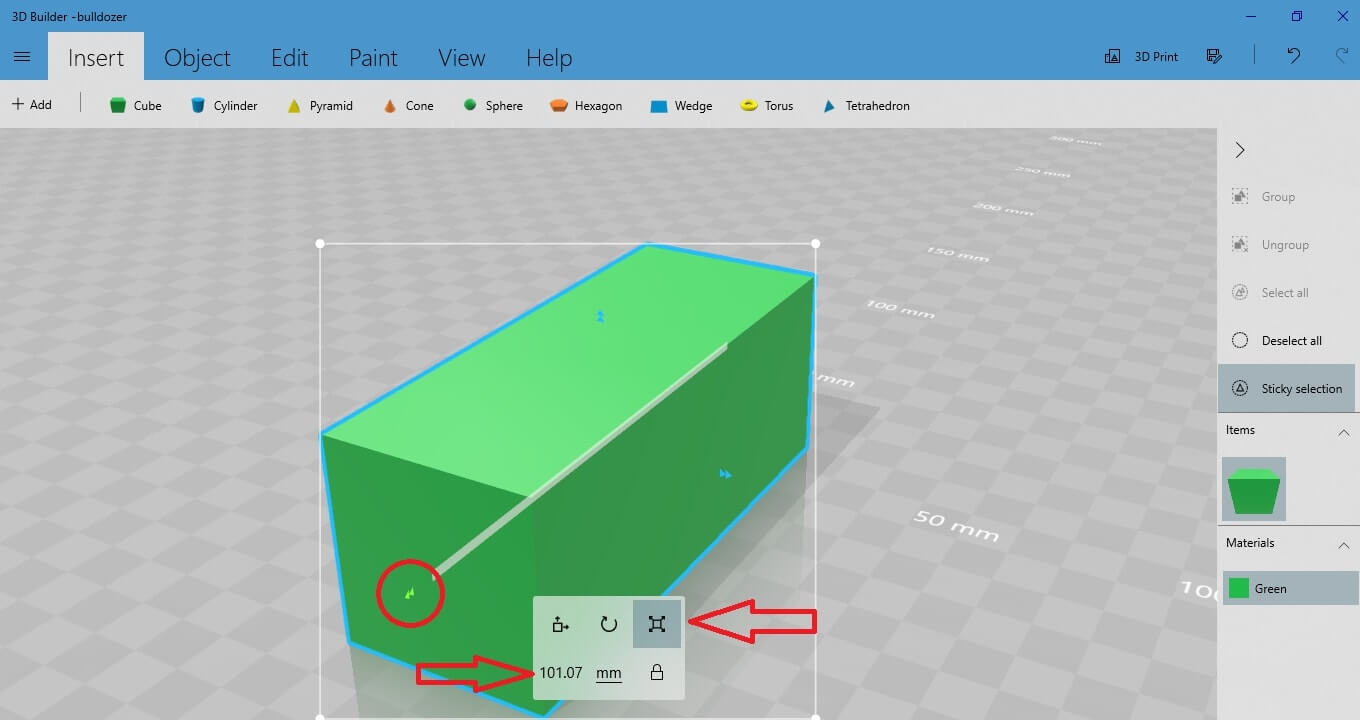
It is also possible to resize your object by keeping the scale ratio. In other words, you can keep the proportions of the shape and just adjust its scale.
To do so, click on the corner of the white frame that it created around the 3D shape and drag it in and out to resize the whole object.
Duplicate your 3D object
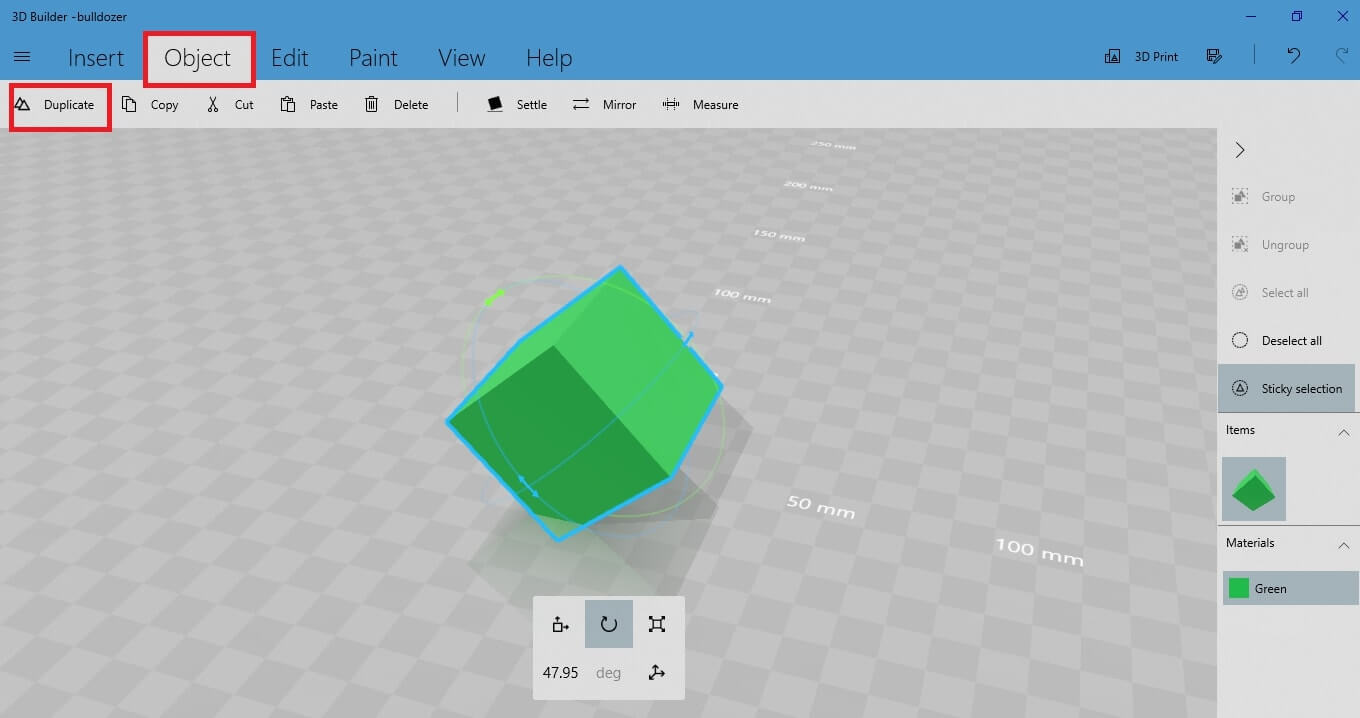 The cube is instantly duplicated.
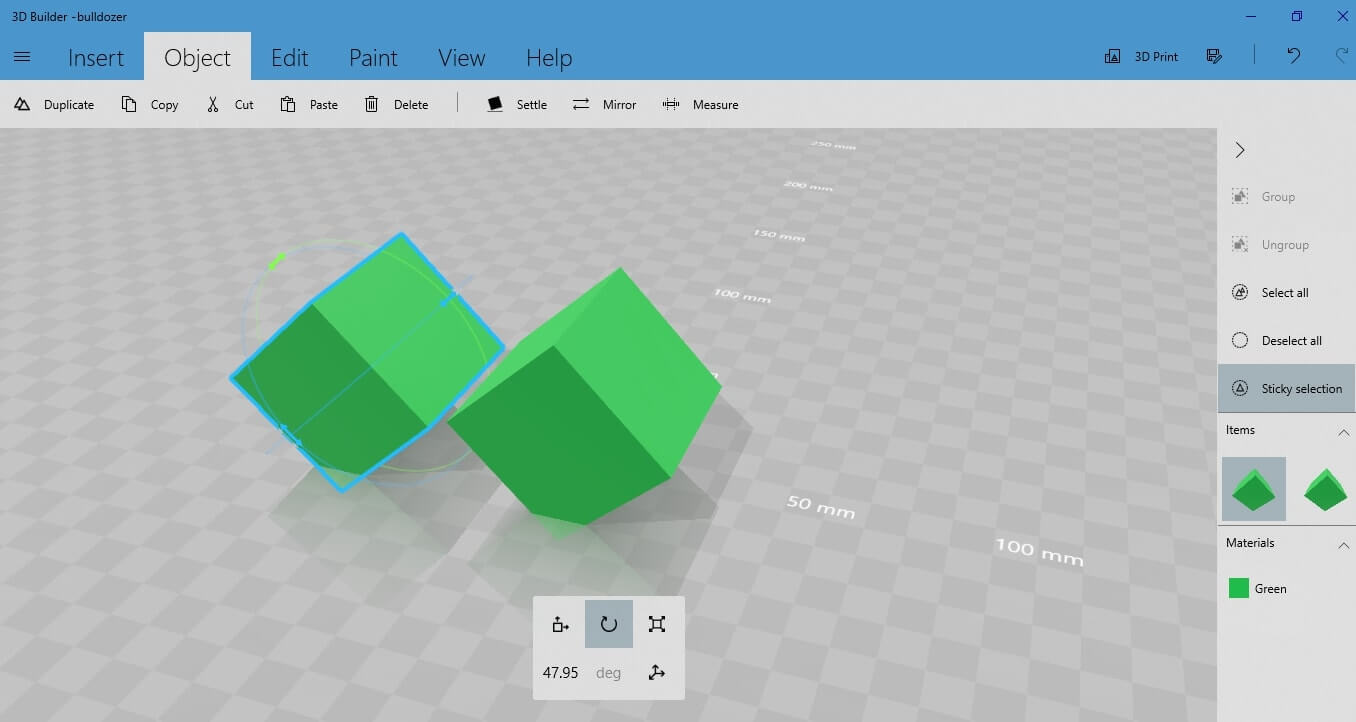 Now there are two objects on your workspace. Select the one you want to move around, rotate it and change its dimensions as you wish, as explained in the previous paragraphs (1.2 -1.4).
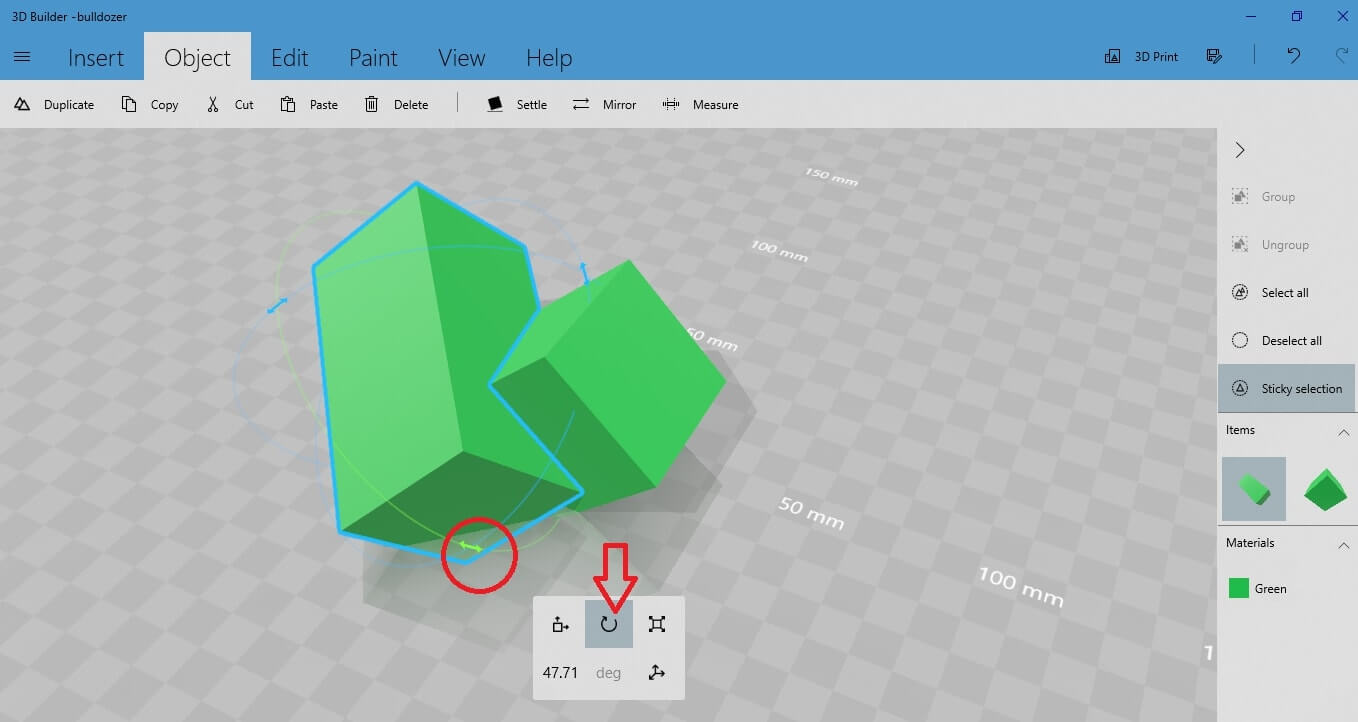 You can move or edit both the objects that are in the workspace at the same time.
To do so, select them both at the same time. Select the first object by left clicking on it, hold the “Shift” button and left click on the other object.
Now both objects have the blue stroke around them, which means they are both selected.
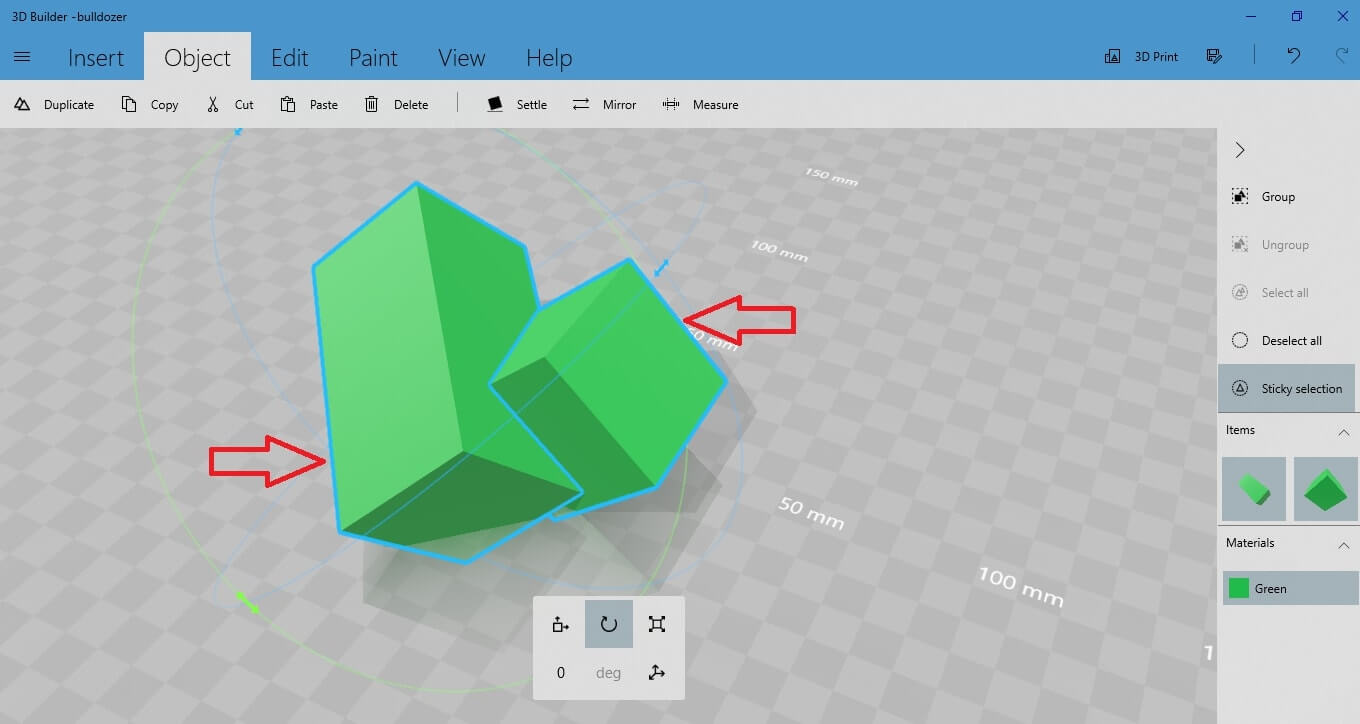
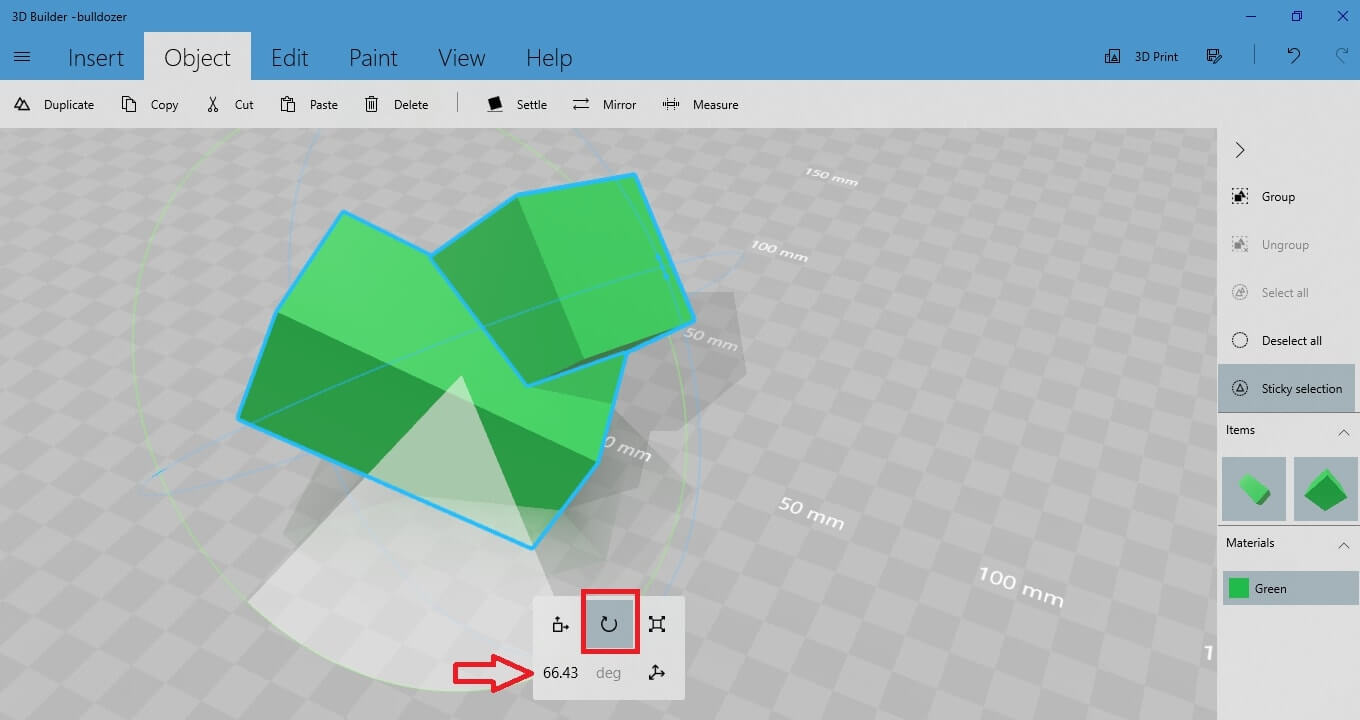 If you want to delete an object that is inserted in your workspace, just select it and press the delete button.
 Check the stability of your object
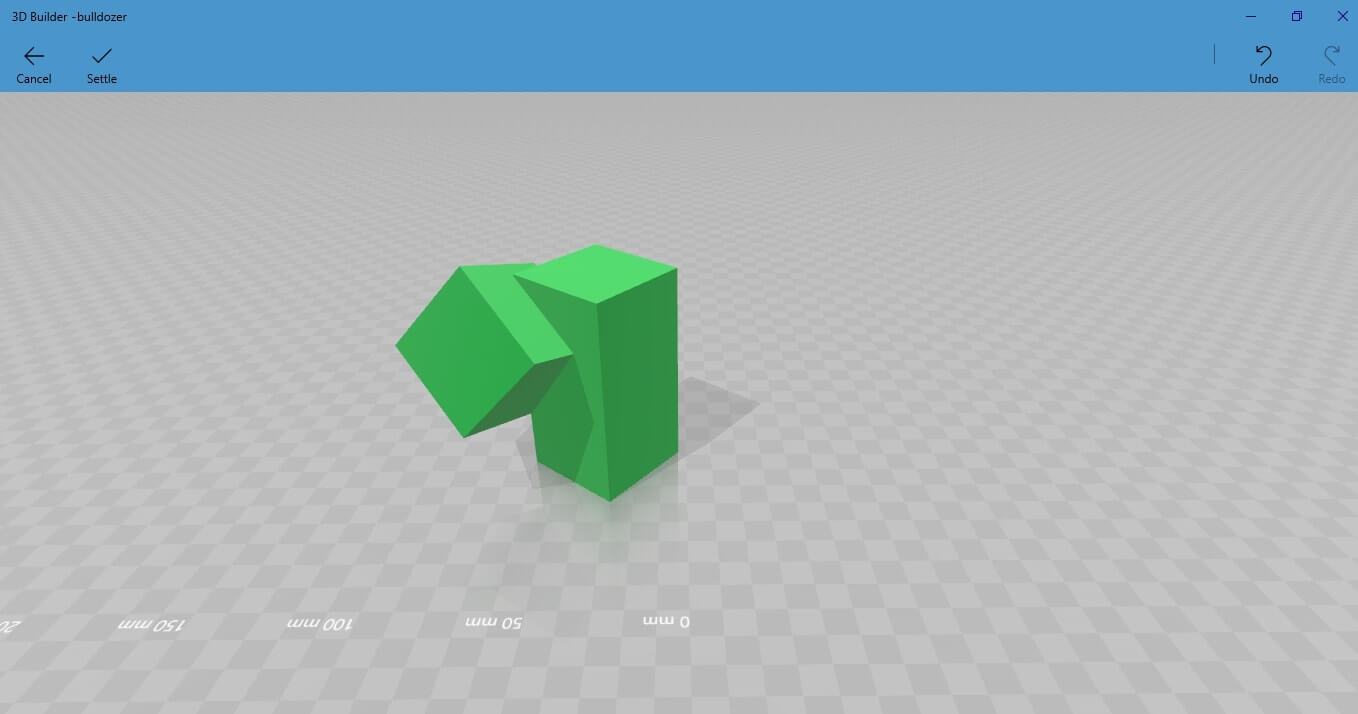
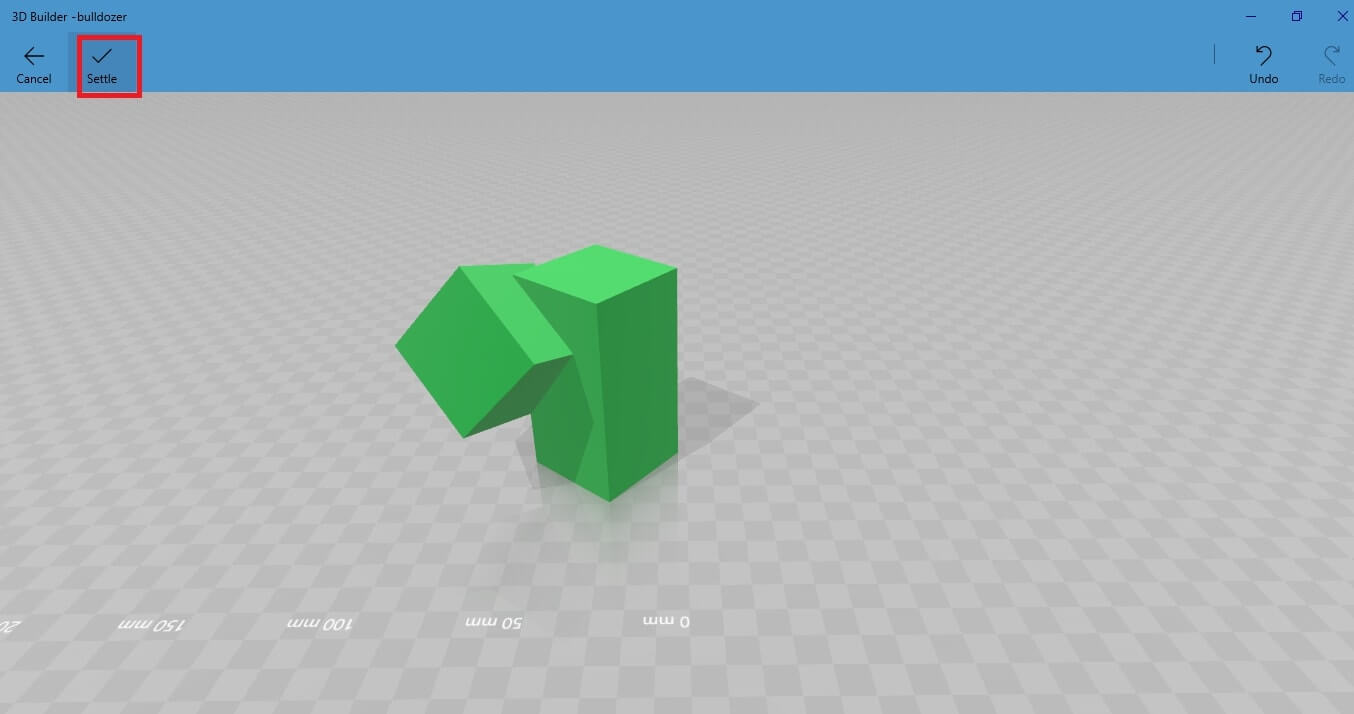
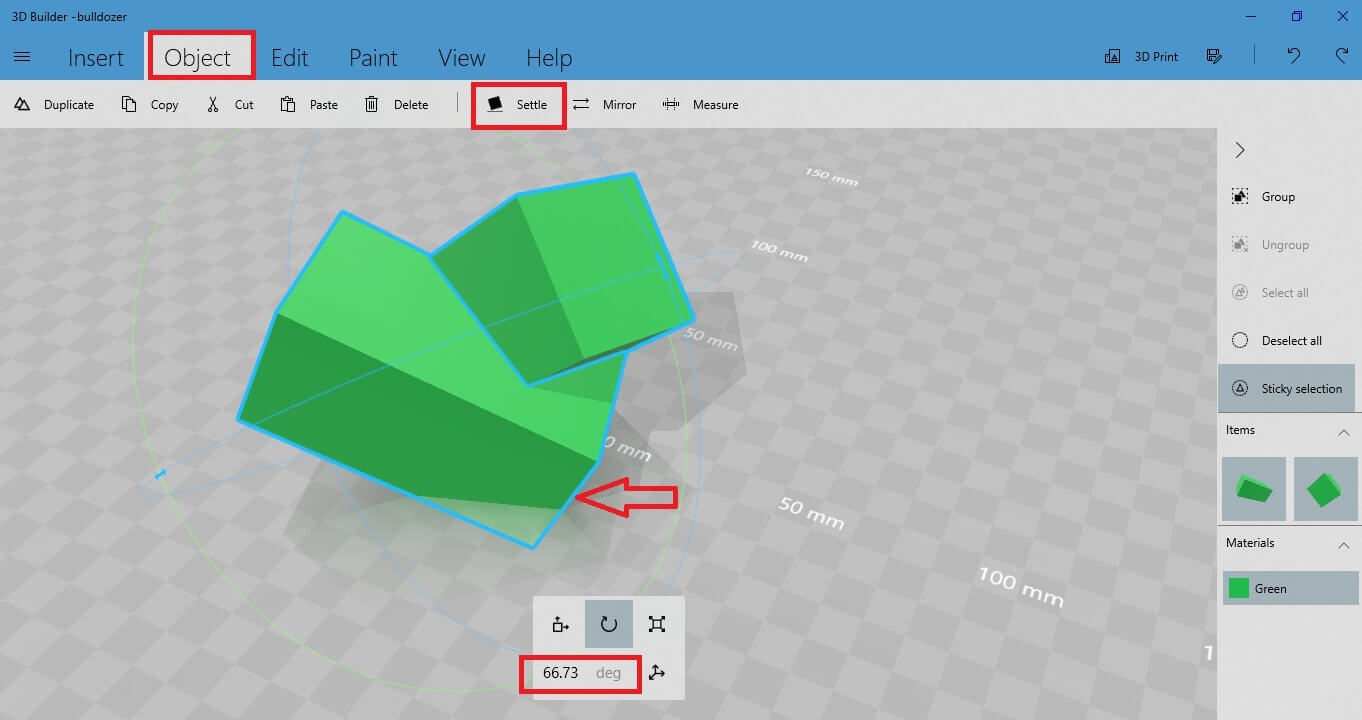 Press “Sette” and you will get this result:
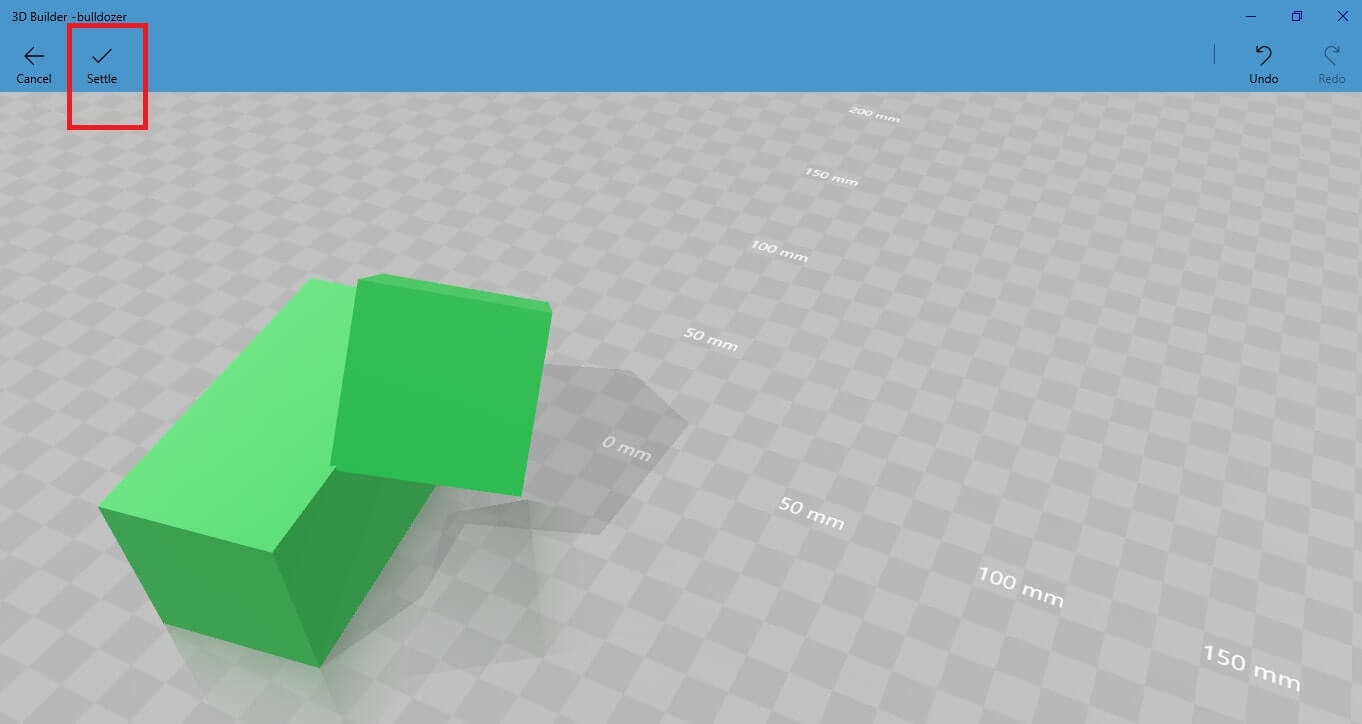 As you see, now the object stands on its whole surface, not on just an angle. This means that the objects are stable and they can stand.
However, it is possible to change the surface on which the objects are standing. Do that by left clicking on your objects and moving them around, until the objects find balance at a certain surface. For example, try to put them in this position:
Split your object
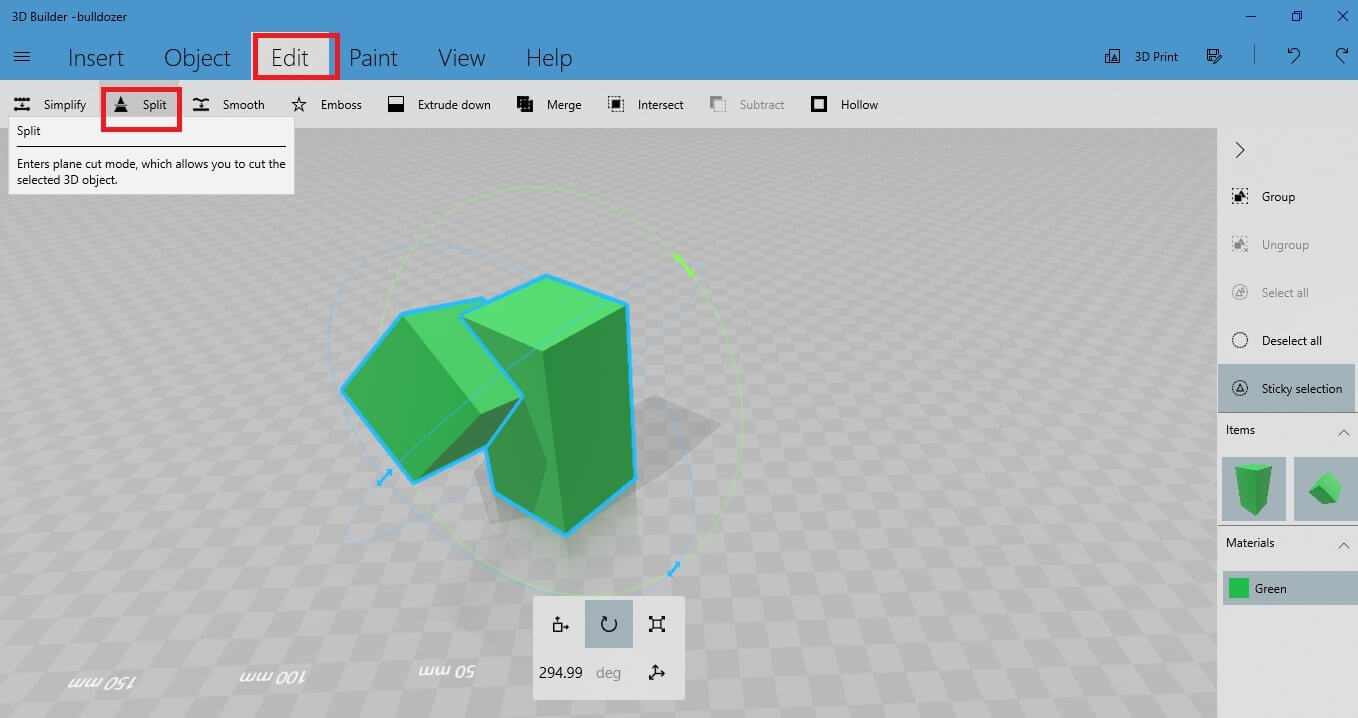 You will get this scene, where you can select among “Keep Top”, “Keep Bottom” and “Keep Both”. Let’s select “Keep Bottom”. This action keeps only the parts underneath the
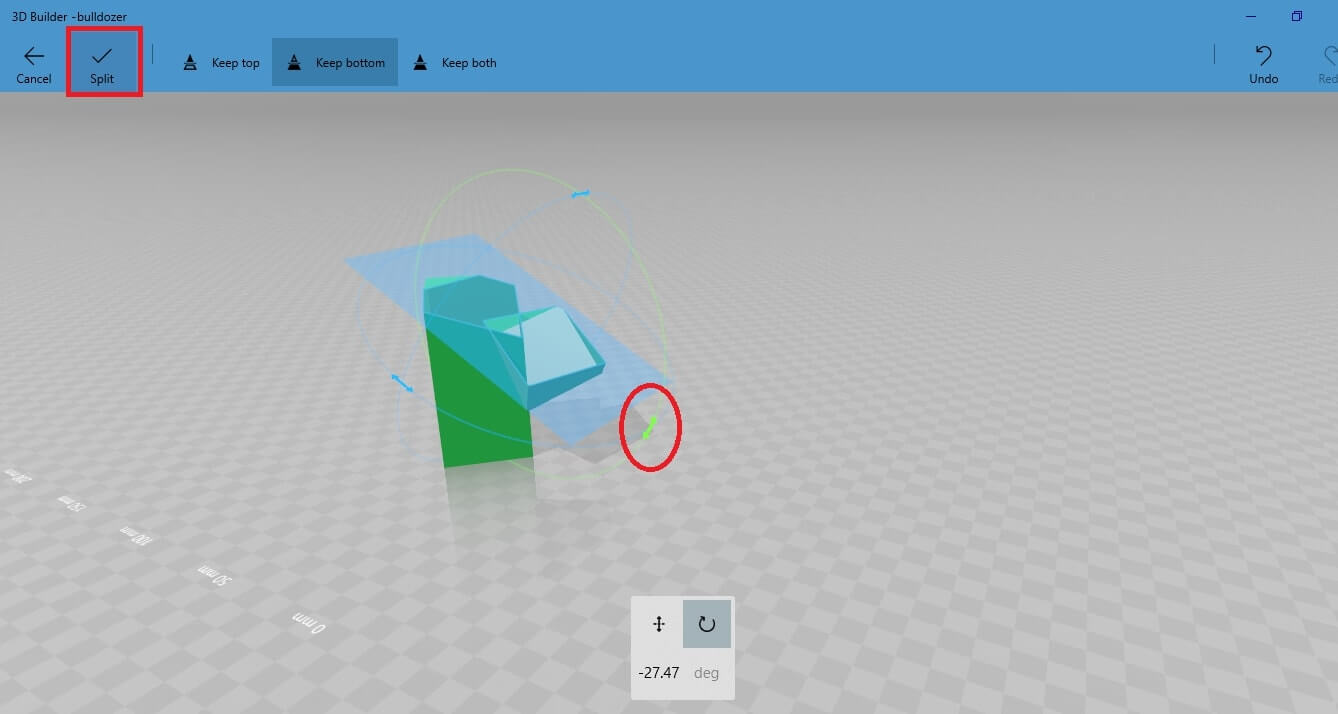
 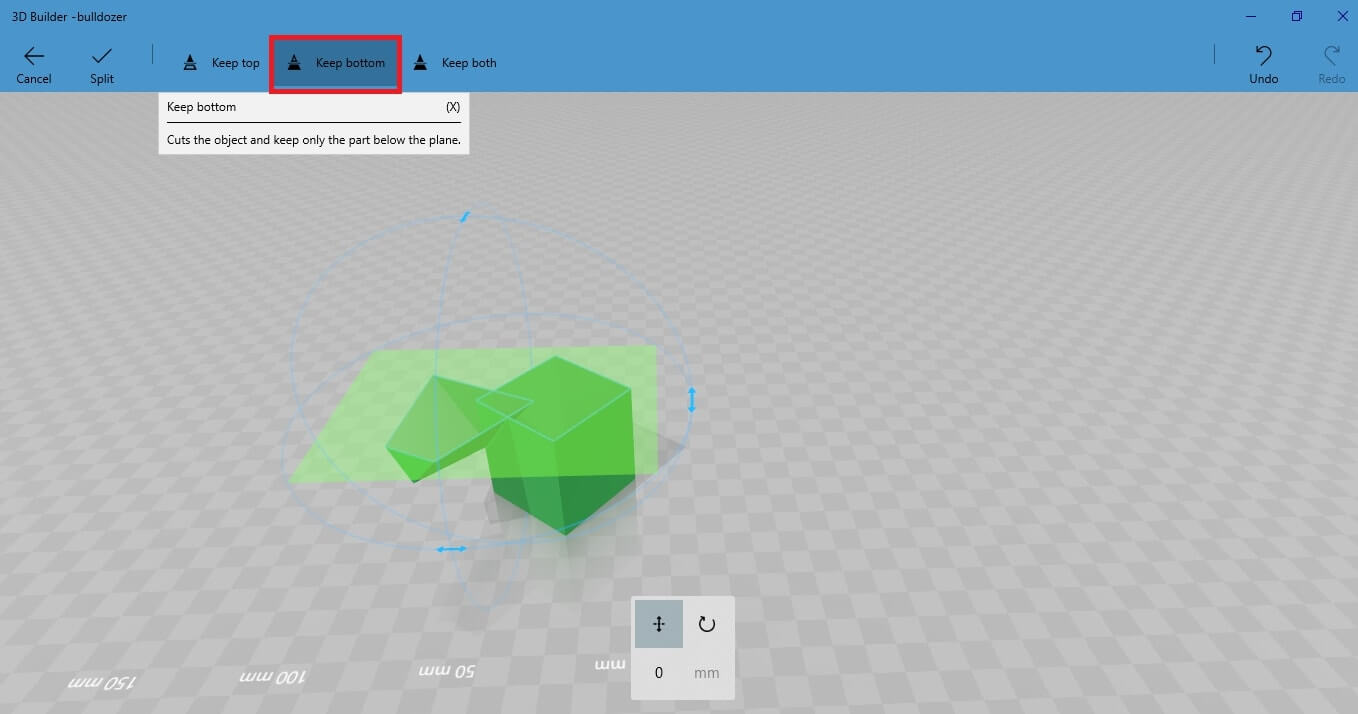 You can change the rotation or the direction of the surface. To do so, go to the table at the bottom of the screen.
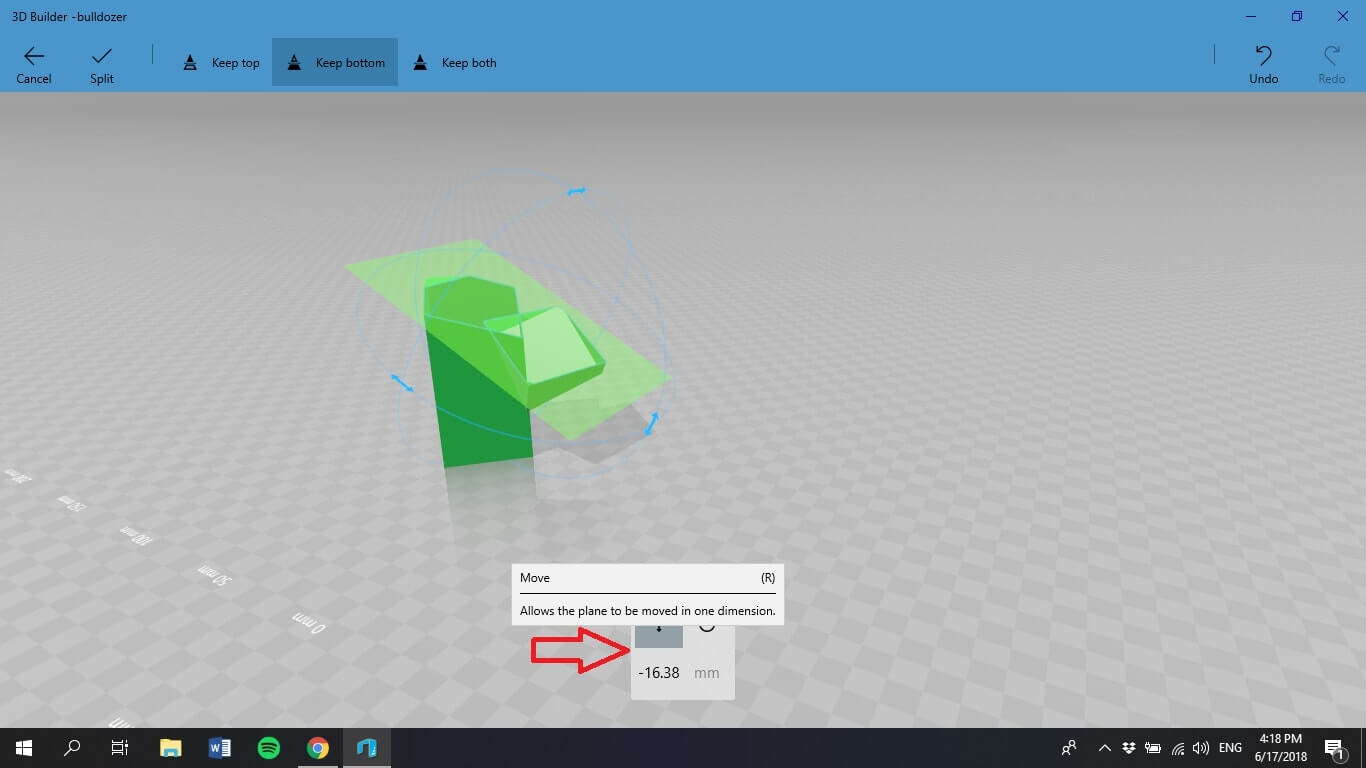 Once you are done with the adjustments of the cutting surface, validate the splitting and return to the main workspace.
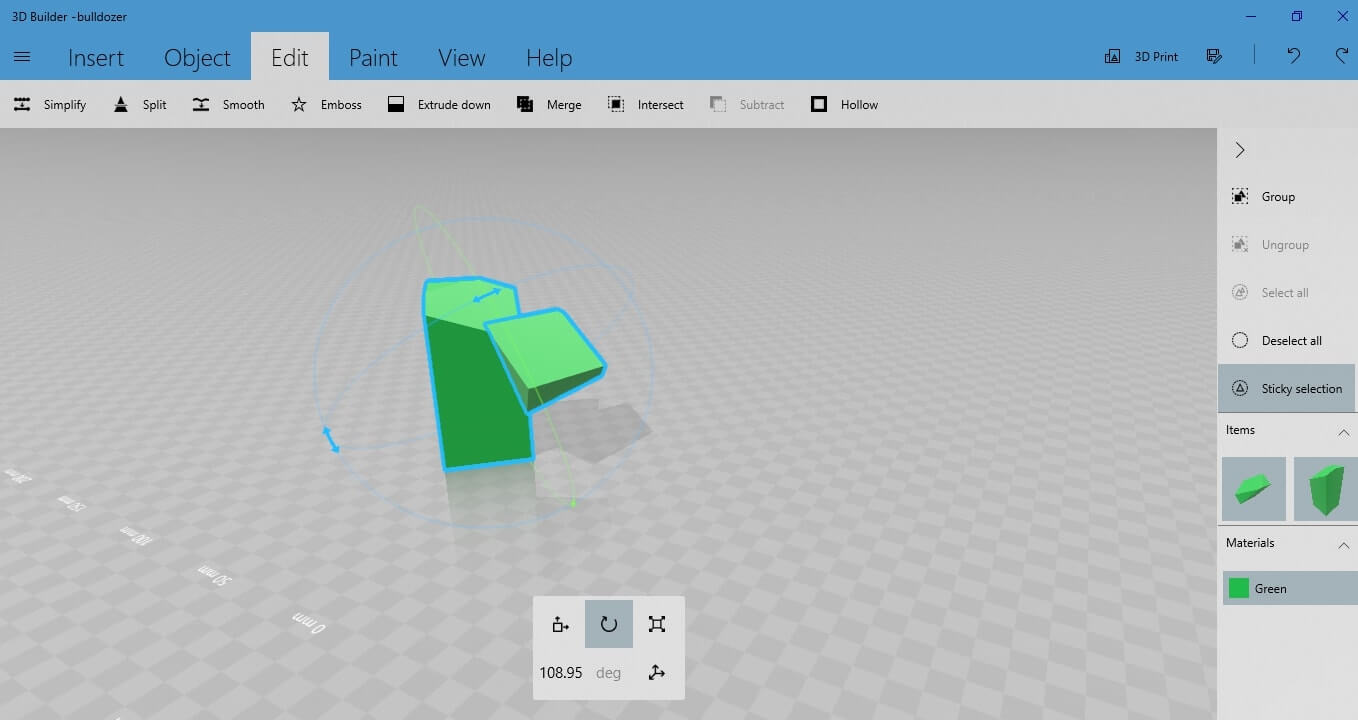
Smooth your object
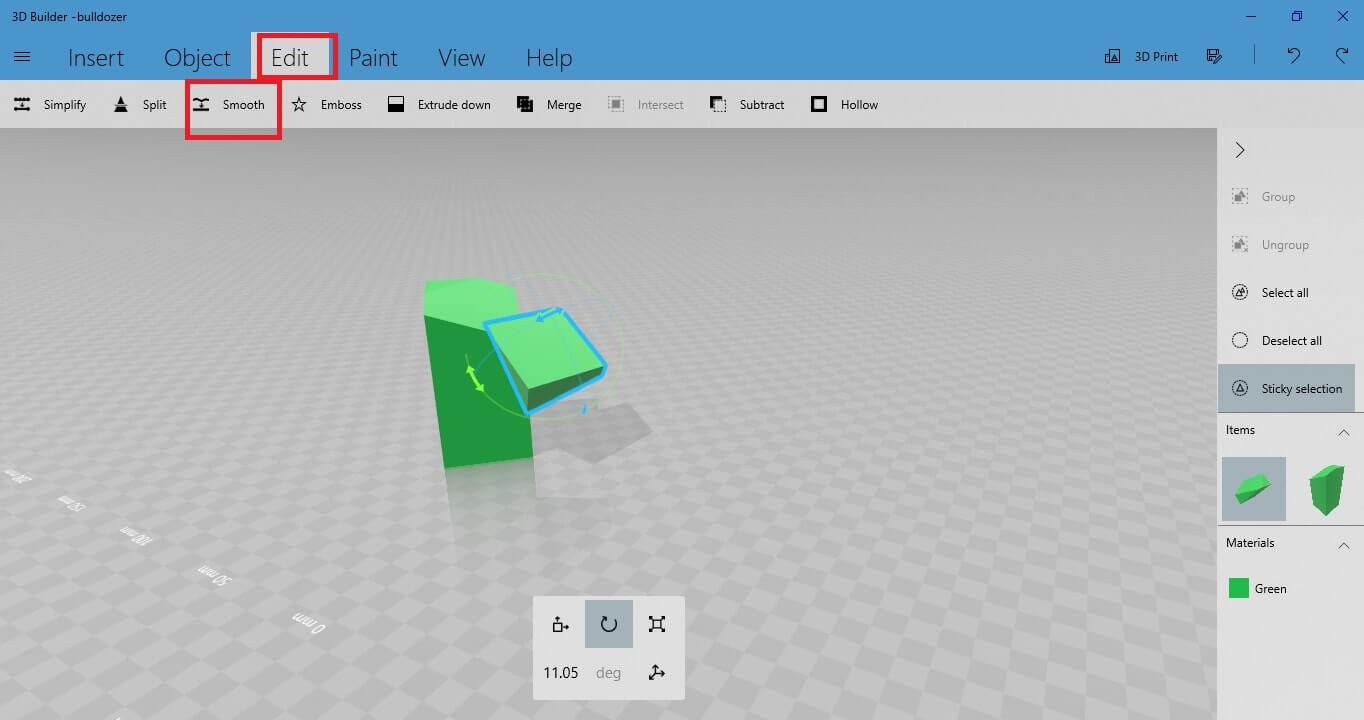
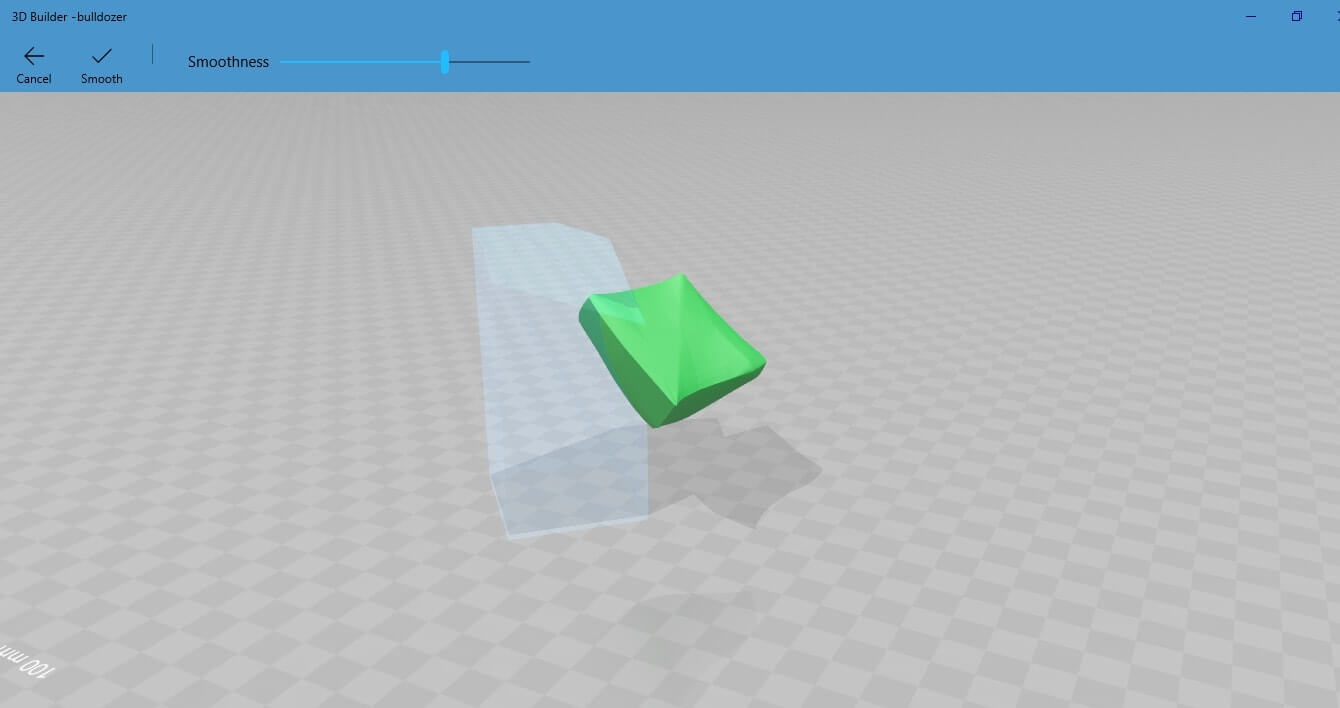
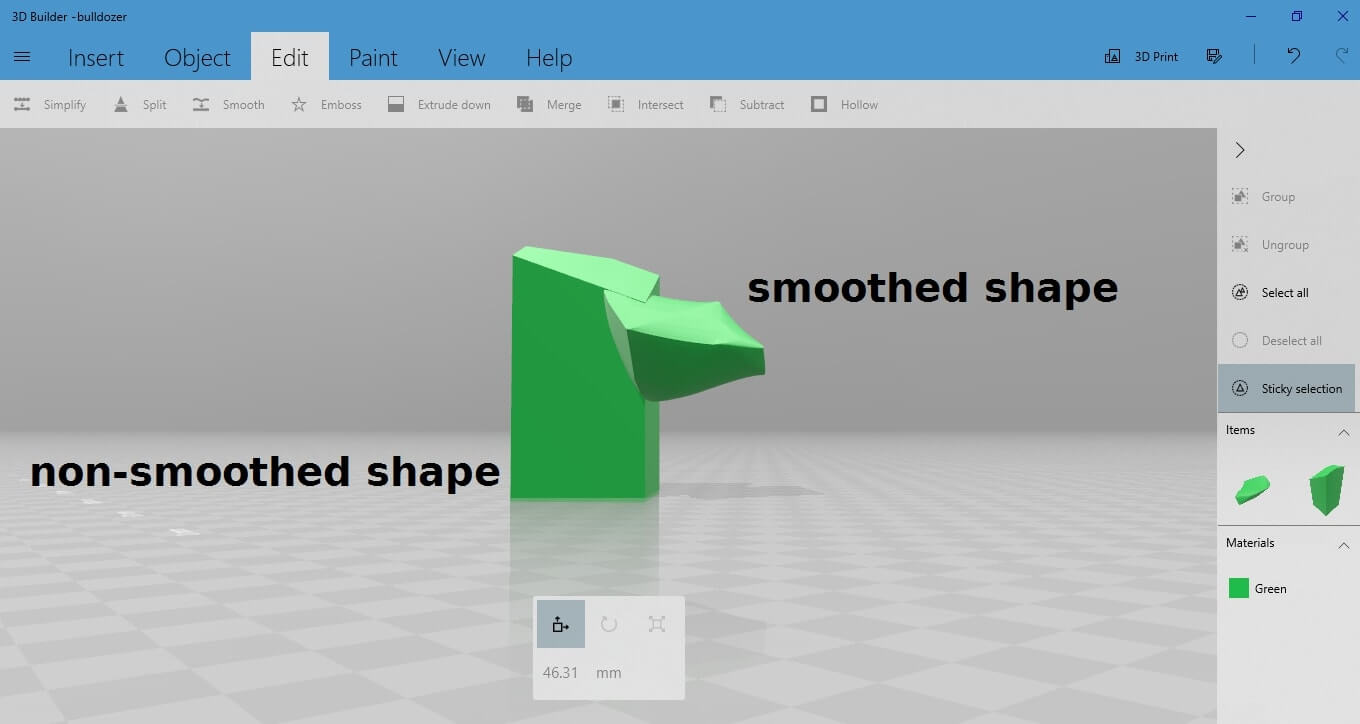
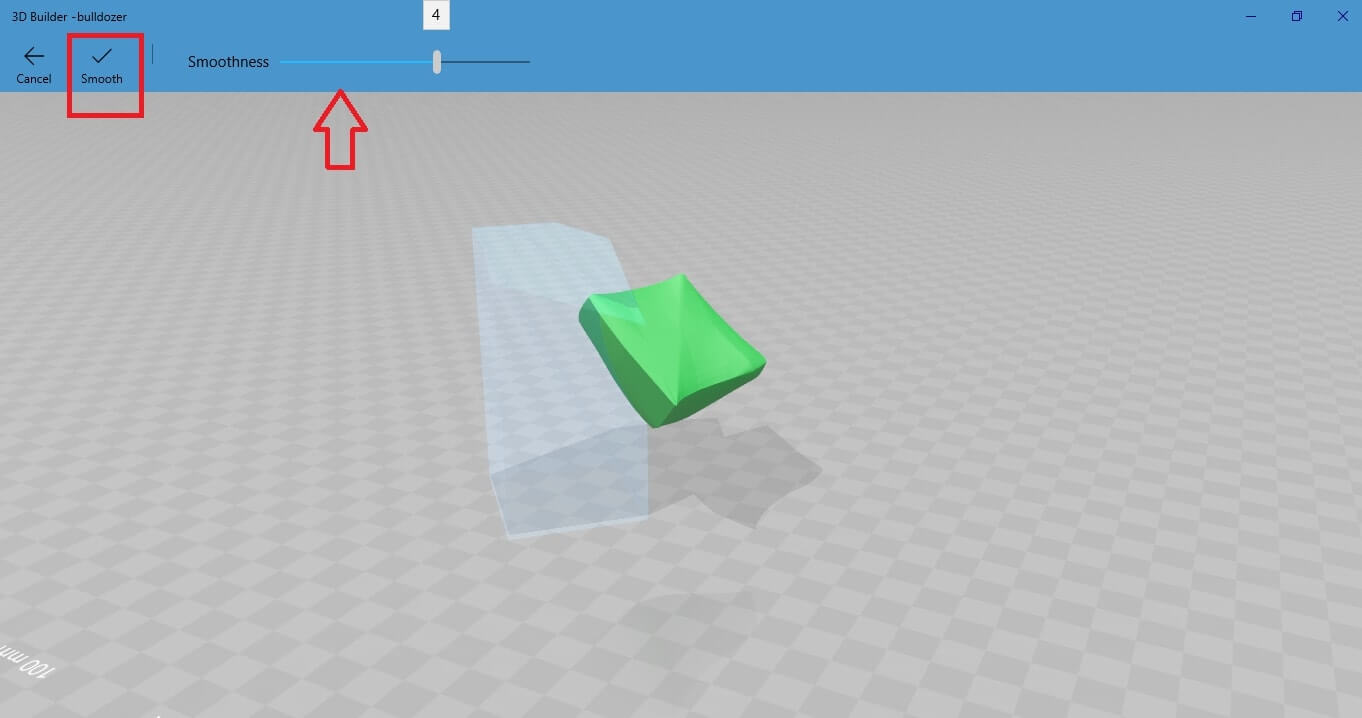 Now you see the difference between the smoothed object (on the right) and the non-smoothed object (on the left)
Add Emboss to your object
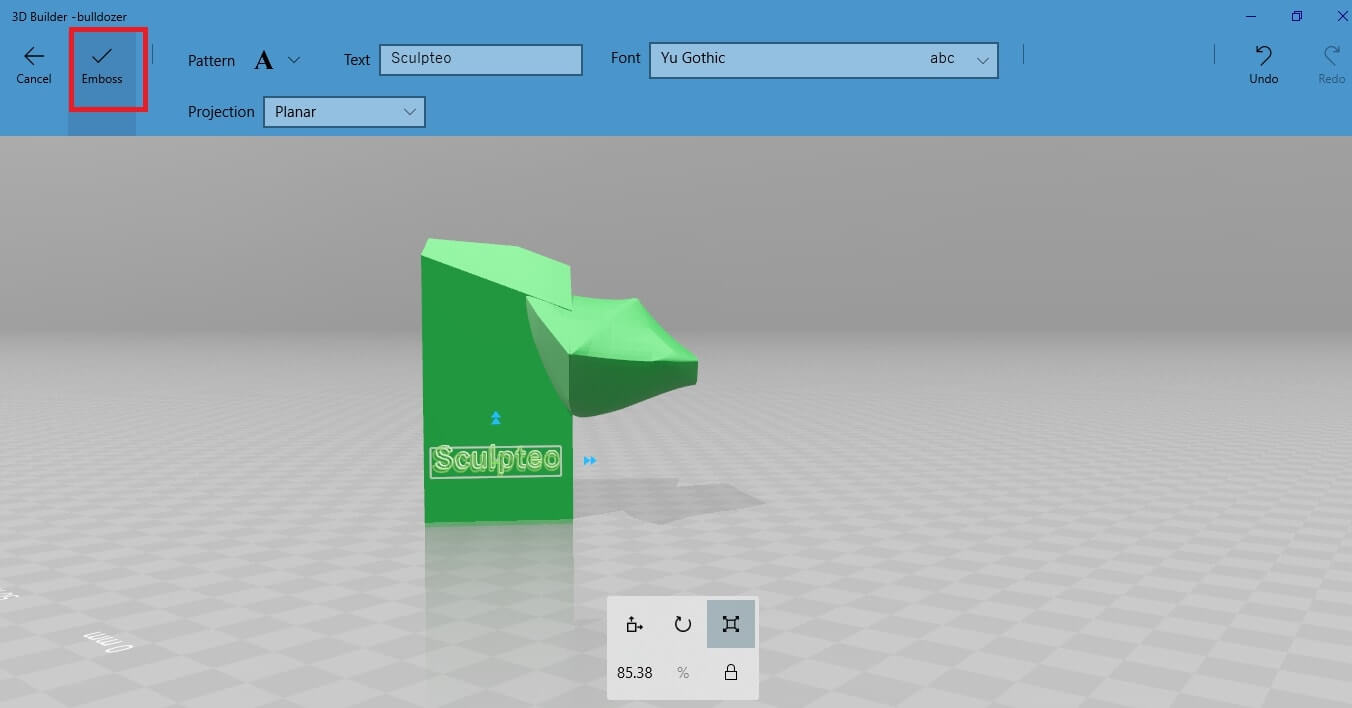
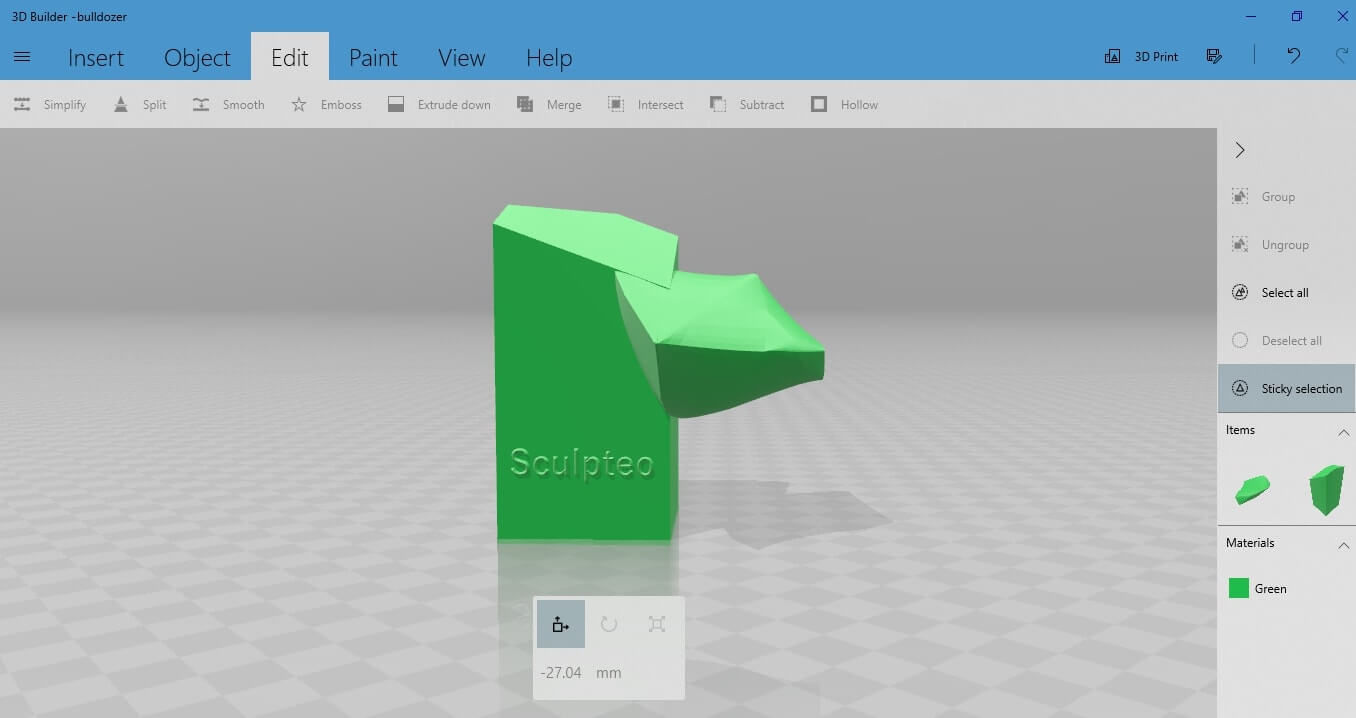
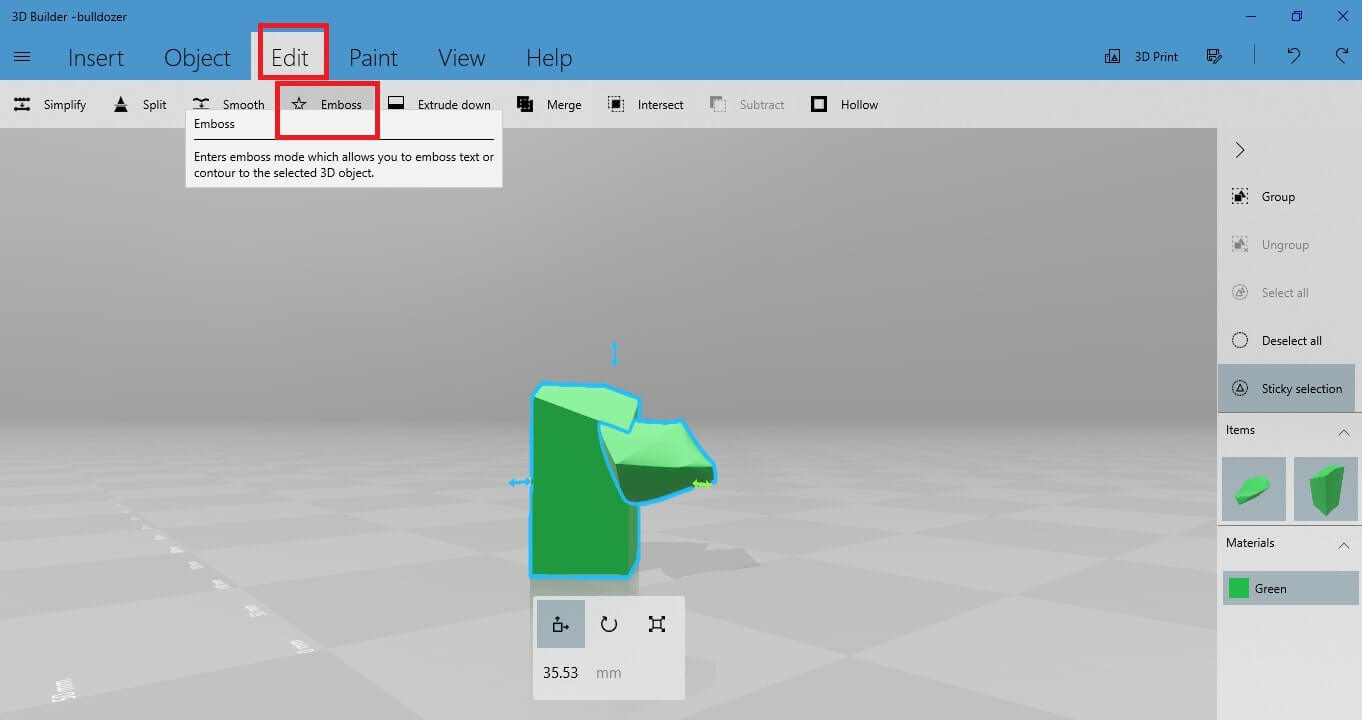 In the “Text” field type the text you want to insert. For example, let’s type the company’s name “Sculpteo”.
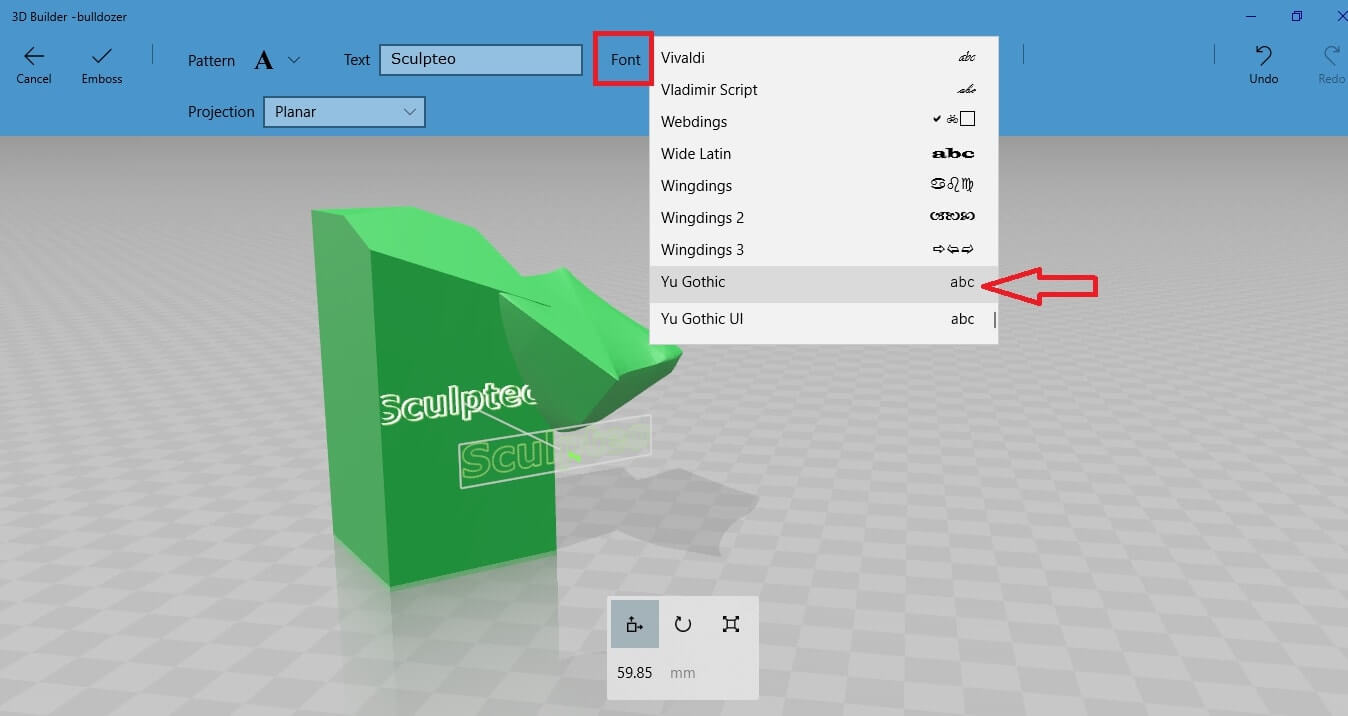
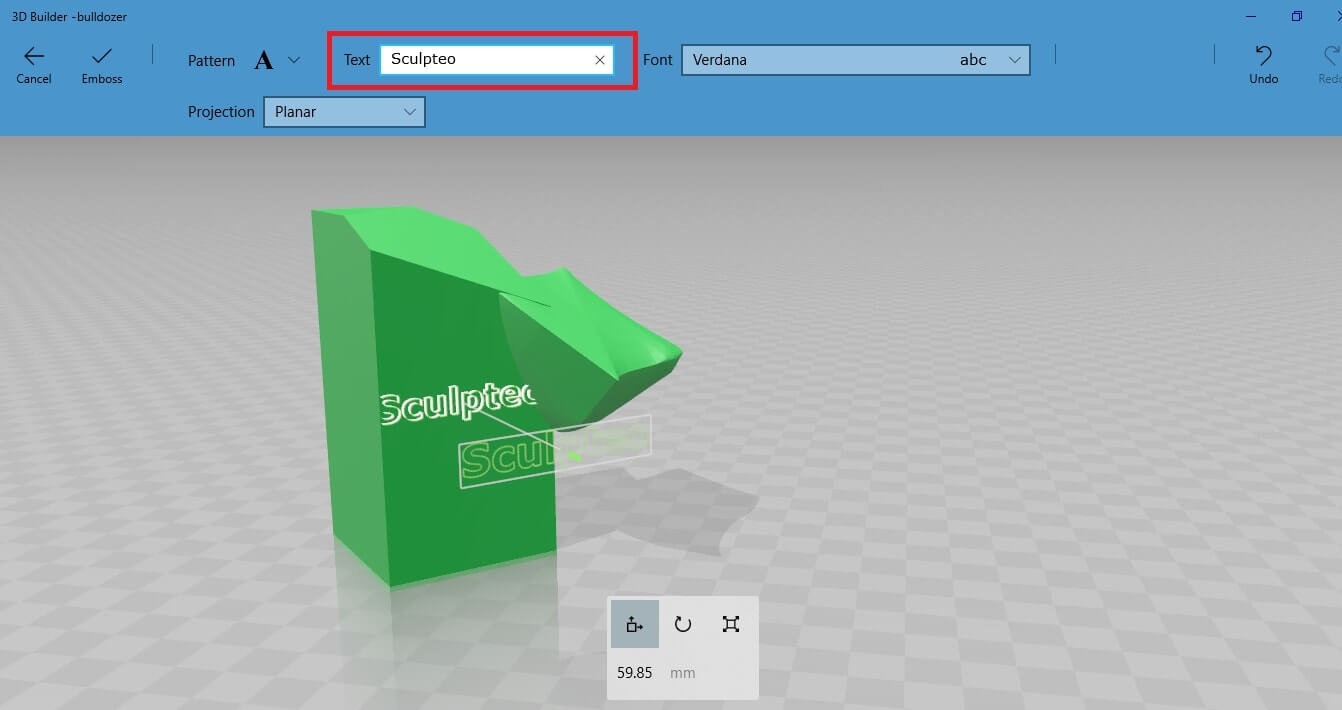 Select the font you want.
 Select the projection mode for your text. Select between Planar, Cylindrical or Spherical.
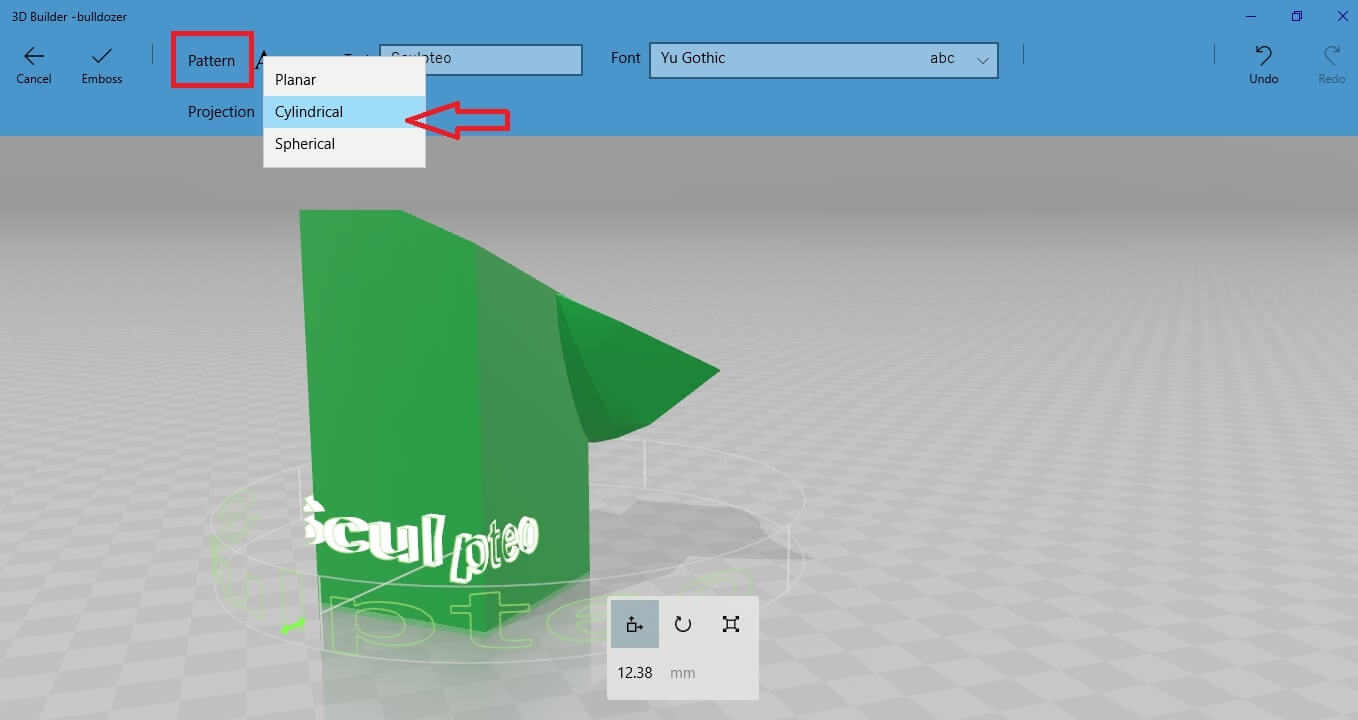 Let’s select the planar version, as it’s the simplest one for this case. Move the text around to find the location where you want to place it.
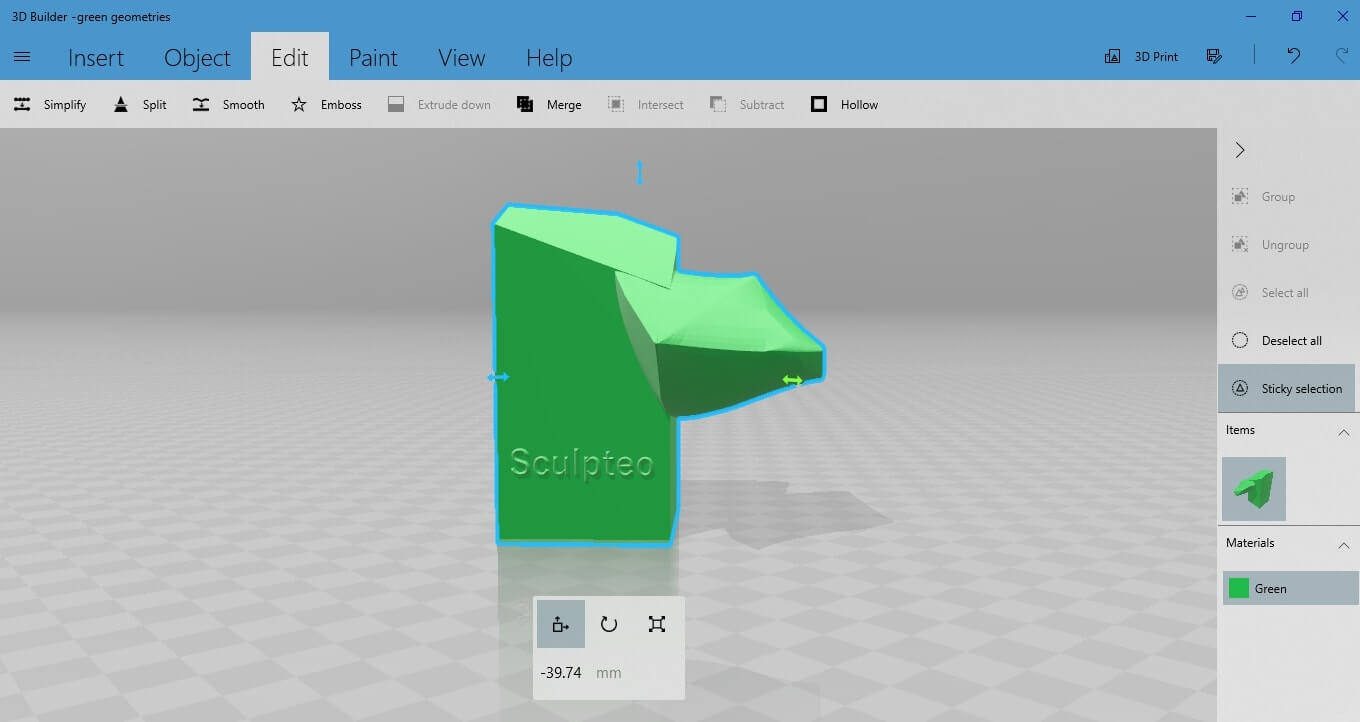
Select the “Scale” button and drag the green arrow to increase the extrusion of the text so as to make the text visible.
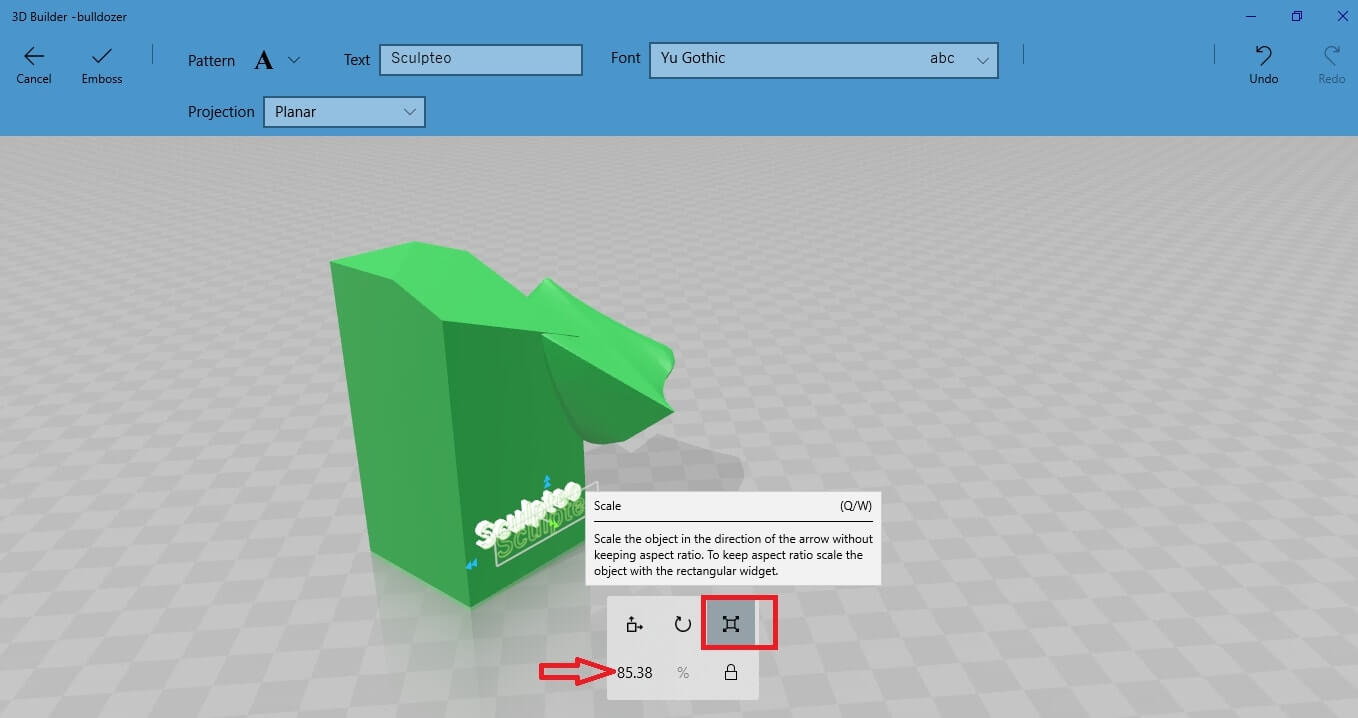
Convert a 2D image into a 3D object
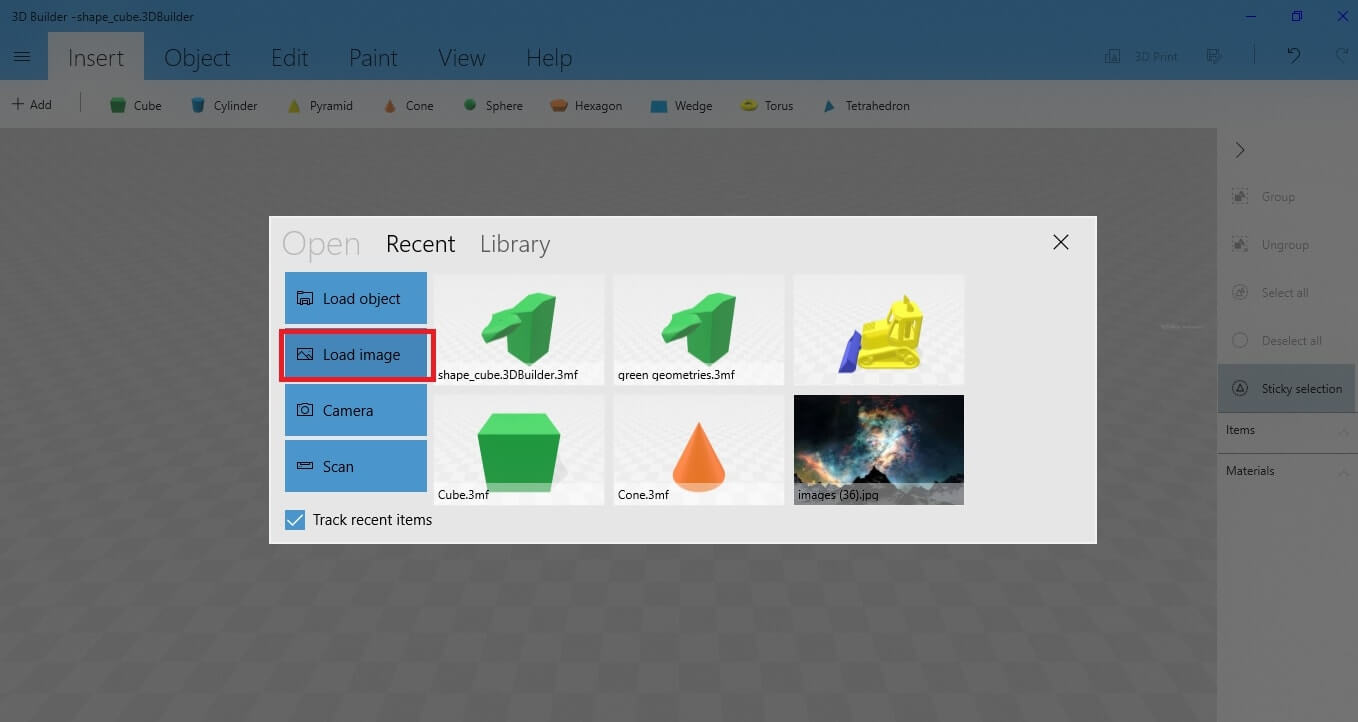
Load image
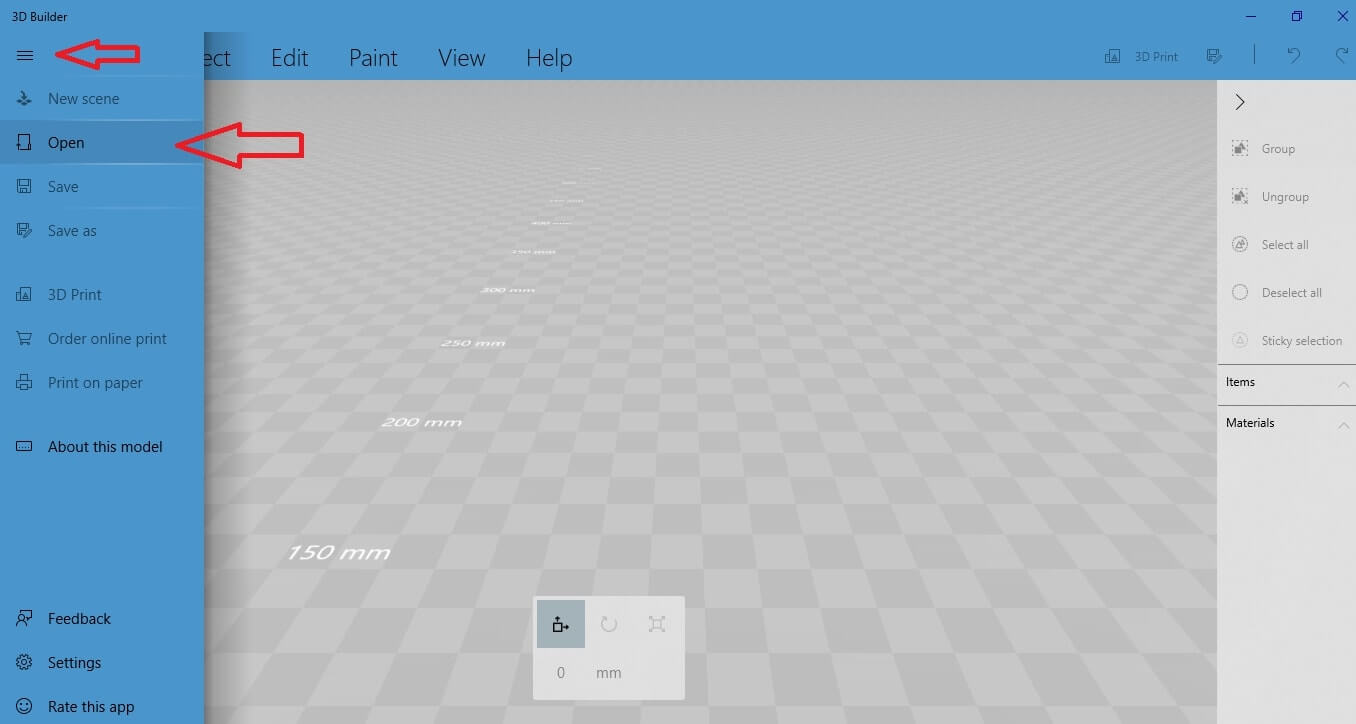
To import your image, go to the menu on the left side of the screen and select “Open”.
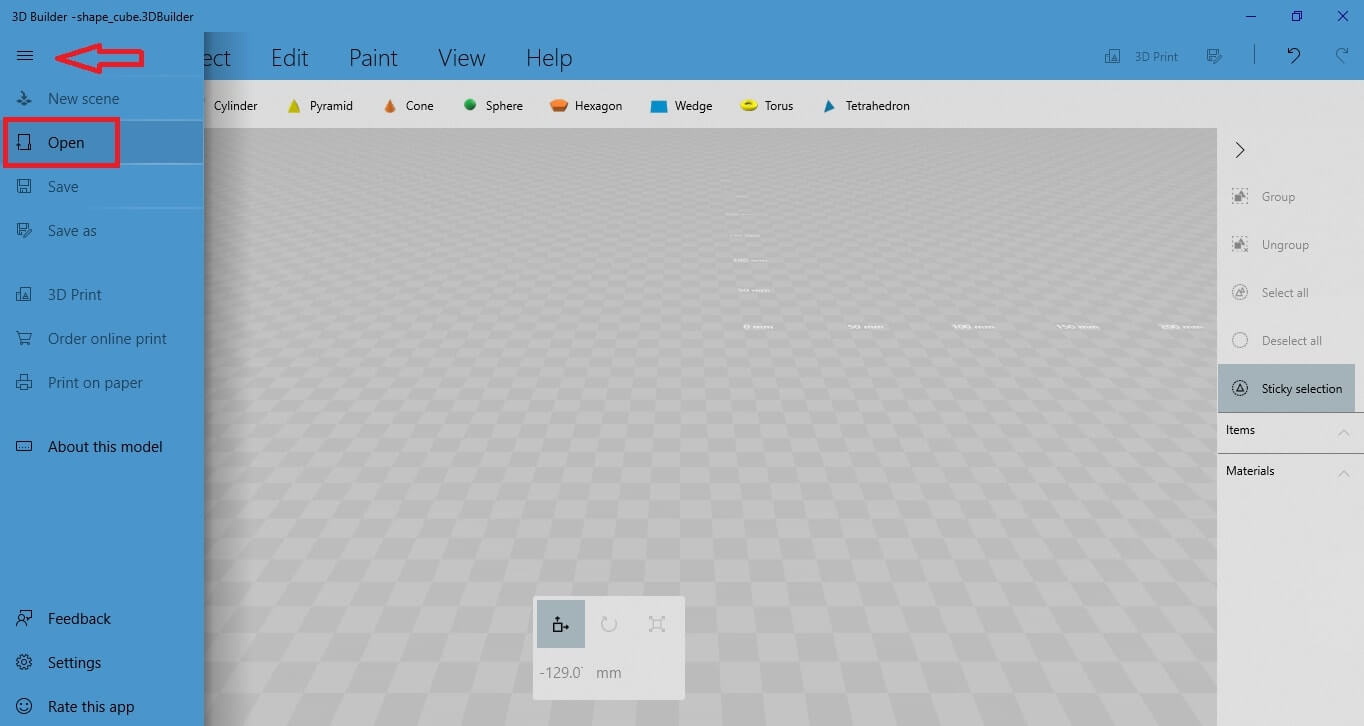
Then select “Load Image”.
Let’s use the 2D image of the Sculpteo logo for this demonstration.

Download the image of the Sculpteo logo and open this file.
Once you open the file, you will get the following result:
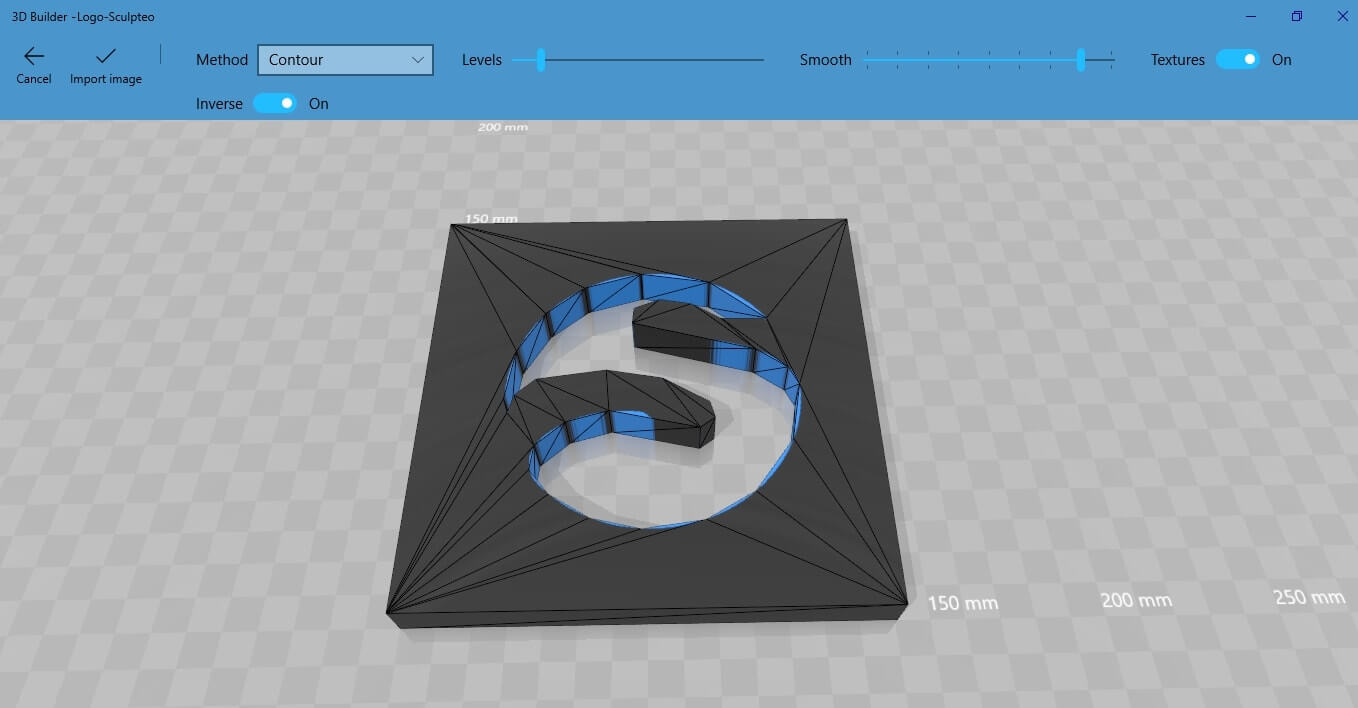
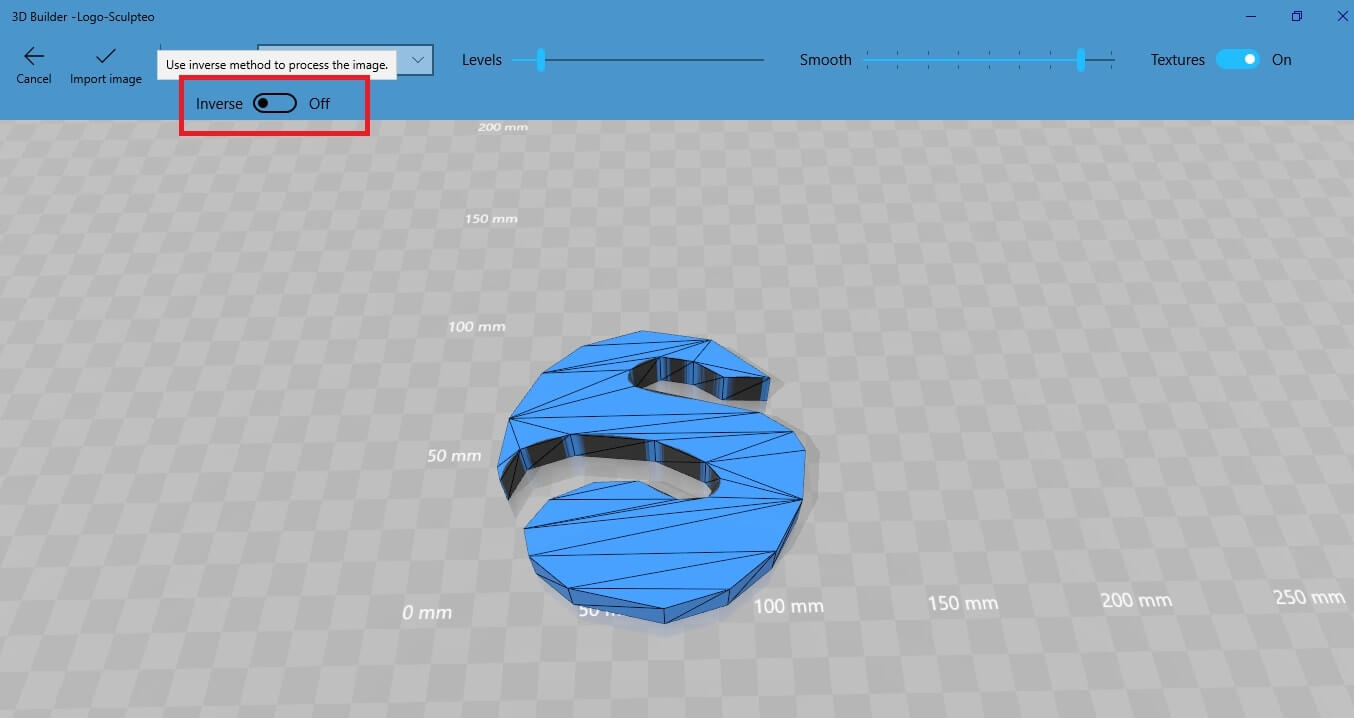
Select the inverse button to keep the inverted part of the image.
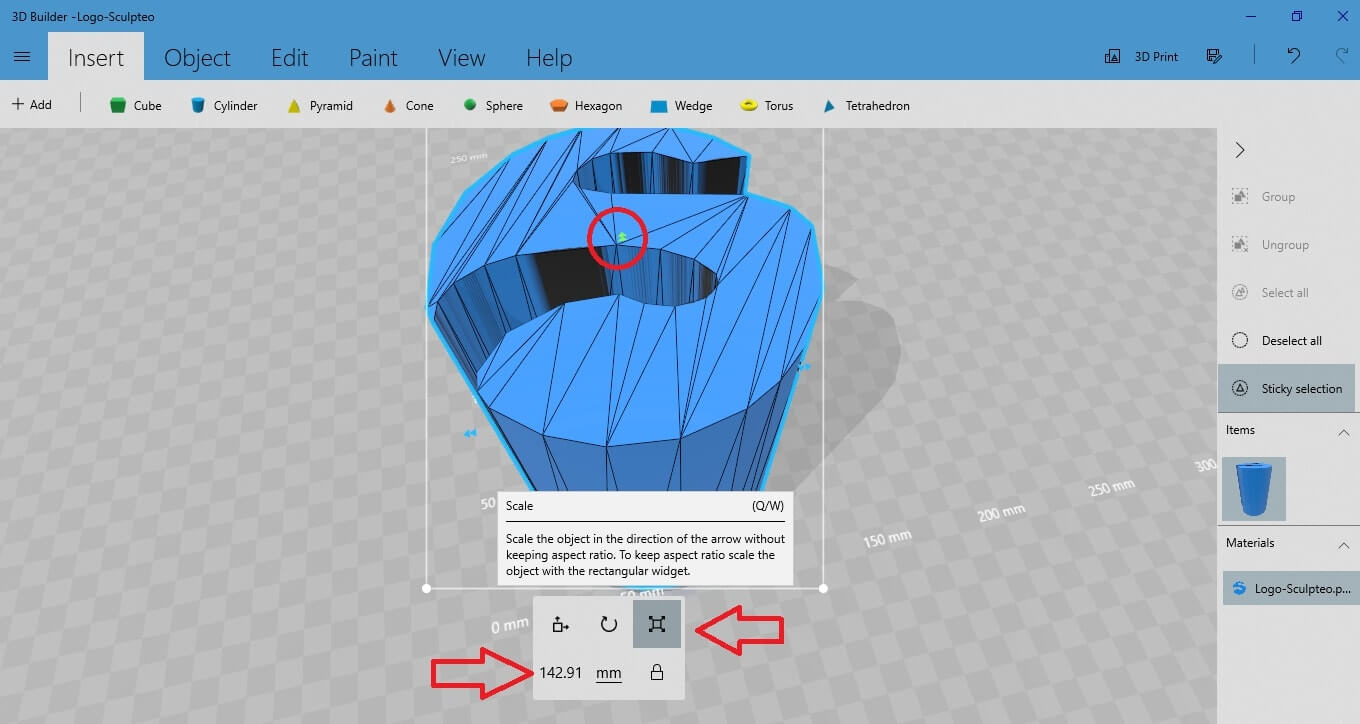
Go to the “Scale” button to adjust the height of the letter. All you have to do is drag the green arrow towards the direction you want to increase or decrease its extrusion value.
Validate the “Import Image” action and you will get this result:
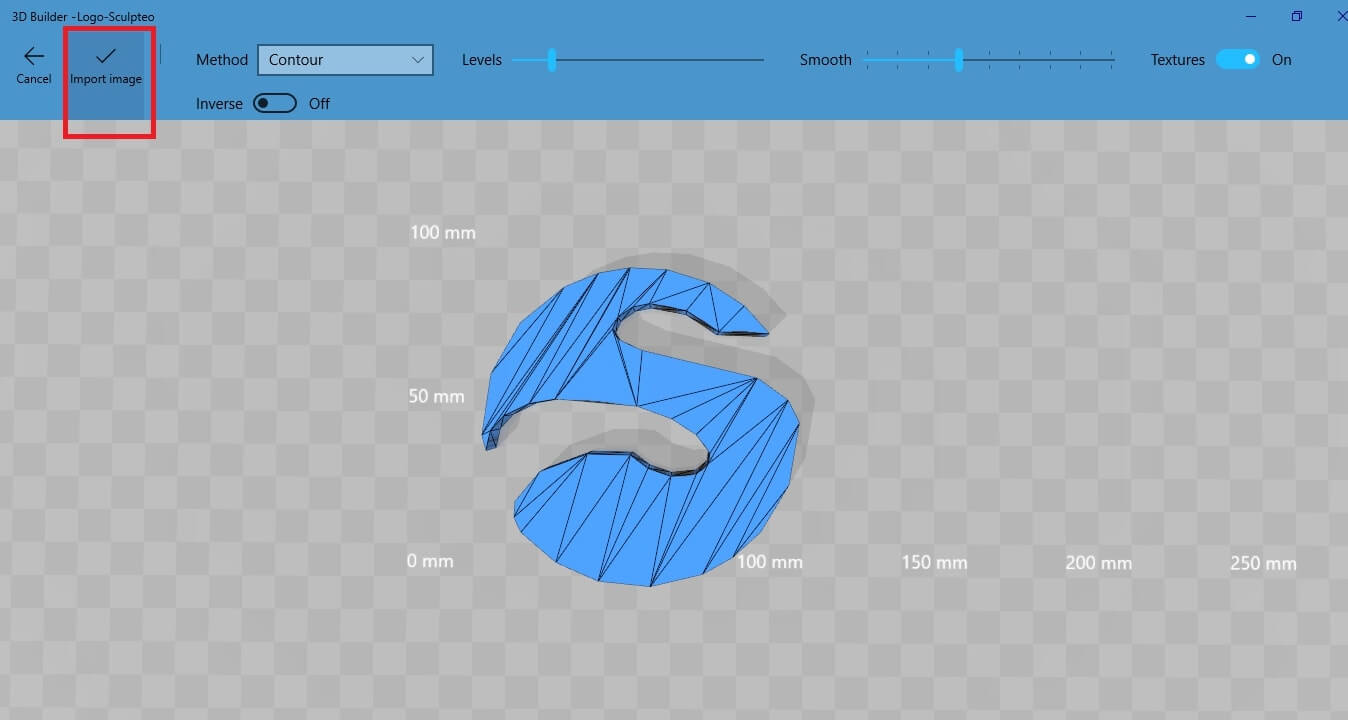
This is how
Now you can further modify this 3D object using all the tools for editing that are explained in the previous paragraphs (rescaling, duplicating, splitting, smoothing, embossing etc.).
The camera feature
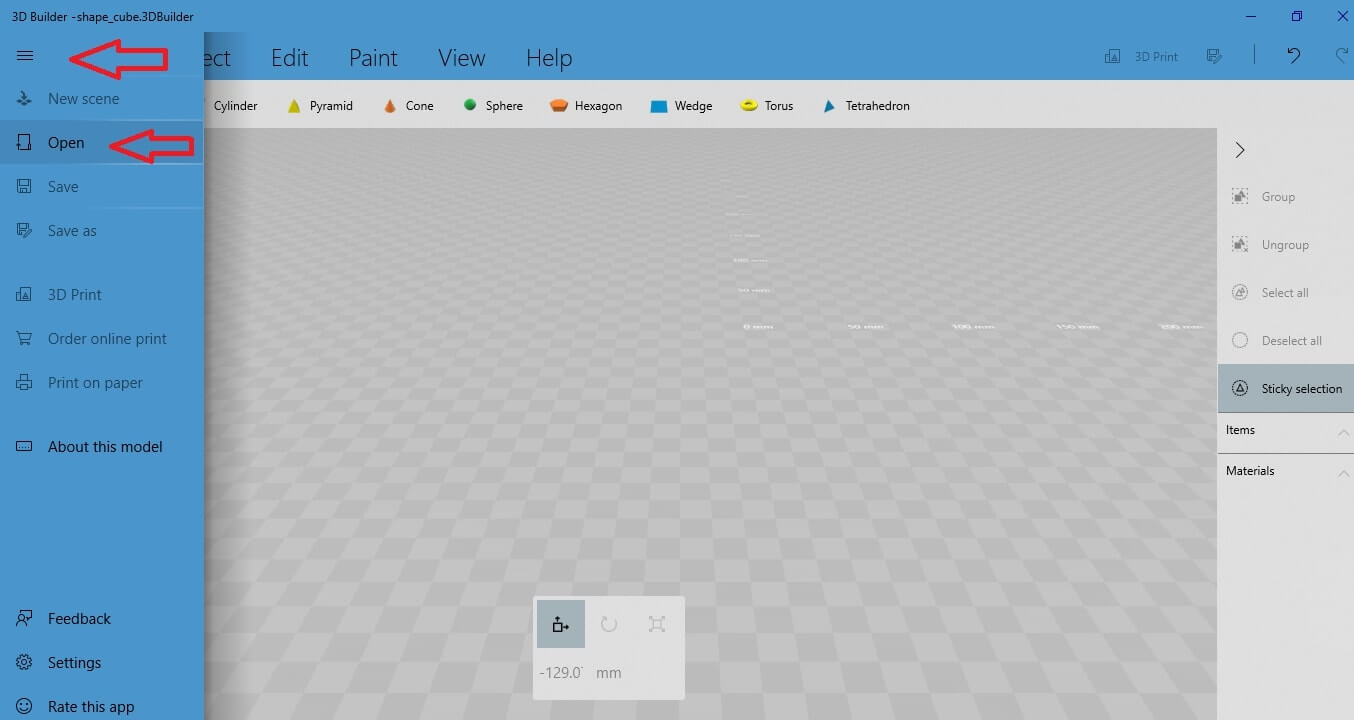 You will see the option “Camera”.
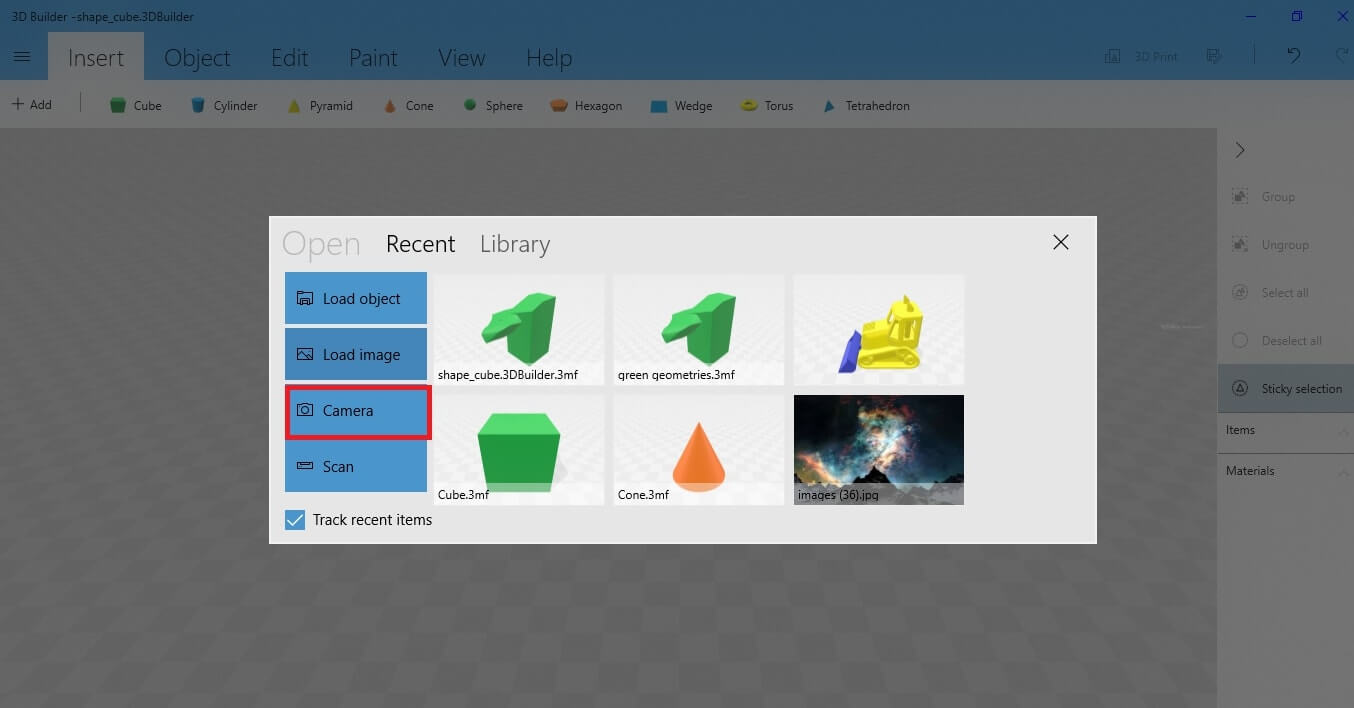 The “Camera” option works as the “Load image” option. You can take a photo with the camera of your computer and then turn it into a 3D object, exactly as you would do with the “Load image” function. If you want to create a customized 3D object out of a 2D image this is the tool for you.
 Scan option
Go again to the left side menu and select “Open”.

Let’s say for example that you want to edit the width of the cube. Select the scale button. Click on the arrow that corresponds to the dimension of the cube you want to edit. Drag the arrow towards the direction you want, to increase or decrease the width of the object.
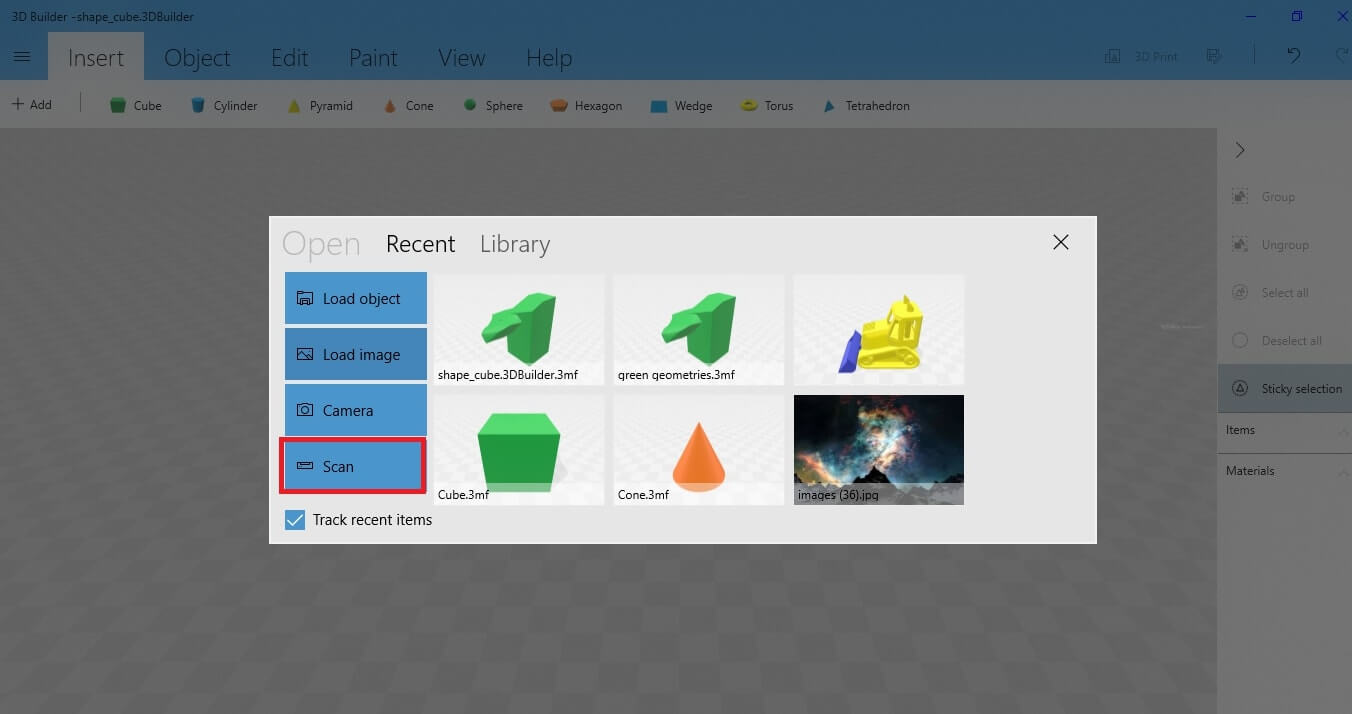
The “Scan” option gives you the possibility to scan an existing object and modify it using the 3D builder software. This is an excellent choice if you want to 3D print
Prepare your 3D object for 3D printing
Merge your 3D objects
Let’s go back to the example we used in the paragraphs 1.1 to 1.9. There are two separate 3D shapes: a big vertical box and a smaller shape. These objects, it is possible to edit them as a whole or individually. You can choose how to do it simply by selecting them one by one or both of them at the same time.
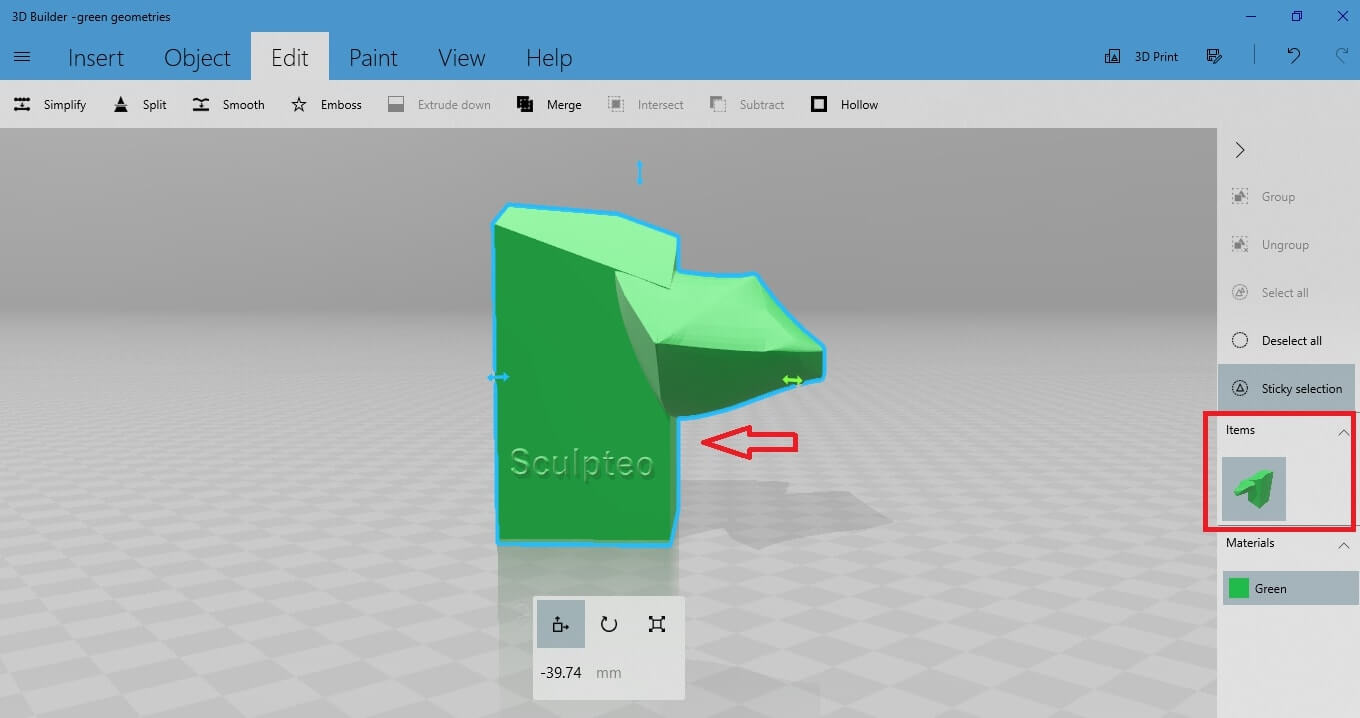
In the current photo, there are two different objects because there are two separate windows, one for each object in the right menu.
However, if you want to 3D print your object, you should merge the two different shapes into one. This is something useful to do, as some 3D printing technologies do not accept files with multiple objects.
To do so, go to the “Merge” button. Select the “Merge” option that is under the “Edit” button from the upper menu.
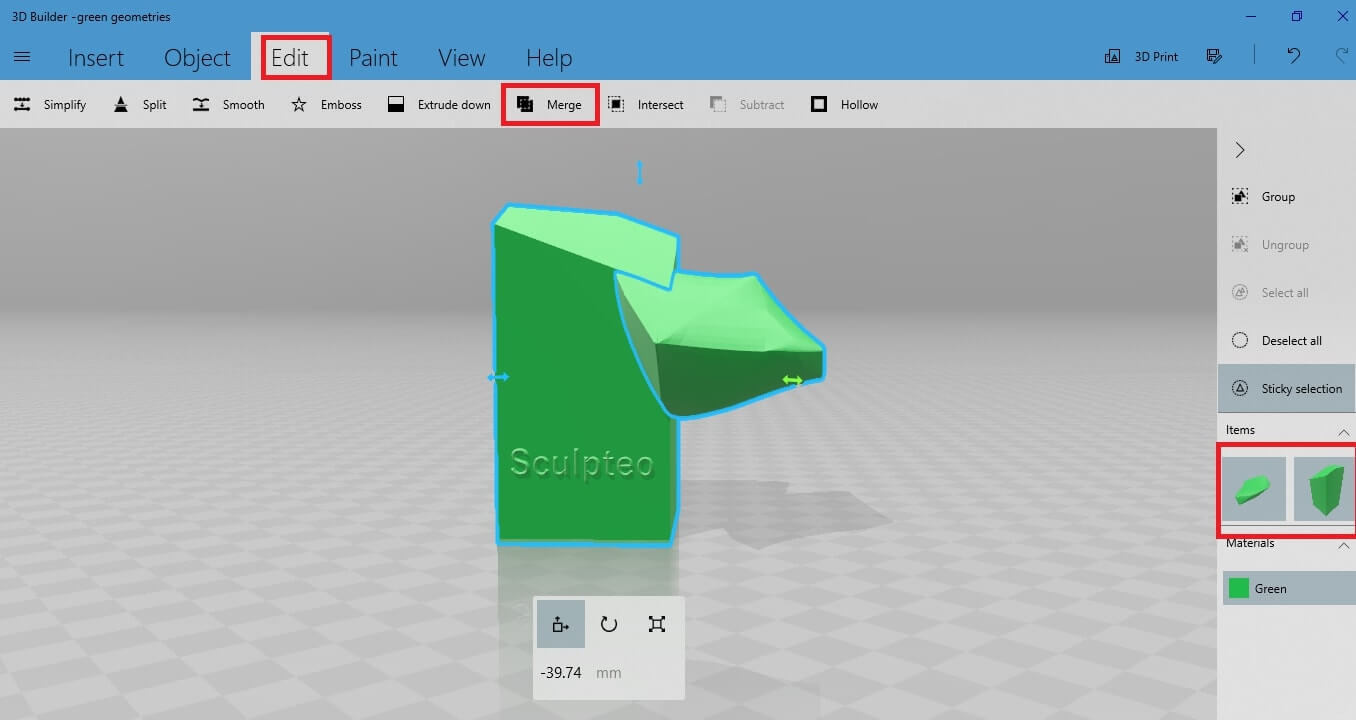
Now both objects are merged. You understand that now there is only one single object in the workspace, because of the single window on the right side of the menu. Also, notice that the blue stroke around the object has changed and it is unified to include both 3D objects.
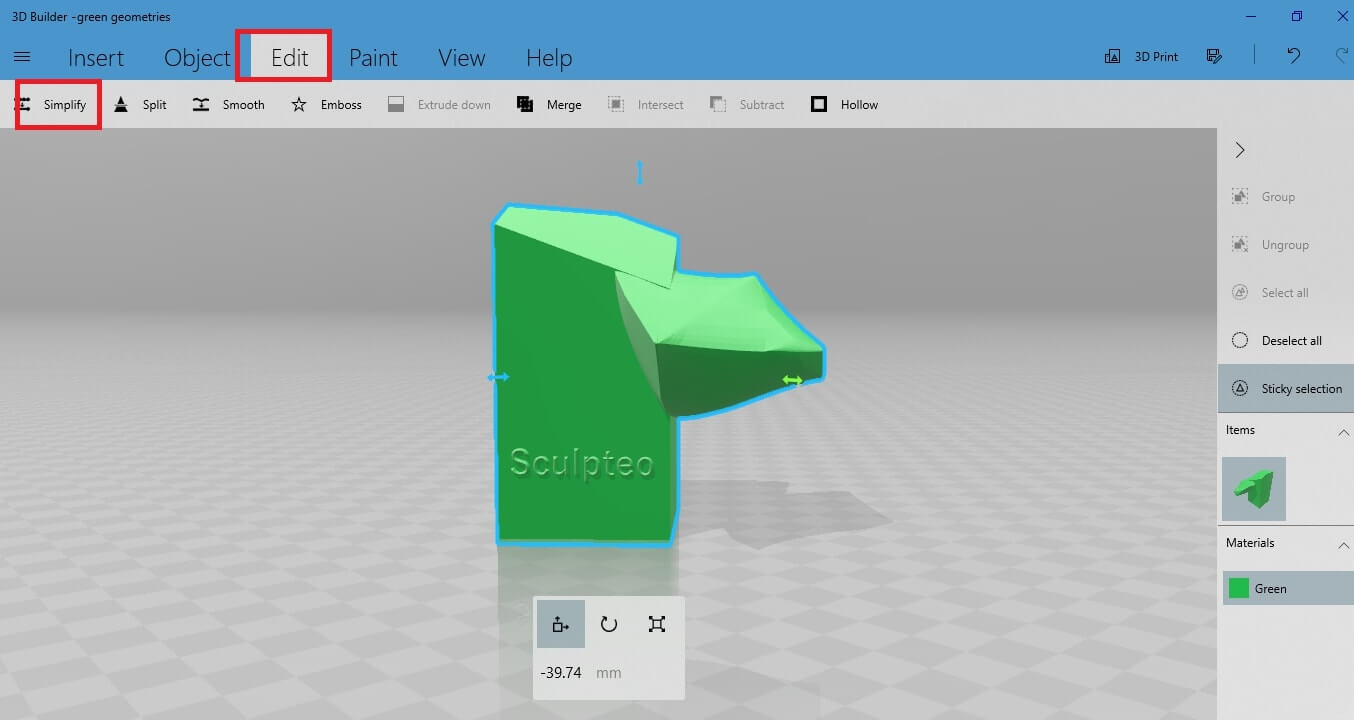
Simplify feature
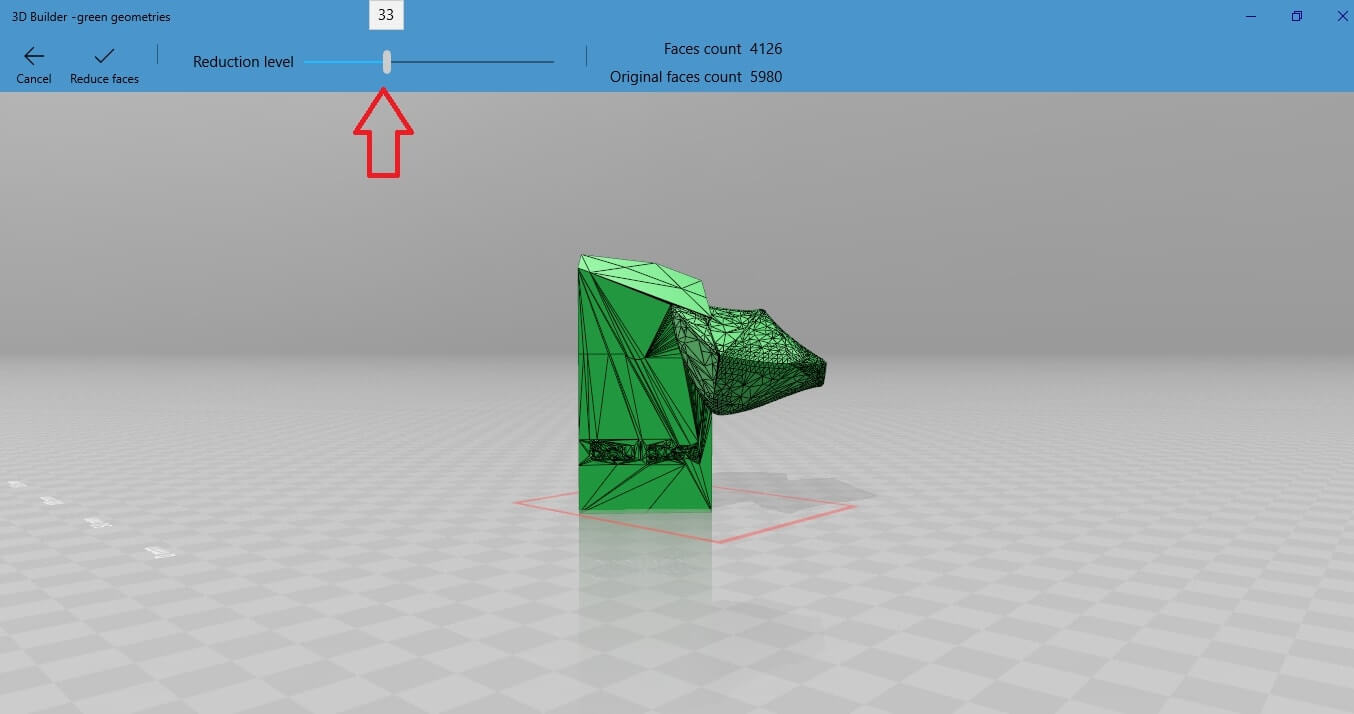
 Once the simplification is activated, you see the number of original faces. You should set a number of faces lower than the number of original faces. To do so, drag the Faces count bar to give the value of polygons you want.
 Let’s say for example you want your polygon mesh to be 4604 instead of 5990 that was the original.
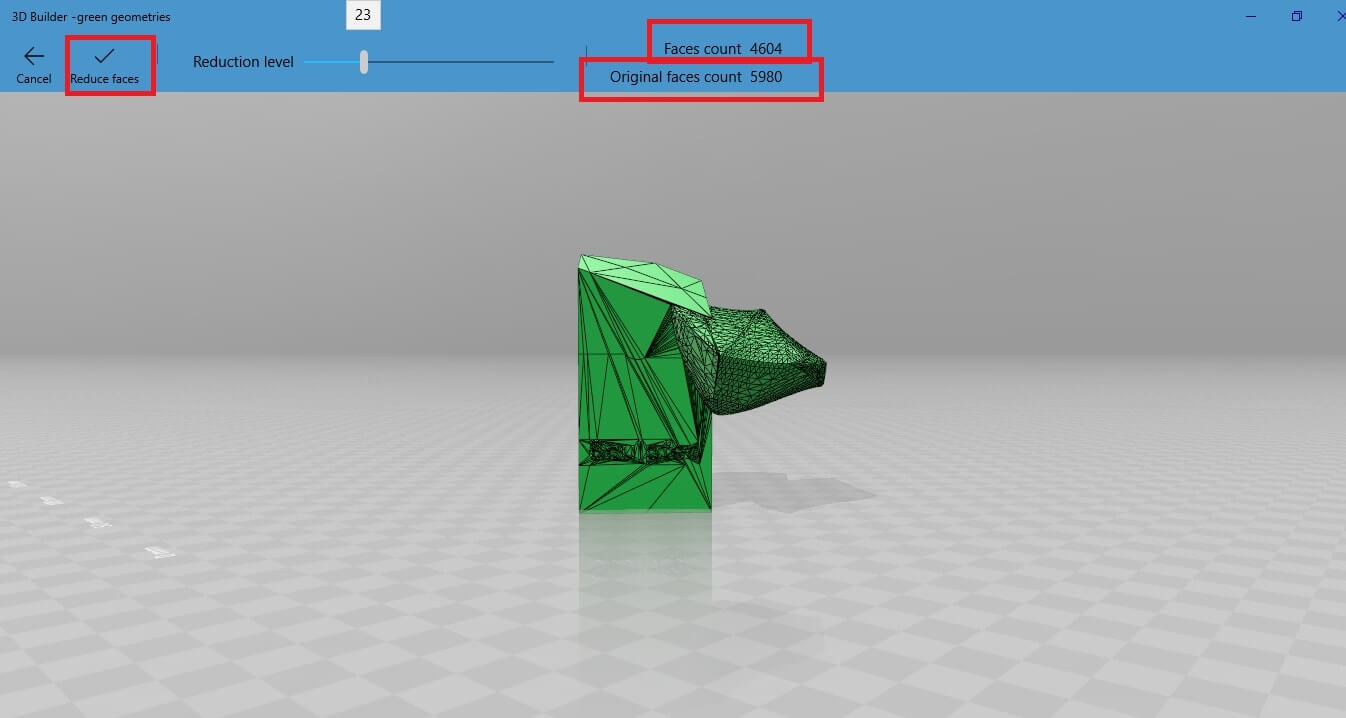
 Validate the action and return to the main workspace.
Now the mesh of your 3D model is significantly lower.
Simulate the result of your 3D print
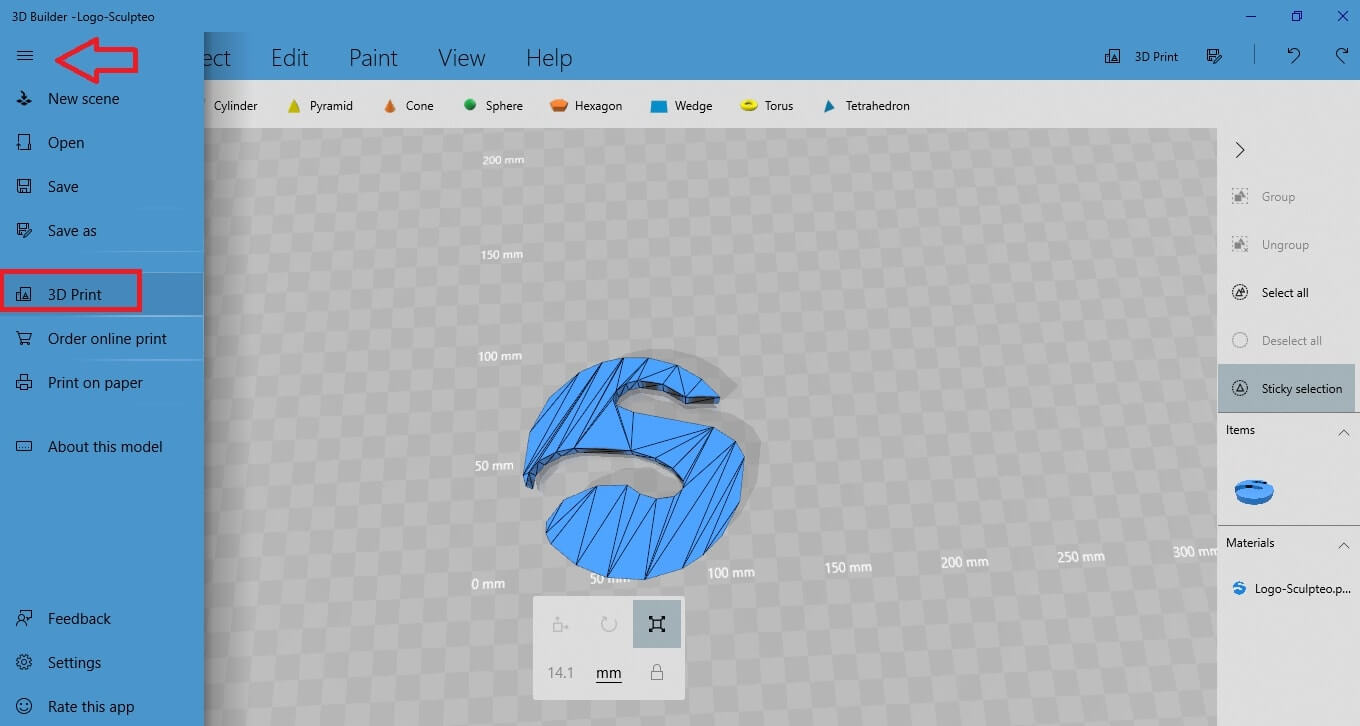 You will get this window:
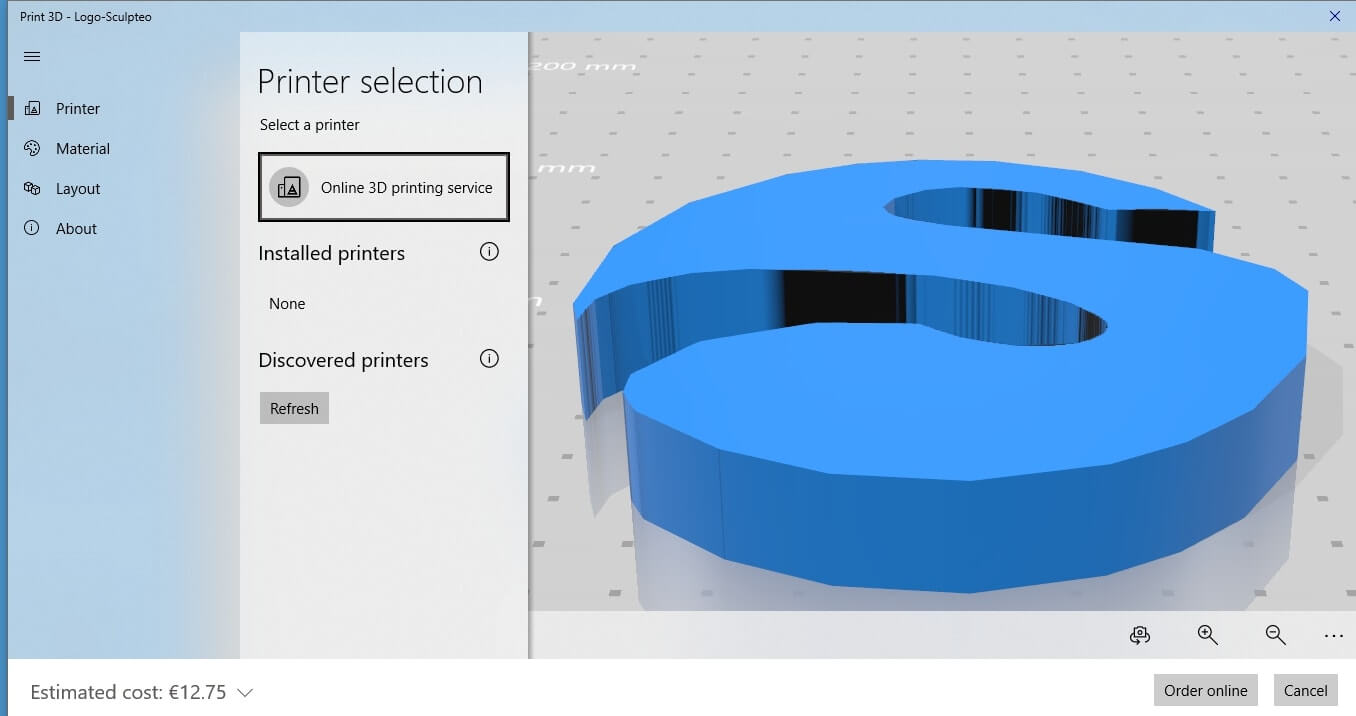 Select the “Material” button. You will get various options for the 3D printing technology and color to choose for your print.
 Once you choose technology, material and finish option, you can see that the estimated cost for your 3D print changes dynamically in the lower left corner of your screen. This way you can get an idea of the cost of your 3D model that depends on many factors: 3D printing technology, material, finish, size etc..
 This is an excellent simulation tool to preview your 3D model with different textures and colors before sending your 3D object to the printers.
 Save your file for 3D printing
 There, the suggested format to save your file for 3D printing is
  Select which one you want and save your file.
Now you are ready to upload your 3D file to our online 3D printing service and send it to our printers! We will 3D print it for you and send it you the soonest possible!

 Connect with Google
 Connect with Facebook