 Connect with Google
 Connect with Facebook
Tutorial: How to Fold Sheets of Metal in Steel and Aluminium Easily
Posted By Hannah Bensoussan on Mar 15, 2017 | 0 comments
We recently released our new metals for laser cutting: stainless steel, raw steel and aluminium. This service, directly available online, is a great tool to create mechanical parts, directly from your 2D file. But what if you want to create 3D objects with our laser cut metals? Well, you can! You just need to fold the laser cut metal sheets. And with the right design, it’s possible to do this by hand, without the need to invest in expensive, specific tooling or machines.
Folding metal without tools
Today, we give you a tutorial on how to fold laser cut metal sheets without machines or tooling. Two of our designers, Piotr and Alexandre, tested several types of patterns on our raw steel and aluminium (they assumed stainless steel would act in a similar way as raw steel when folded, and since raw steel is less expensive, it fitted better for tests). They tried folding metal sheets of 1, 2 and 3 mm thickness, with 4 different patterns designs, that respectively remove 50, 60, 70 or 80% of the material on the folding line. These folding lines enable to fold more easily and precisely.
For each material, each thickness and each design, they compare:
- the ease of folding and whether folding is indeed possible without any tool
- the aesthetic aspect of the part
- whether the folding process deformed (in an unwanted way) or tore the material
- the shape and angle the folding line takes.
We did the test on the small metal parts that you can see below. If you want to do your own tests, all you have to do is upload your own 2D file in a few clicks!
Design guidelines to keep in mind for the pattern of your folding line
Adapting the pattern to the metal’s thickness
There is one rule you always need to keep in mind when designing for metal laser cutting, which are especially relevant in our case (folding laser cut metal): you can never make holes that are smaller than the sheet’s thickness, and the distance between the holes also needs to be equal to or bigger than the sheet’s thickness.
When keeping that in mind, it becomes obvious that the pattern of your folding line will need to be adapted to the thickness of laser cut metal that you choose (the holes will be at least 1 mm large and spaced by 1 mm for the 1 mm thickness, at least 2 mm large and spaced by 2 mm for the 2 mm thickness, etc.).
Removing enough material for the laser cut metal sheet to fold properly
The point of drawing holes on the folding line is to remove matter, in order to make it possible to fold easily, and precisely on the line and in the direction that we’ve chosen. The patterns our designers chose remove 50 to 80% of the matter on the folding line.
Don’t remove less of 50% of the matter of the folding line: if you do, you might have issues folding the sheet, and it will probably get deformed on other areas than the folding line, as you can see on the example below: when the holes of the folding line remove less than 50% (30% or 40% here), the sheet is bent. And that’s for the thickness of 1 mm! With a higher thickness, it will be even more difficult to preserve the initial shape of the sheet when bending on the folding line.

This kind of deformation should be avoided, as you can’t exactly control it.
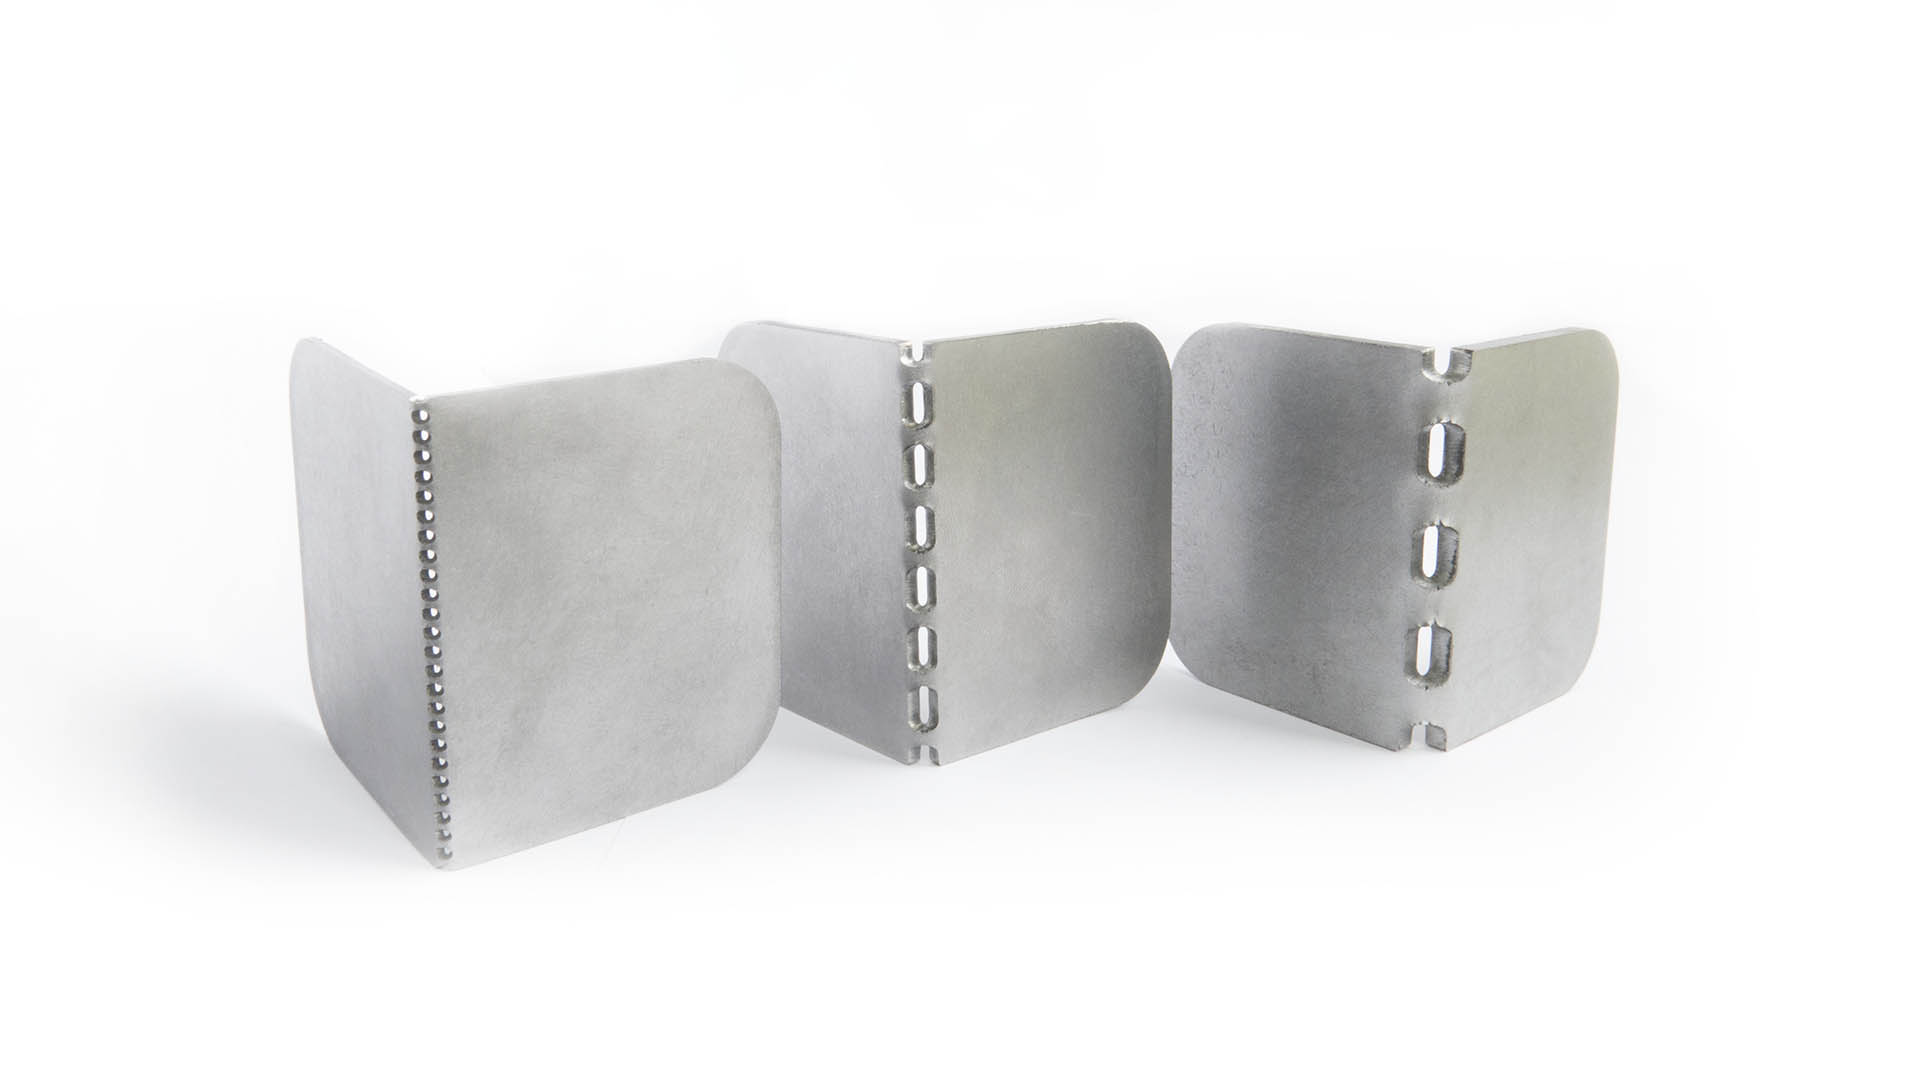
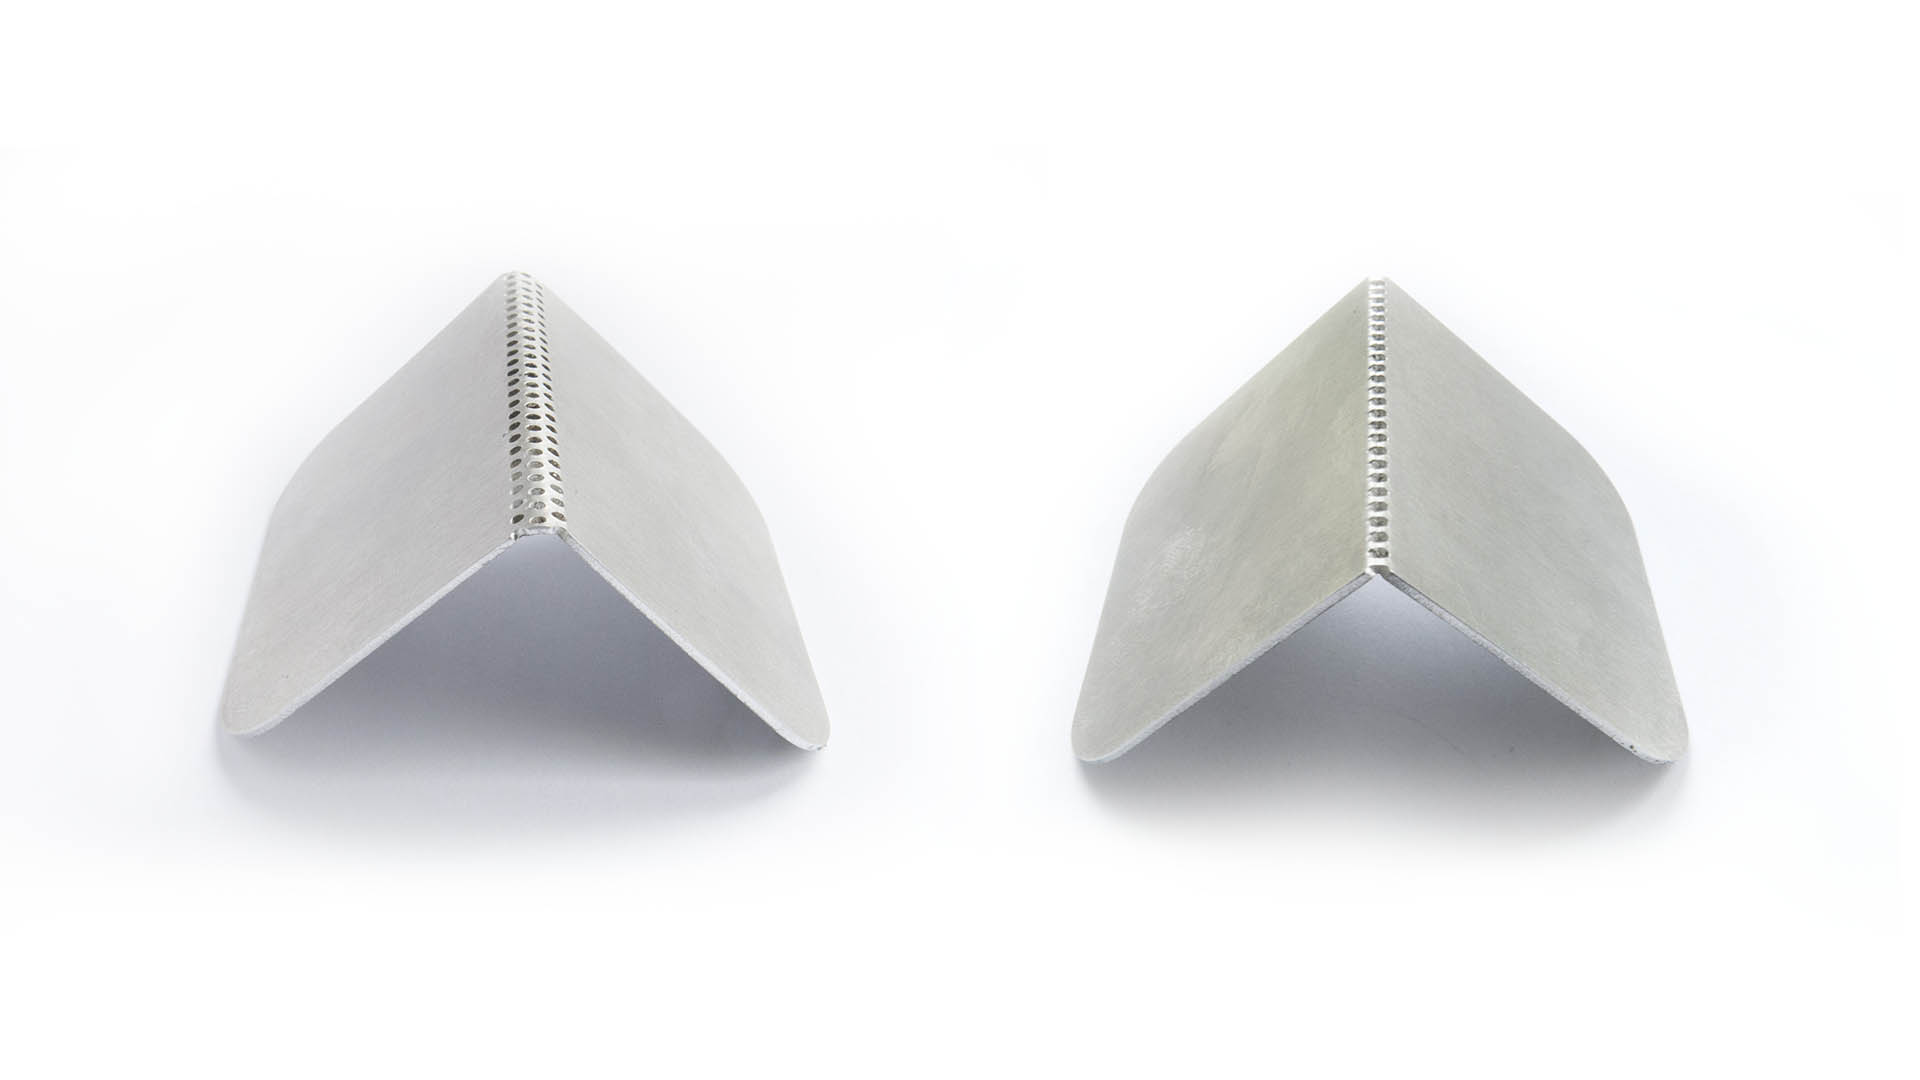
The pattern of your folding line will determine the bending angle and shape of your metal part
The bent parts we show you have a sharp bending angle, with a more or less square shape. But you can play with your pattern and imagine ways to change this shape, make the bending zone larger, twist it in different ways…
Here you see the folding line on the left is larger than the one on the right, and allows a more circular folding line. It’s up to you to change the aspect of your folded metal part!
Comparison of the tested patterns for folding laser cut metal
Below, we show you a comparison of the folded metal parts, with 4 patterns, that remove respectively 50%, 60%, 70%, 80% of the matter in the folding line. You can compare the effect of the folding on the 3 layer thicknesses we offer (1, 2, 3 mm), and on the two materials we compared: aluminum and steel.
Conclusions of the metal folding experiment:
1. Aluminum was easier to fold by hand than steel. Once folded, they both remain in their shape very well, ensuring a strong folded object, in every thickness.
2. As planned, it is easier to fold when you remove more material.
3. On the 3 mm thickness, it became almost impossible to fold by hand. Folding required a hammer and a vise. However, needing this small tool help is still cheaper than using heavy, expensive specific metal tooling and machining, which means this design still reduces the cost and effort of folding, even for very thick sheets. It also allows to fold on a straight line with the hammer and the vise, which is very hard without a folding line design.
4. With the 3 mm thickness for the aluminum, and the 2 mm thickness for the steel, the folding line gets quite deformed, torn in places. It doesn’t mean the bent part will break, just that the aspect of the object might not match your expectations. Keep that in mind when thinking of folding thick metal sheets.
5. The folding line’s holes take a slightly oval shape, the circles are elongated on the outside and compressed on the inside, as you can see on the picture below. This is also to keep in mind when planning your object’s final aesthetical look.
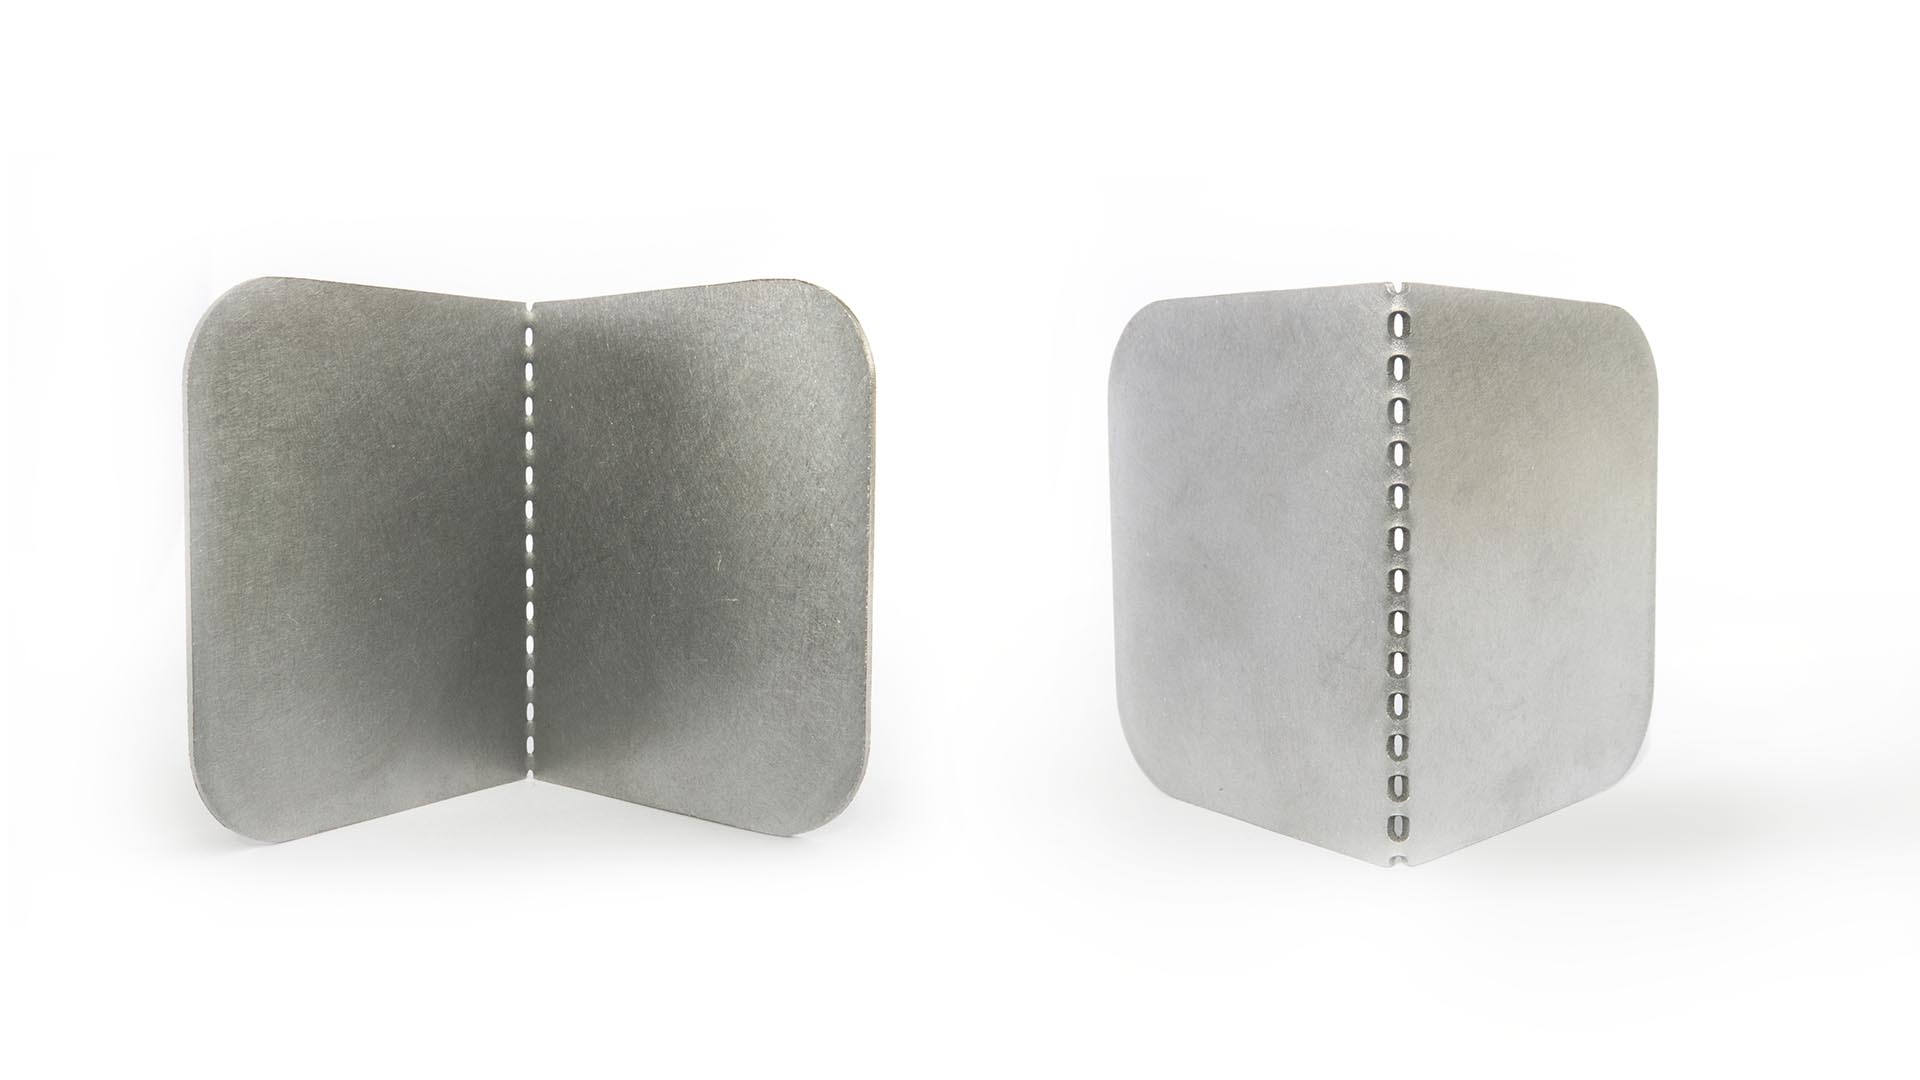
Inside / outside comparison of the folded metal part
You can compare the folded parts yourself below:
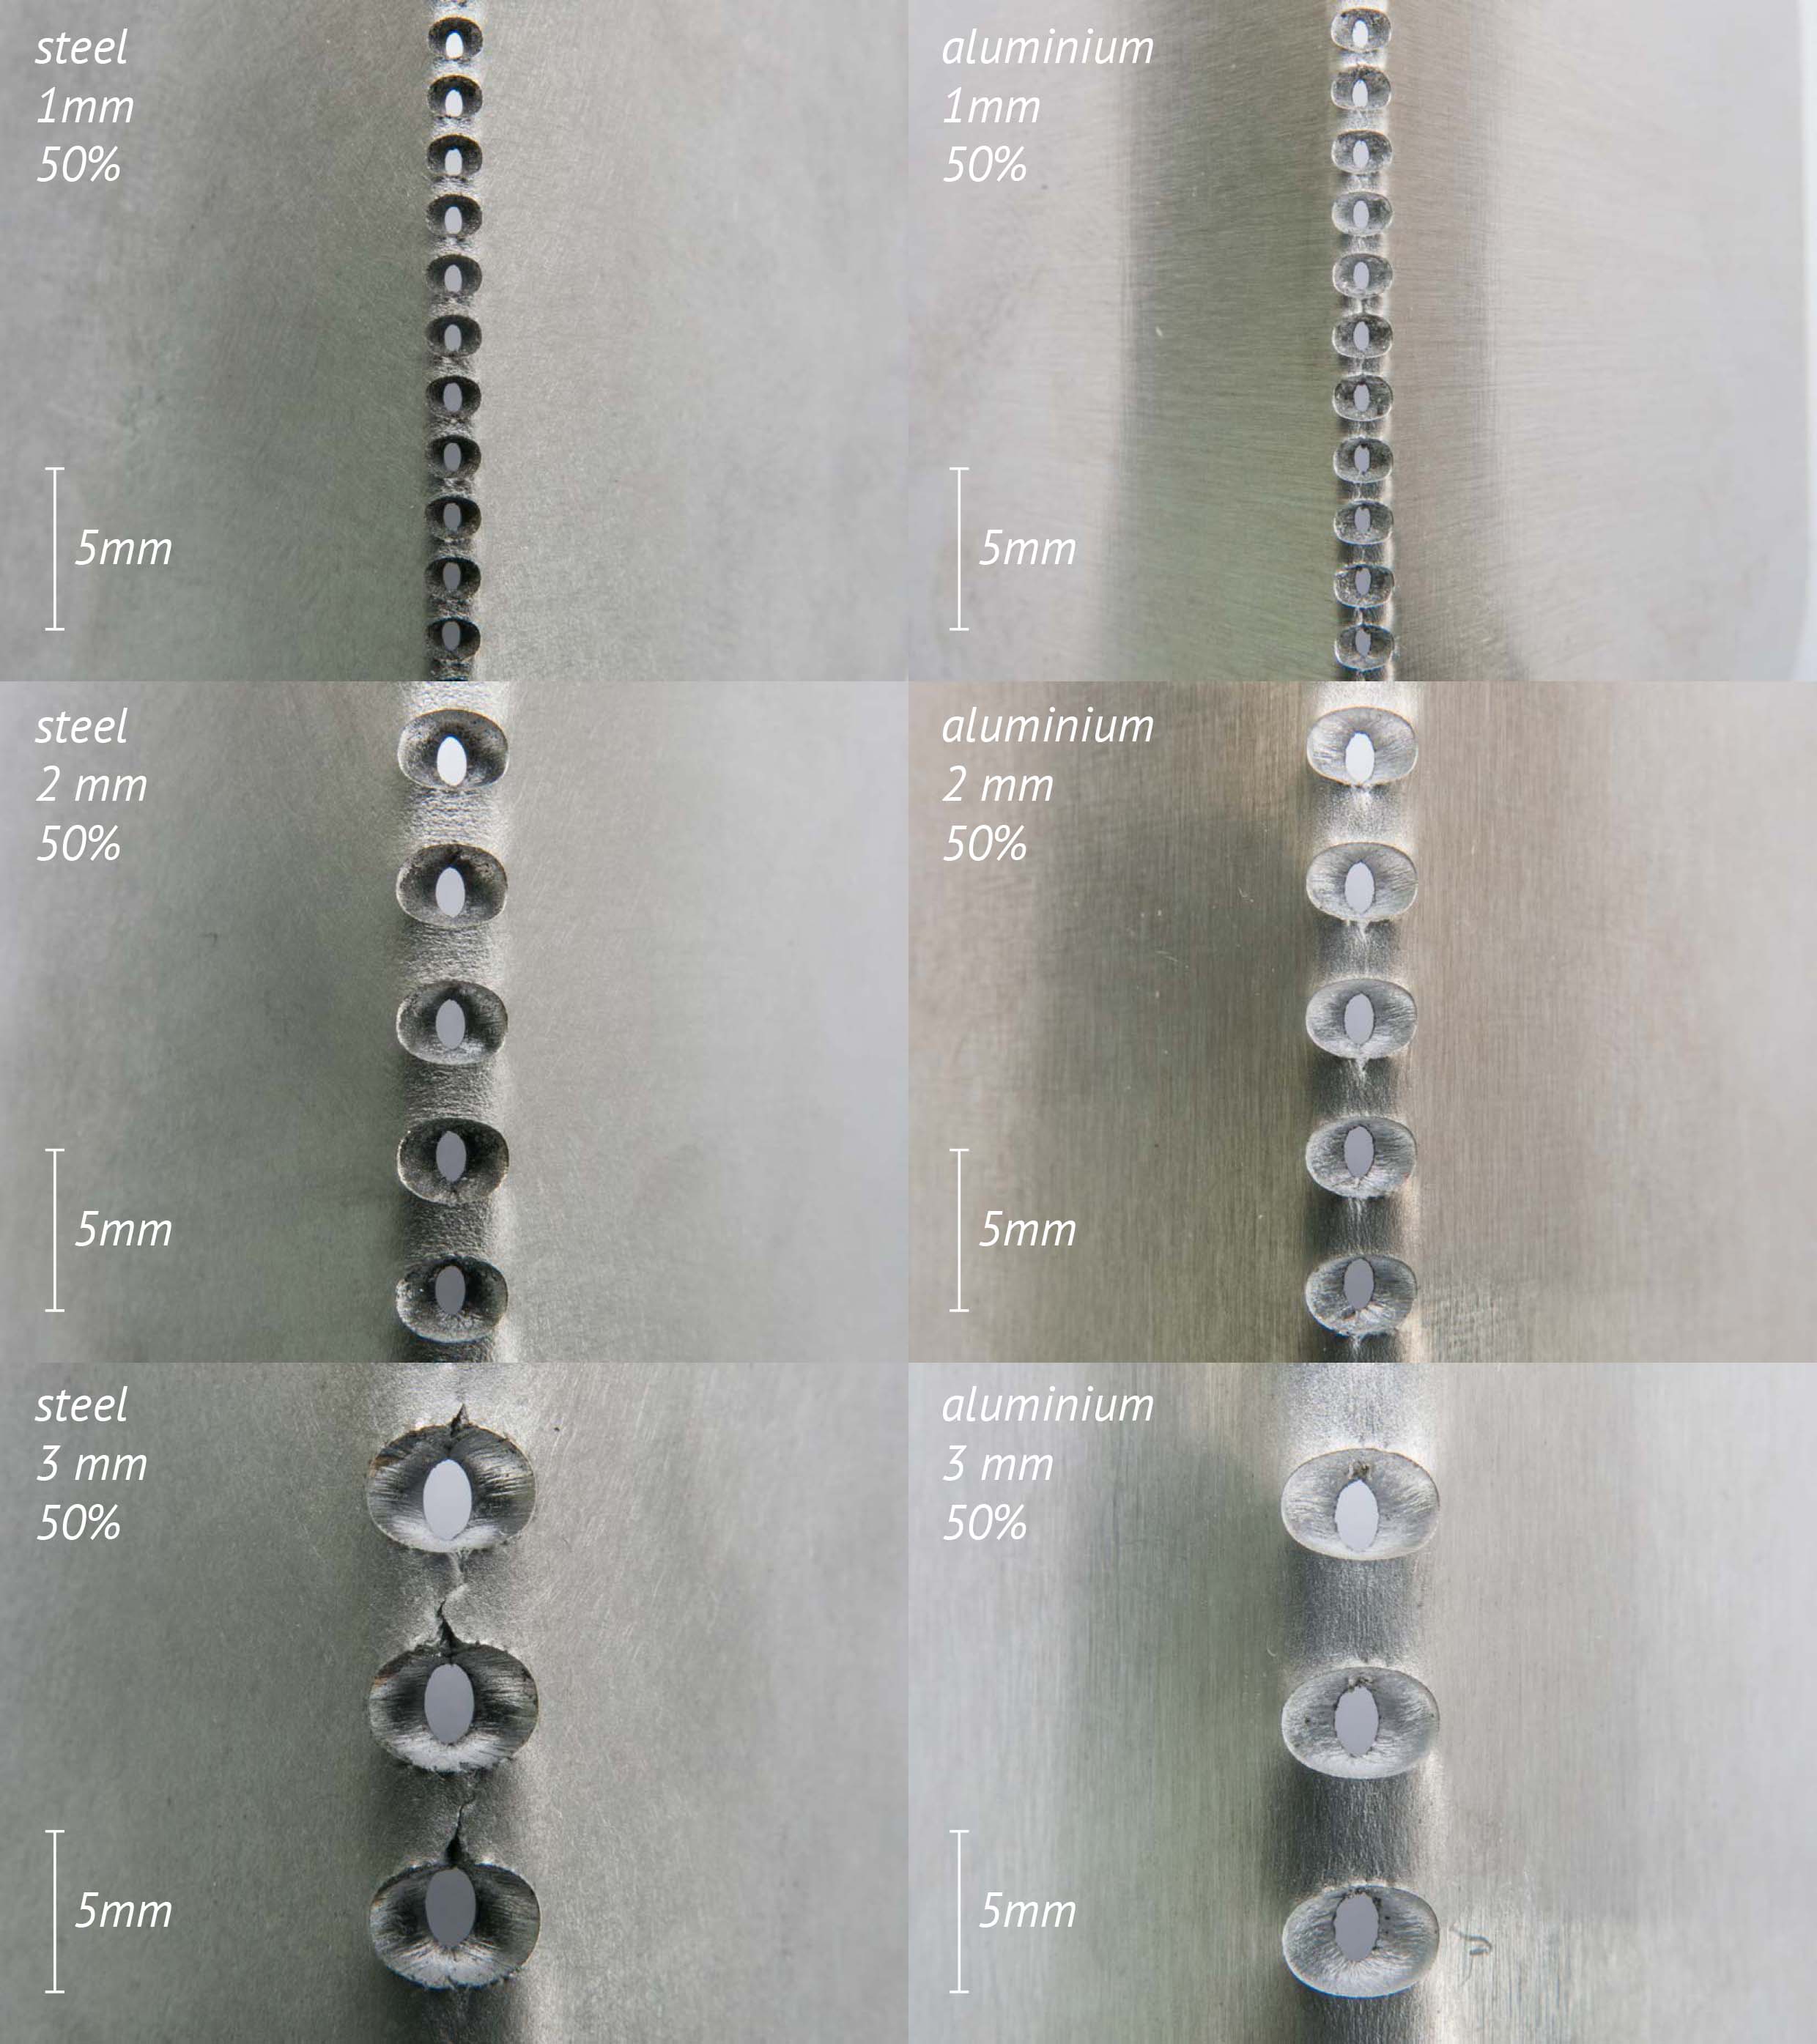
Here the patterns remove 50% of the matter on the folding line (comparison aluminum and steel, with 1, 2, and 3 mm thickness)
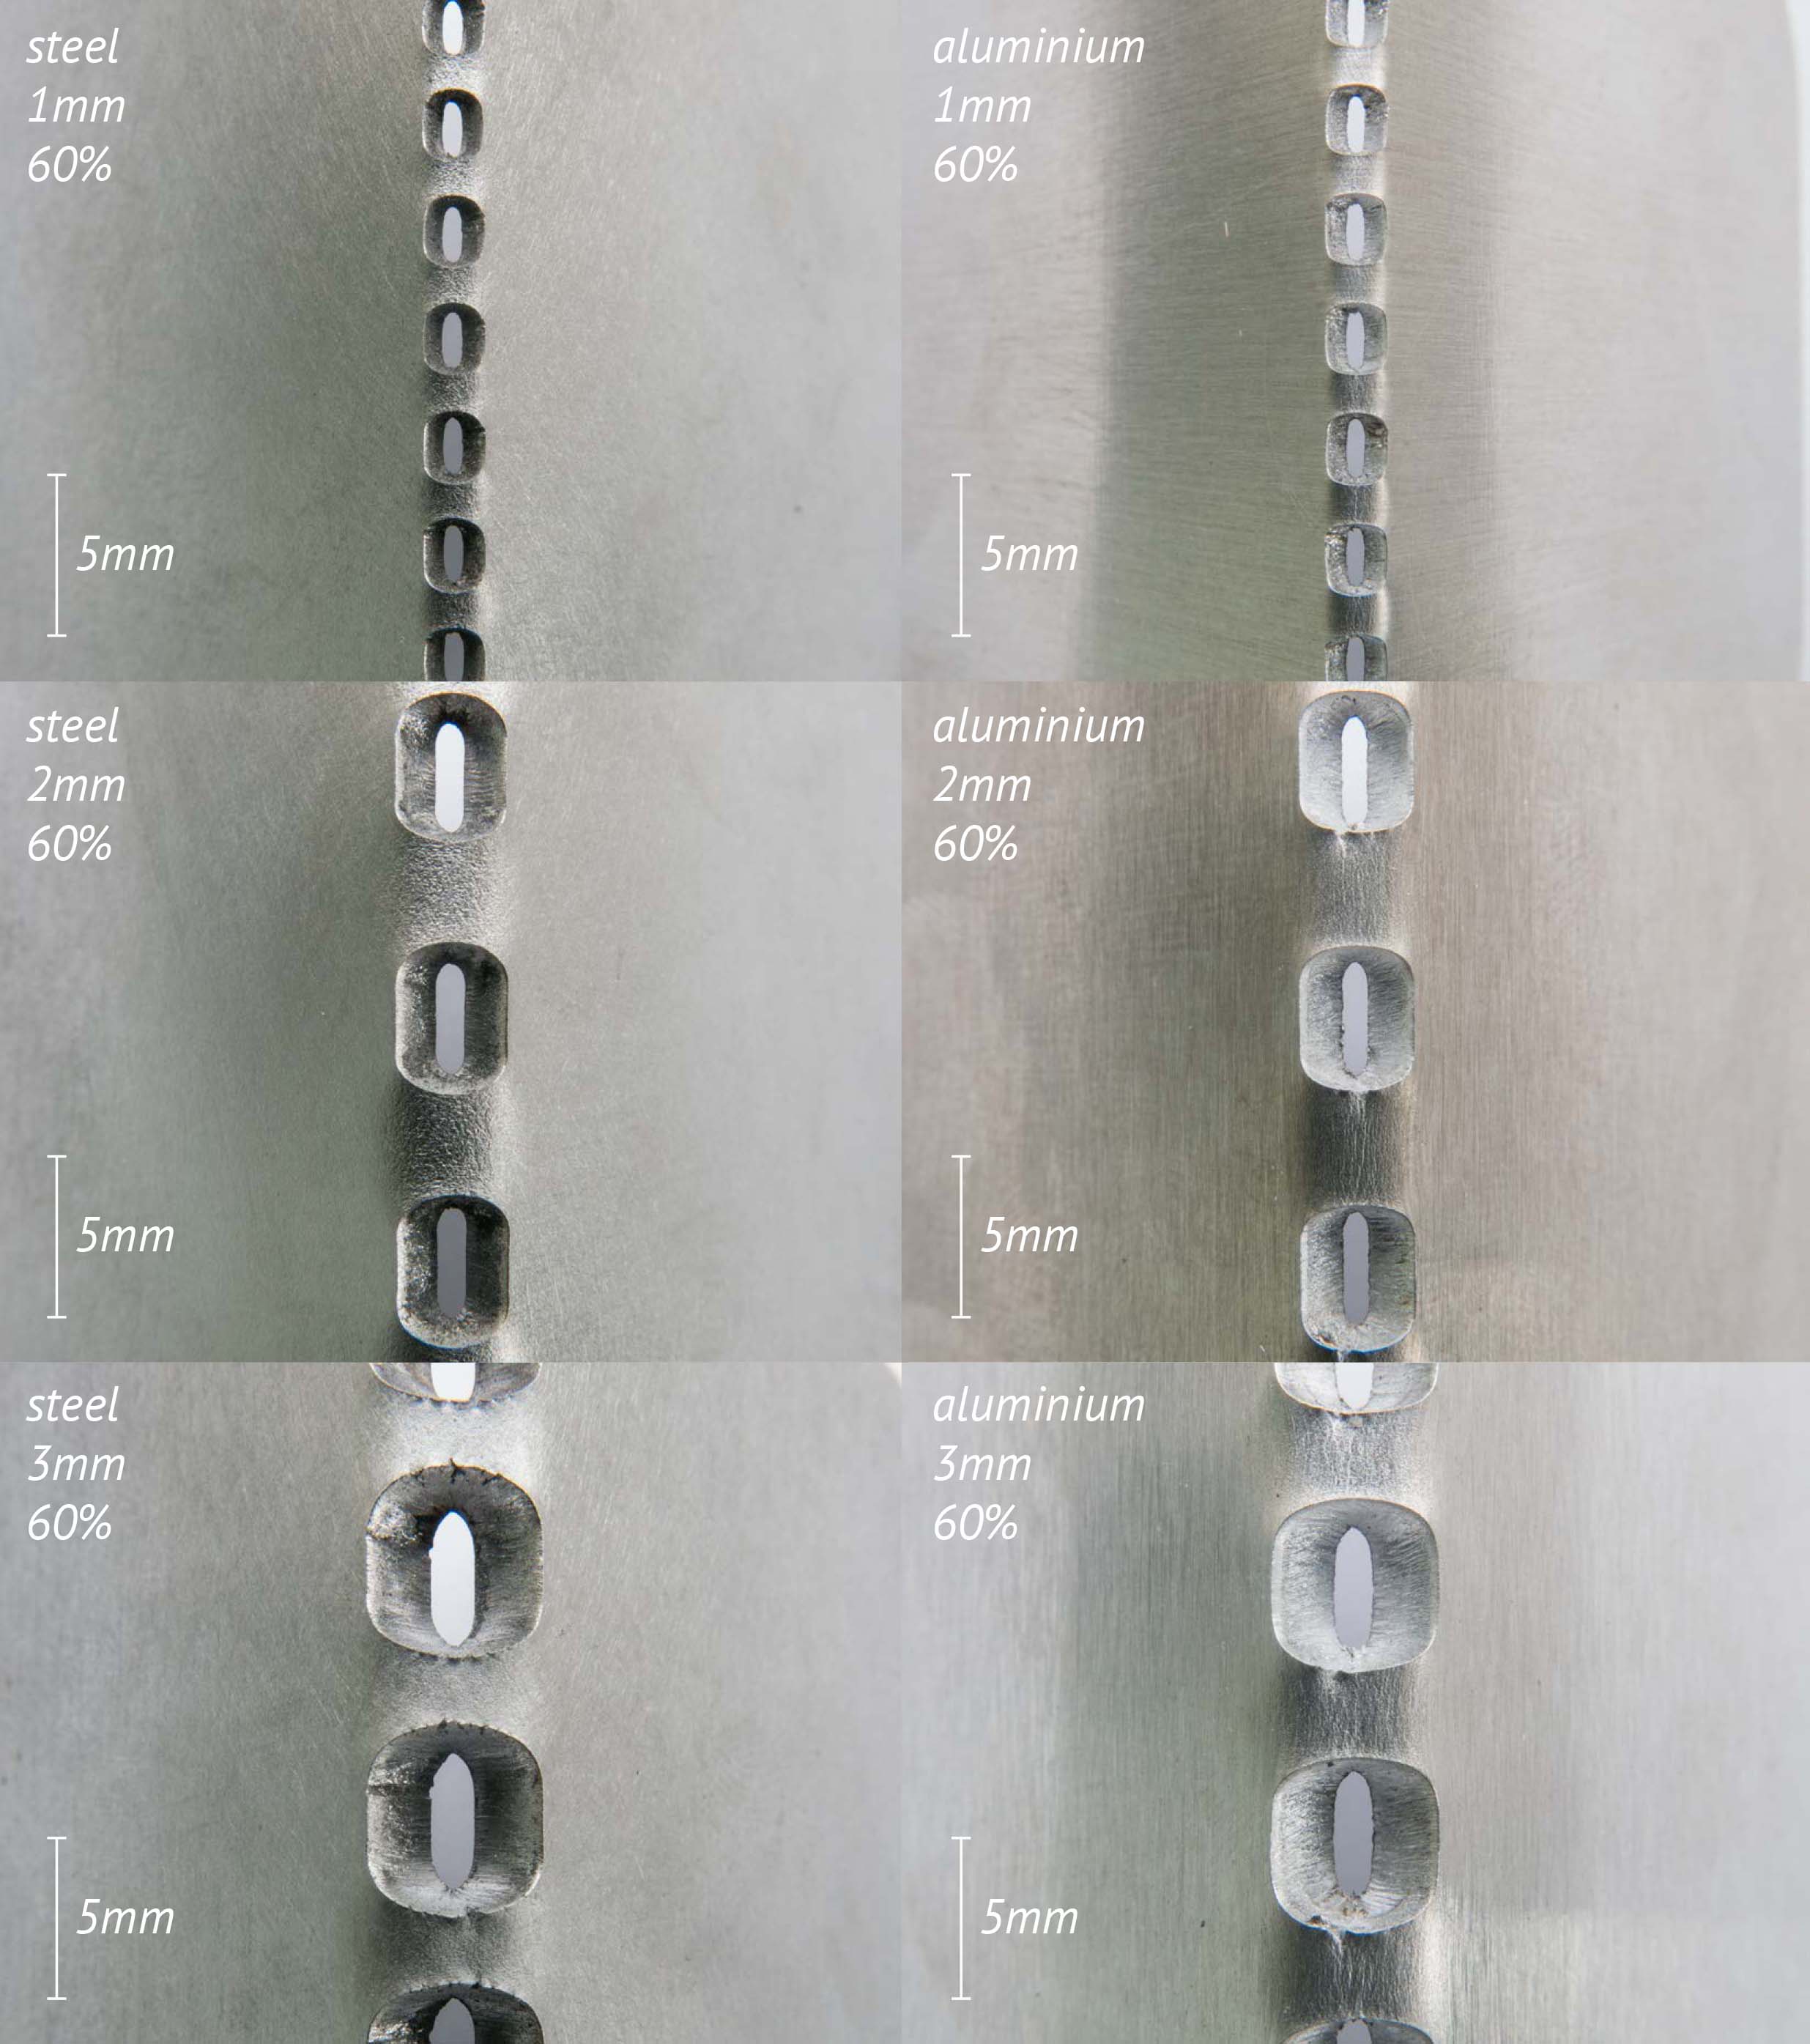
Here the patterns remove 60% of the matter on the folding line (comparison aluminum and steel, with 1, 2, and 3 mm thickness)
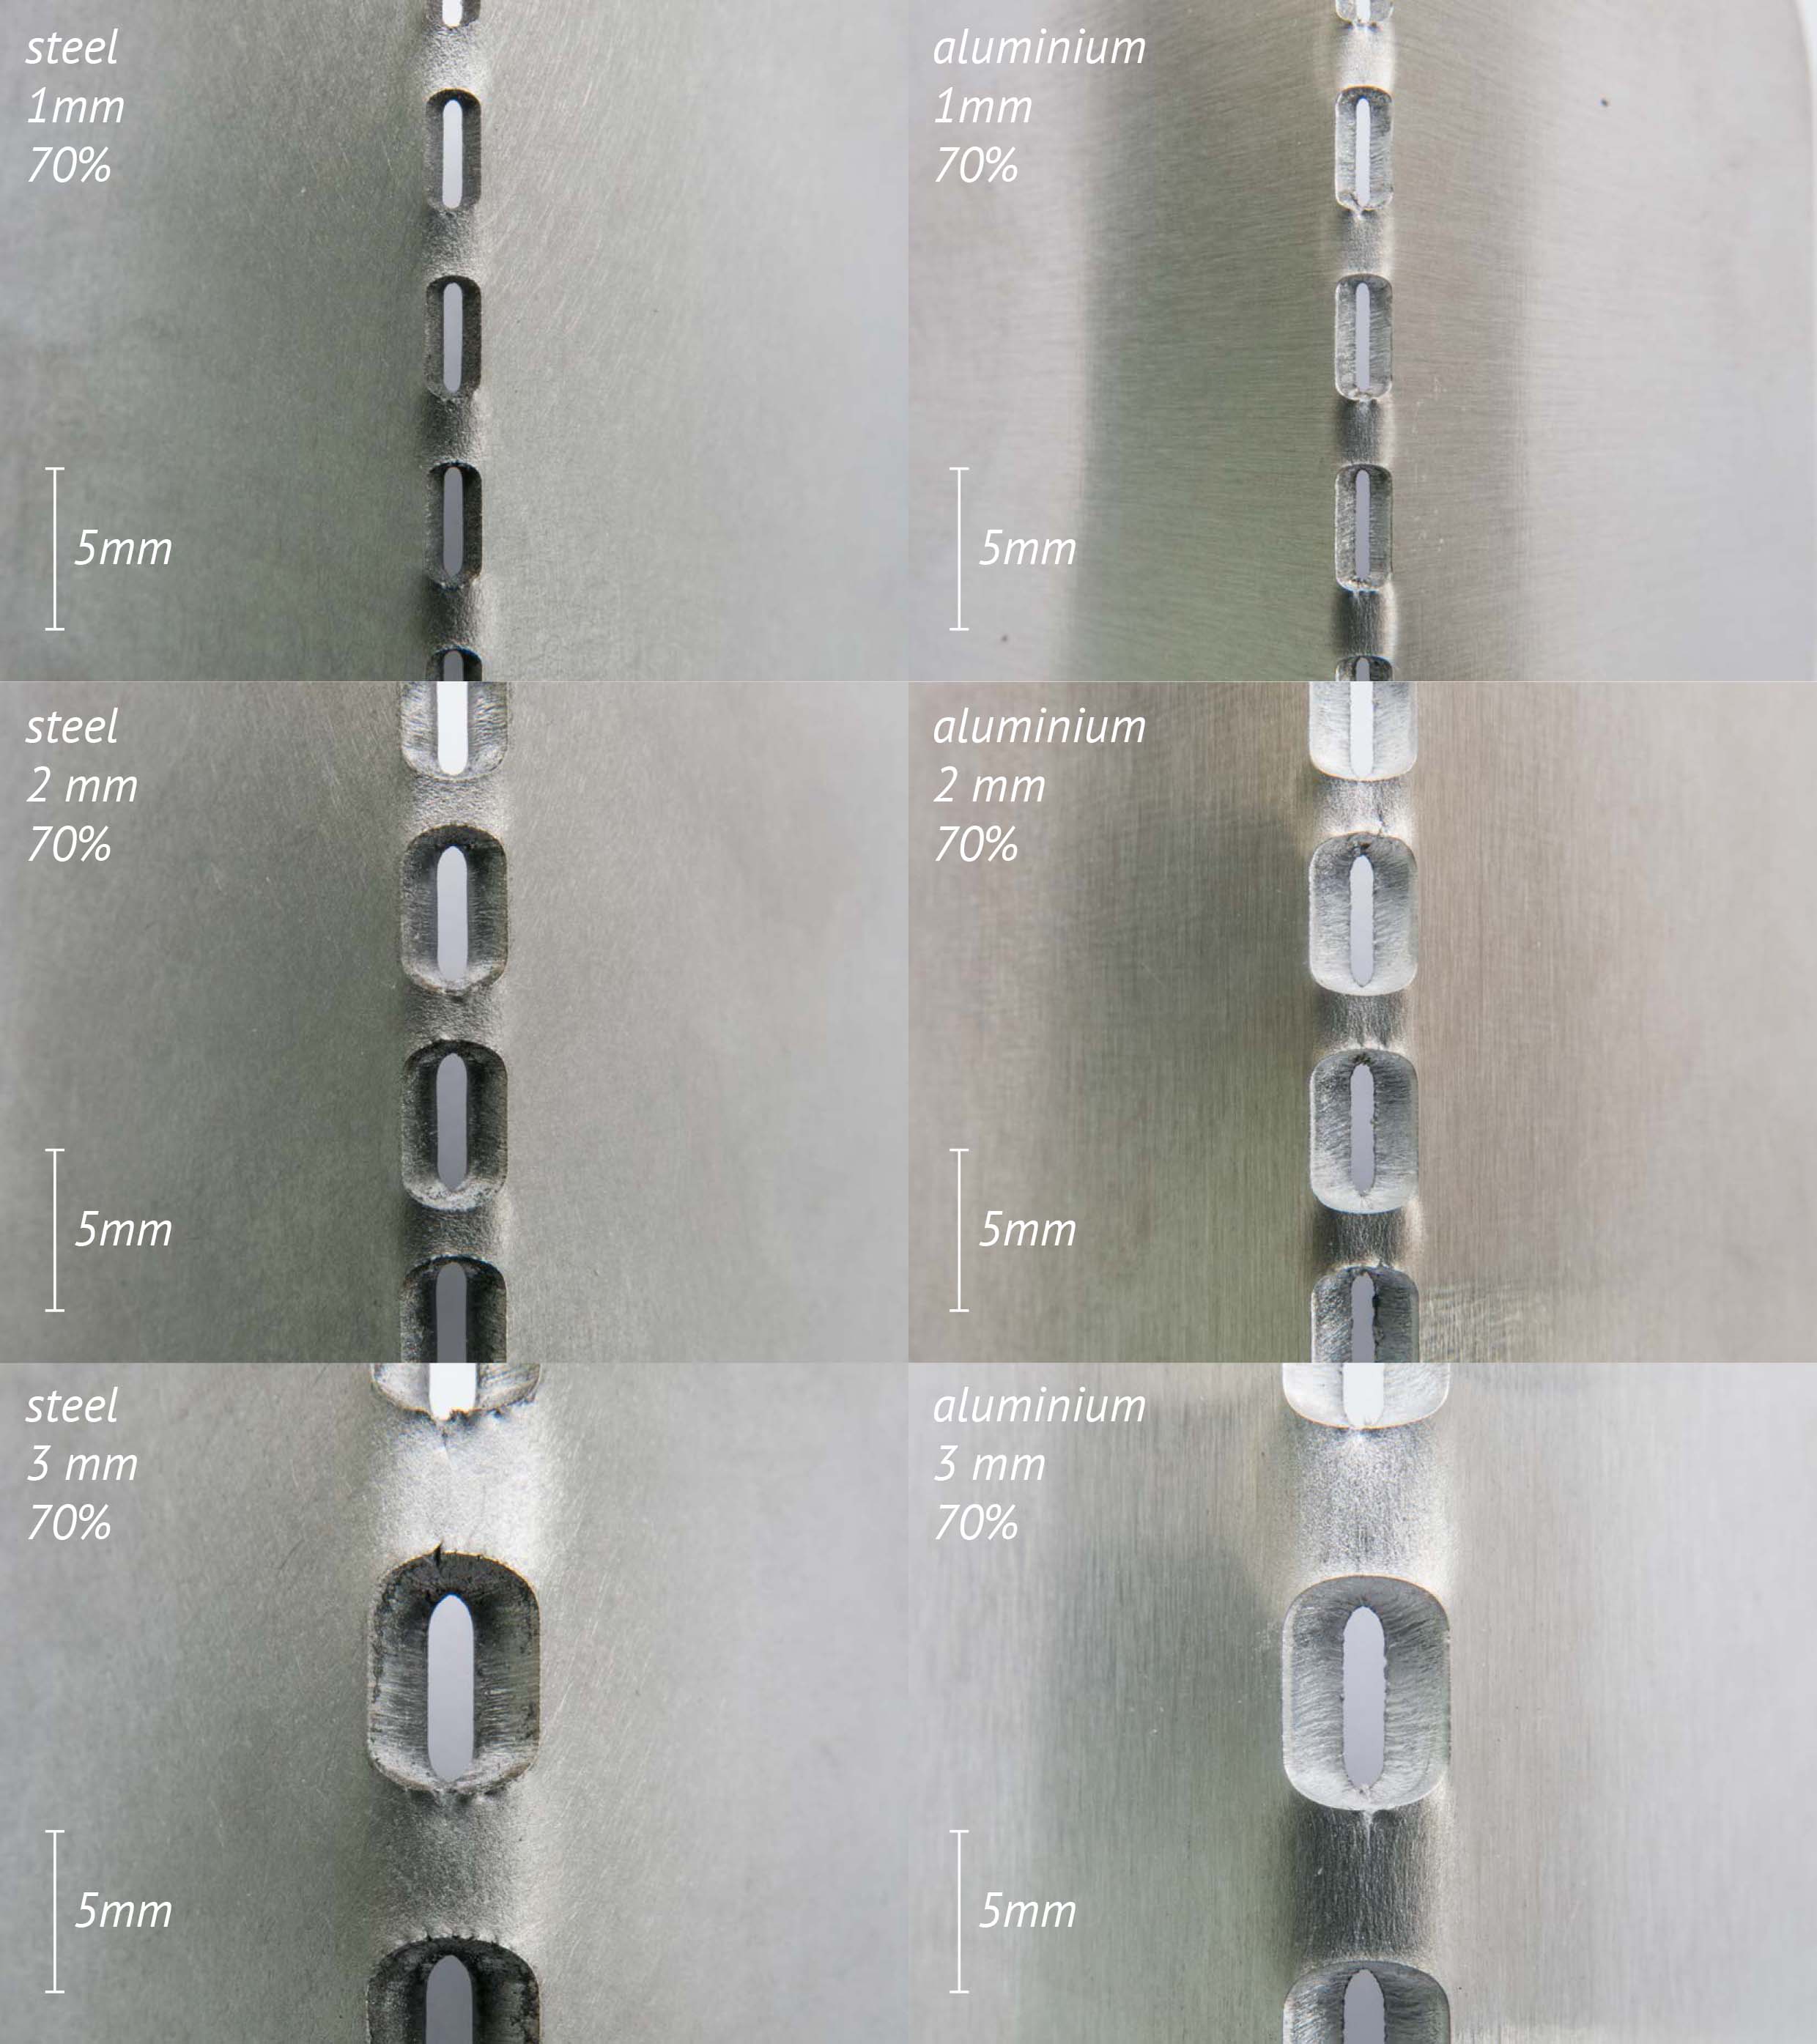
Here the patterns remove 70% of the matter on the folding line (comparison aluminum and steel, with 1, 2, and 3 mm thickness)
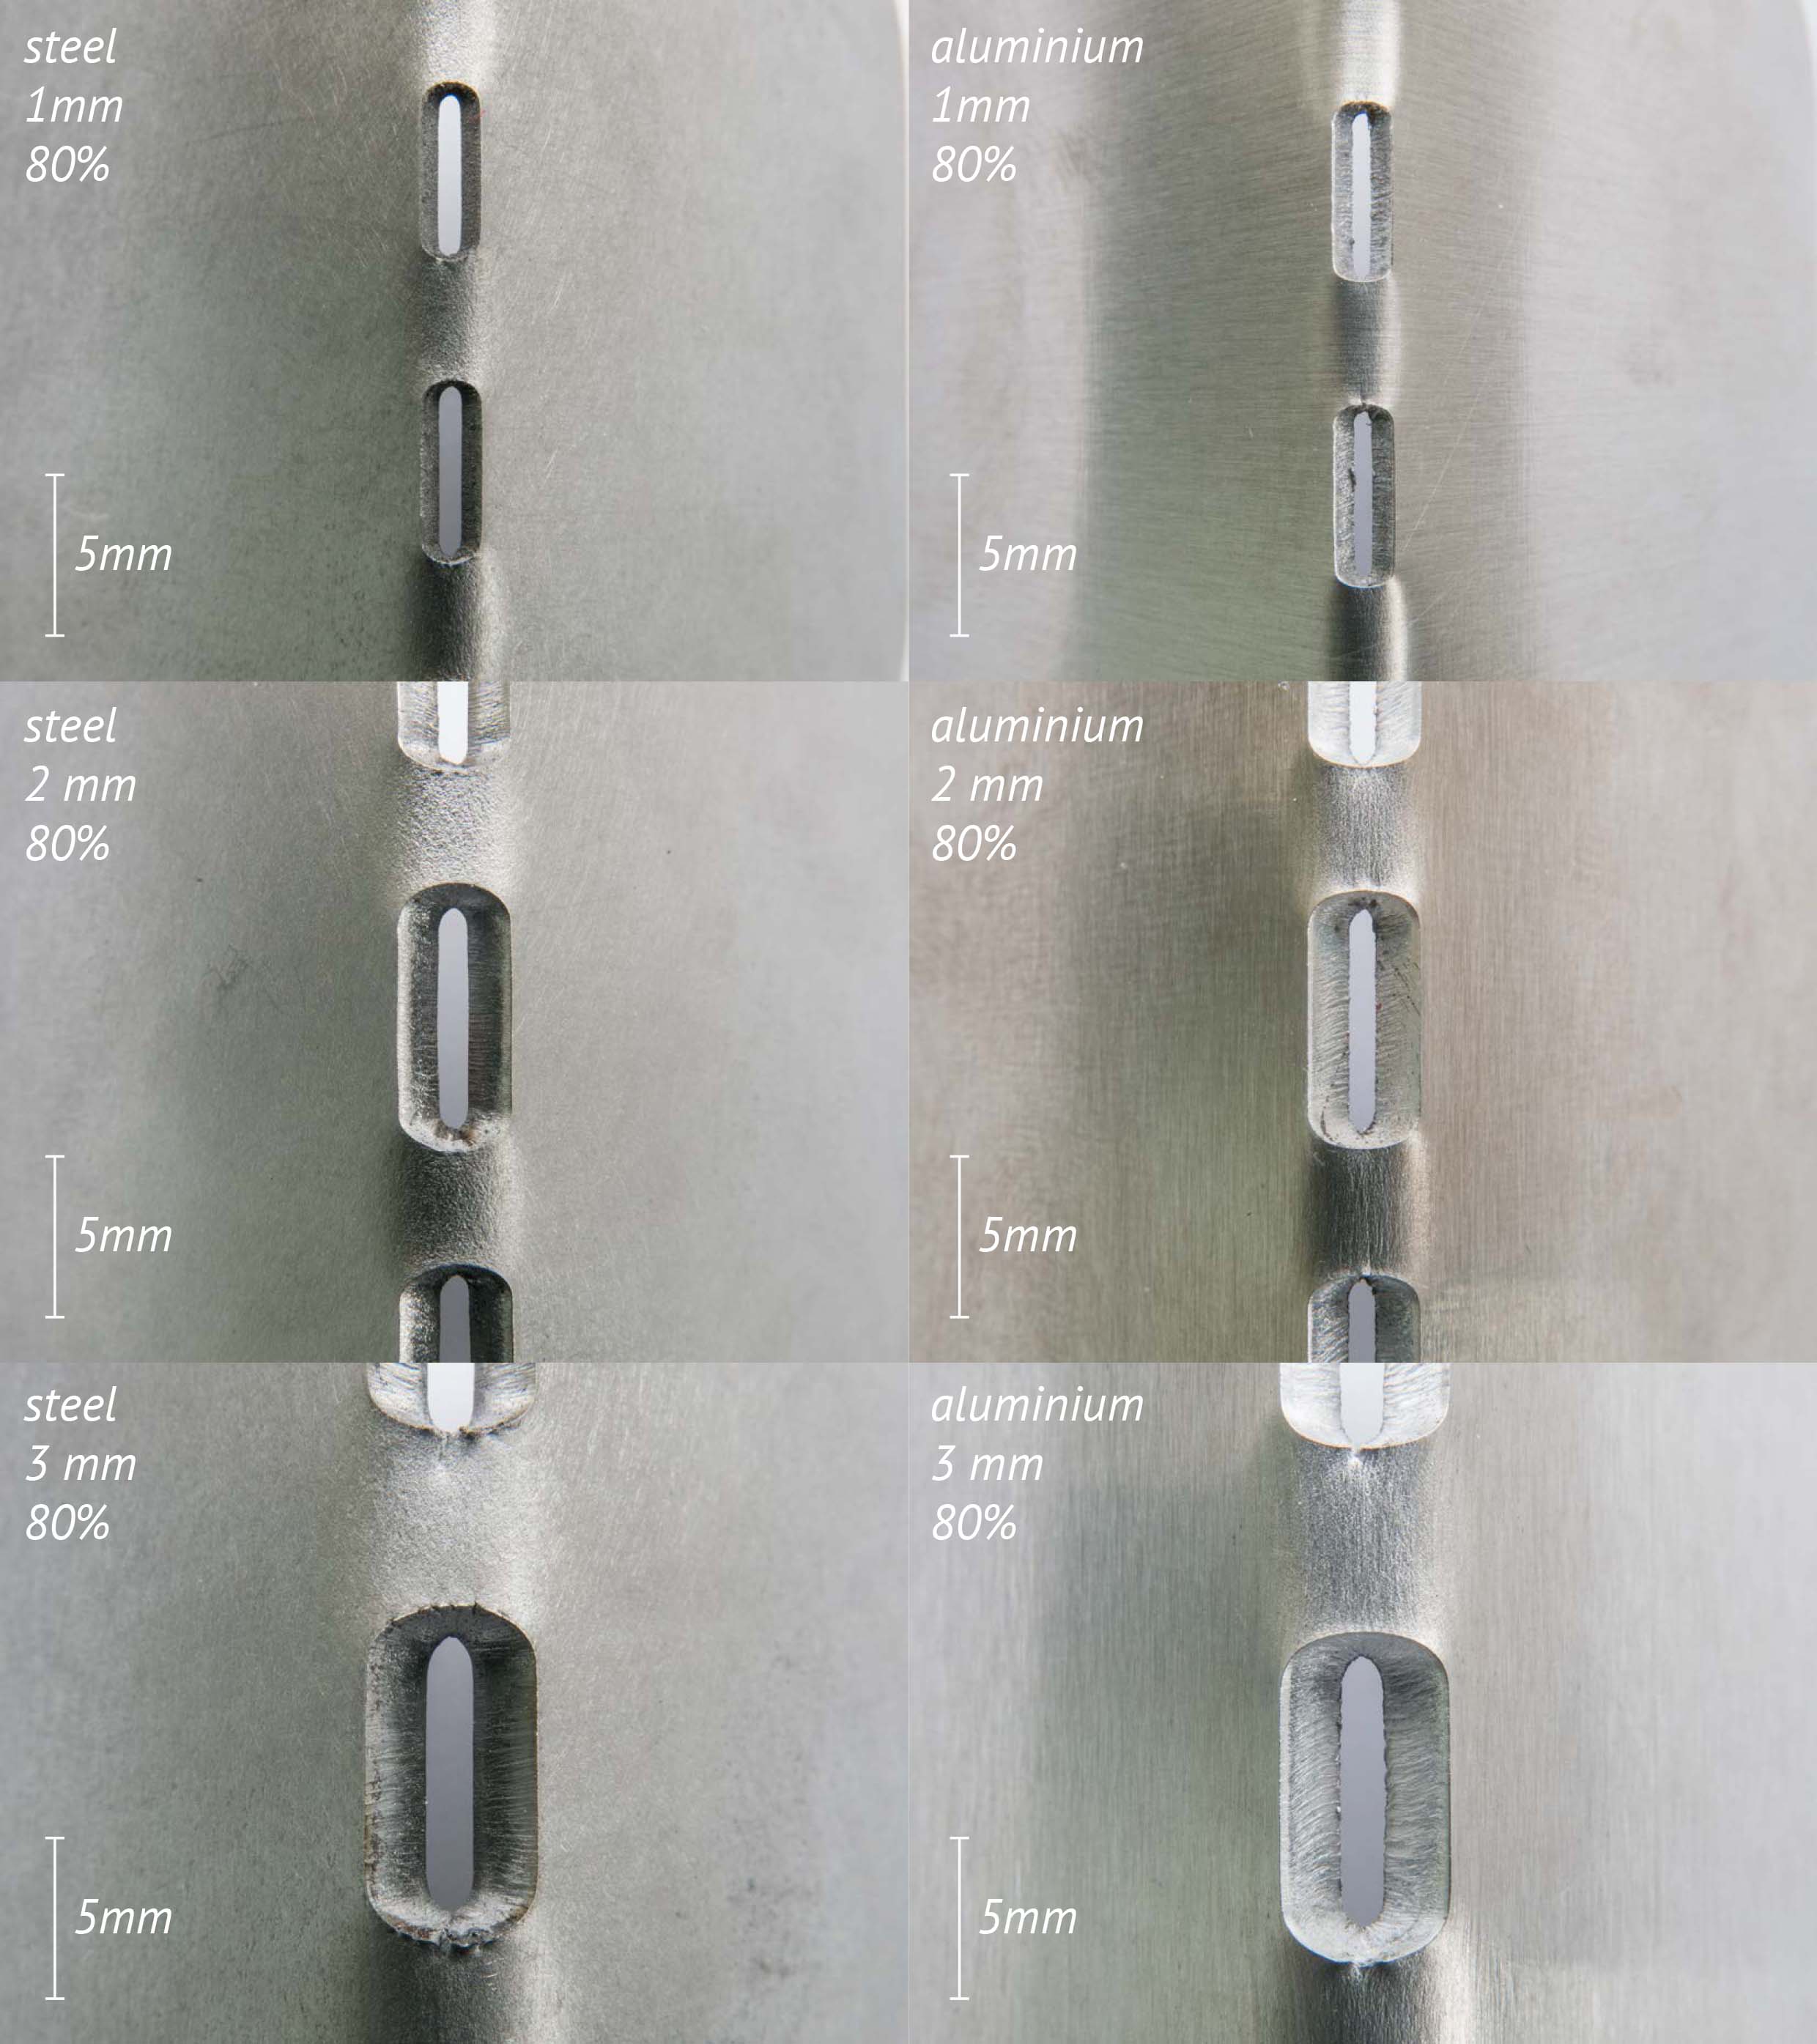
Here the patterns remove 80% of the matter on the folding line (comparison aluminum and steel, with 1, 2, and 3 mm thickness)
We hope these tests will help you decide on your method of folding for laser cut metal sheets, and move along with your projects. If it did, you can upload your 2D file, and start laser cutting right away!
You can also order the samples our designers created to make your own tests directly: the 1mm thickness pattern, the 2 mm thickness pattern, and the 3 mm thickness pattern.
We hope you’ve learned how to fold sheet in the best way!
Happy laser cutting!