 Connect with Google
 Connect with Facebook
How to: 3D print your own brain using MRI or CT scans & free software
Posted By Lucie_Sculpteo on Nov 8, 2017 | 2 comments
As a testimony to the fascinating nature of 3D printing technology, we will walk you through the steps to 3D print your brain from an MRI image or CT scan (computed tomography scan). There are unlimited medical benefits involved in 3D printing from MRI scans! Whether you’re using this method for medical or artistic, the fact is… 3D printing is fantastic! Follow this simple tutorial to discover how to create a 3D model of your brain.
Why you should 3D print your brain
3D printing can be used for many things. It can be for rapid prototyping, research, production, or design work. But additive manufacturing is also an excellent method to explore many possibilities. And one of these possibilities could be creating your brain model.
You don’t need the help of 3D designers, and you don’t need to get 3D printers to get your 3D printed model. First, you have to get an MRI image of your brain. Once you have it, you can download and install 3D software to convert it, work on it and prepare it for 3D printing. Then, you can use our online 3D printing service! For the moment, you can’t choose to print it with brain tissue, but you have the choice between several 3D printing materials on our website.
There are numerous reasons to 3D print a model of your brain for an experiment, medical research, or just for fun. Who thought about 3D printing a model of his brain? Did you even know that it was possible? There is only one way to ensure it works: give it a try by following our tutorial!
Step 1: Download the right 3D software
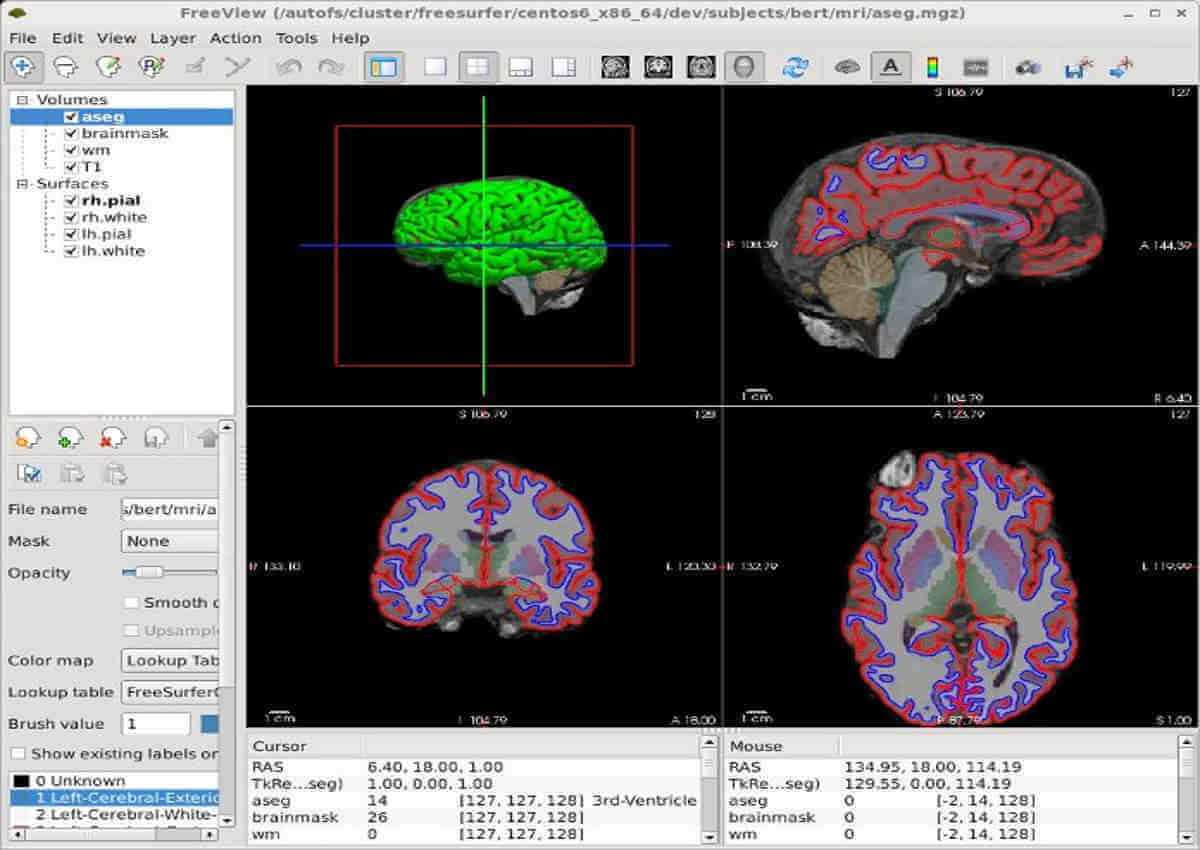
Indeed, the first thing that you want to do is download the free software package that you’ll be using to 3D print your brain. You first need a software called FreeSurfer designed to process and analyze human brain MRI images. FreeSurer is available for both Mac and PC. You have to download and install this open-source software, FreeSurfer.
The next download is Meshlab which will assist you later in this tutorial. MeshLab is an open-source, portable 3D modeling software created to process and edit unstructured 3D meshes.
Don’t worry. This software is also free. We will use Meshlab to clean up our brain scan. As you will see, there are a lot of shadows and other brain matter resulting from the MRI scan that we won’t want to include in the print.
Step 2: Convert your MRI brain scan using FreeSurfer
Most medical scanners will produce files in a format called DICOM. This usually takes the form of a folder filled with a bunch of files with a .dcm extension.
First, you have to import your DICOM file. FreeSurfer includes mris_convert, allowing you to convert your file into .stl files. Here’s how to proceed to convert your file using FreeSurfer:
- Open a terminal
- Convert the right and left hemisphere of your brain by tying:
- your_subject_dir/surf/ mris_convert rh.pial rh.pial.stl
- your_subject_dir/surf/ mris_convert lh.pial lh.pial.stl
- You’ll get two different files: rh.stl and lr.stl
If you need more help converting your file, check this FreeSurfer’s guide!
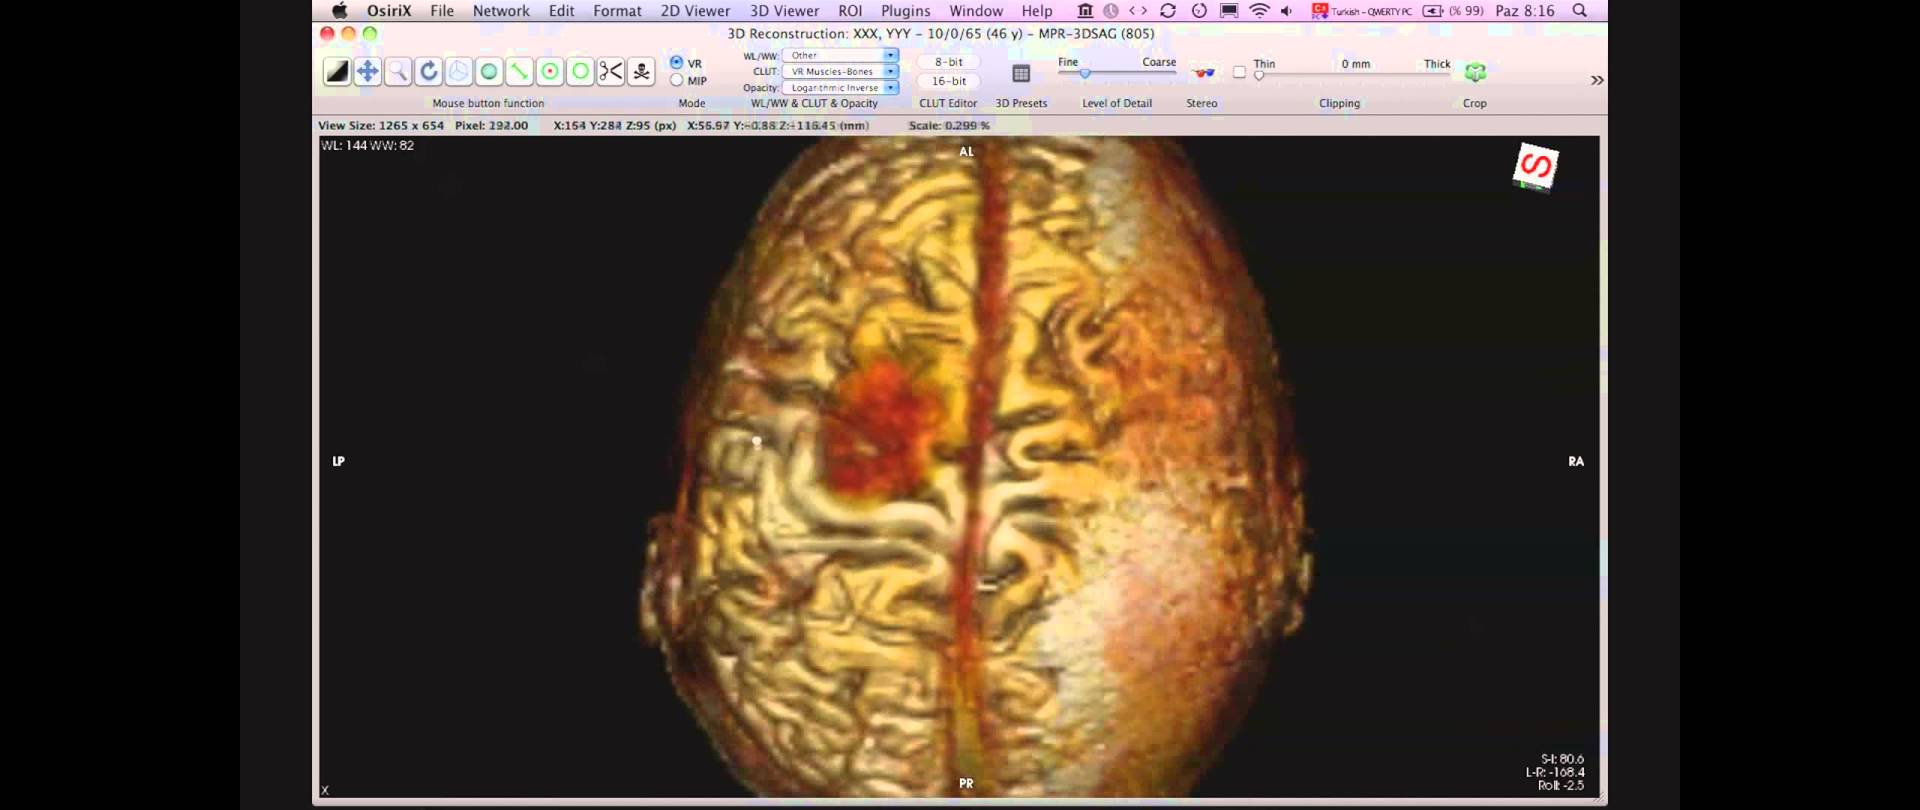
It is also possible to use software like OsiriX, a medical viewer, that will allow you to export your DICOM file into a 3D file! This software is not free. Here’s how to proceed:
- You can upload or import DICOM files into FreeSurfer by launching Osirix and looking in the top left corner of the screen. You’ll see an “Import” button. Click that, and browse to the folder that has your DICOM data.
- The system will ask us whether to “Copy” or “Link the files” we want to copy the files because OsiriX will automatically copy the files to its database.
- You can delete the downloaded .zip file.
- The toolbar at the top has a settings button with an image of a gear labeled “Export 3D-SR”. That leads to a menu with different formatting options that we will use to convert our file.
- Select the .stl format.
- Export your brain!
Step 3: Clean up the 3D model of your brain using MeshLab
Be very careful: MeshLab DOES NOT have an “undo” button. So every change you make on the mesh can’t be undone. You can only reload your mesh.
- Start MeshLab and import your brain via the “File” button,
- Click on “import mesh” and select ok
- Click on “Filters” located to the left of your screen,
- Select “Mesh Layer” we are going to choose “Flatten Visible Layers.”
- Select apply.
- Now your brain mesh is technically ready to go!
*If our mesh has two vertices, follow these steps to simplify your model:
- Select “Filters” and click on the “Remeshing….”
- Choose “Quadratic Edge…”.
- Next, the system will prompt you to enter your number of vertices. Feel free to use 150, we’ve tested it, and it works on average,
- Next, click on “Apply.”
- If you want to make the model look a bit better, you can use “Filters” once again but this time, click on “Smoothing, Fairing and Deformation” then “Laplacian Smooth.”
- Click on “Apply.”
Step 4: Let’s 3D print your brain with Sculpteo!
Now that you have your cleaned .stl file, one more thing to do: upload it to the Sculpteo website for 3D printing!
Several 3D tools are available to optimize your 3D file for 3D printing to improve its quality and reduce costs. Orientation Part, Hollowing, and Thickening tools will help you make the most of your 3D printing experiment on our online service.
To learn more about the built-in features to help you save money on your print, watch the Webinar below for further instructions.
We hope you enjoyed this tutorial regarding how to 3D print your brain! Are you ready to try it? Upload your files here to get your 3D objects. If you have any questions, don’t hesitate to contact us!
If you want more 3D printing news, subscribe to our newsletter and check out our Learning Hub.