 Connect with Google
 Connect with Facebook
13 ways to assure your 3D models are printable
Posted By Kat Plewa on Nov 7, 2018 | 0 comments
Before sending your 3D models for printing there are a few things crucial to keep in mind. They are important to assure your 3D models will come out looking just as good as on your screen. With this blog post, you will learn what are the essential requirements your 3D model has to meet and how to prepare your 3D models for printing. Let’s get started with our list for the best 3D printing results!
1. Assure the solidity of your model
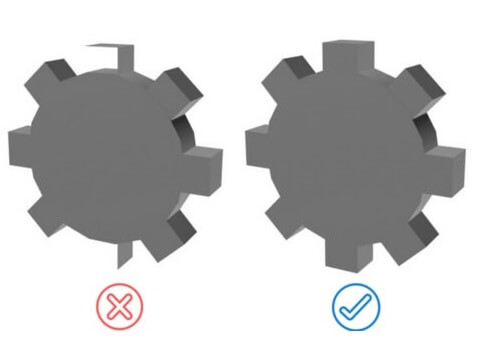
This picture shows exactly the case, if your 3D models have holes, missing walls or vertices, they will be unprintable. You need to assure all the points, curves, lines, and vertices are connected and the objects created only of closed shapes. 3D designers might already know the tools, such as ”cap holes” in 3Ds Max, but if you’re new to 3D modeling software, check out our tutorials.
2. Don’t forget about gravitation
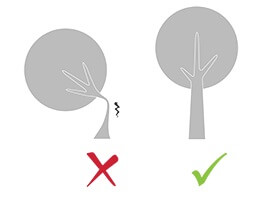
Just as important is the stability of your object. Just because the object looks stable on your screen doesn’t mean it will act the same in reality. This is especially important for mechanical parts which have to withstand a lot of stress. If such need occurs, add supports. They will assure your parts are 3D printable and stable.
3. Choose 3D printing technology
Most of the points on our checklist are universal, however, the Additive Manufacturing you will choose is one of the most important aspects of preparing your 3D models for printing. That’s because each 3D printer and material has its own restrictions.
For example, maximum size to 3D print your objects with SLS and material Nylon PA12 is 545 x 675 x 366 mm, but for the same technology Nylon 3200 Glass-Filled has size limitations at 240 x 315 x 190 mm.
Remember to check all the restrictions of the chosen technology and adjust the parameters of your 3D model in your 3D modeling software. We will go over the most important things to check in the next few points of our design guide.
4. Check Wall Thicknesses
As we said each Additive Manufacturing technology has its own design guidelines based on the 3D printer and the properties of 3D printing materials. Because of that, the limitations of wall thicknesses will differ. Assure your 3D models for printing have the right wall thickness.
It is crucial to check it, especially for mechanical parts. If the walls will be too thin, not only your 3D models might be unprintable, but they also might lose mechanical properties needed for your project.
Find the full list of wall thicknesses limitations for all of our 3D printing technologies and Materials.
5. Set Minimum Detail
Different Additive Manufacturing methods also come down to the accuracy of the technology and the level of detail it can handle. Before sending your 3D models for printing, check if the complexity and details are not too small.
3D printing technologies are already capable of producing some really finely detailed designs, however, the detail limitations are based on 3D printers and materials. Reassure that your complex 3D models still meet the needed restrictions for 3D printing.
Find the full list of wall thicknesses limitations for all of our 3D printing technologies and Materials.
6. Design the right Minimum Clearance
As Additive Manufacturing gives you new design freedom, you can 3D print not only highly detailed designs but even interlocking parts! This brings a revolutionary solution to part assembly, eliminating such a time-consuming process. However, it’s important to remember that there has to be a specific amount of space between the parts called minimum clearance.
For your 3D models to be printable, you have to consider the minimum clearance, otherwise, your 3D printed interlocking parts won’t work properly.
7. Size matters
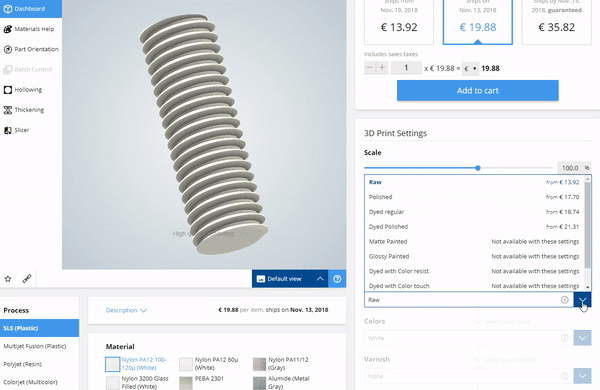
3D printing technologies are very accurate and when you upload your 3D models for printing to our online service we offer you a scaling tool, however for the best result it is safest to scale your models through your 3D modeling software.
This way it will be certain that your 3D models will come out as a 3D print perfectly the same. And while scaling your 3D models, remember that different technologies have their own size limitations.
We prepared for you a design guide on the maximum size for 3D printing your 3D models with different technologies and materials.
8. Check Strength
Checking the strength of your 3D models is essential, especially when it comes to mechanical engineering parts. Additive Manufacturing technologies are capable of producing fully functional parts, but for them to be able to stand the stress, they need to be strong. There are 3D modeling software tools you can use for that, as explained in the video above.
9. Hollow your 3D model
Another useful thing to do before sending your 3D models for 3D printing is to hollow them. This way the production costs will be lower as less powder will be used. This might seem like a design challenge, but there are easy ways to do it. Our tip for 3D designers is to use our Hollowing tool, available when you upload your 3D models for printing.
10. Printing Multiple Objects?
Despite that you can 3D print interlocking parts, it is better not to print multiple copies of one part within the same 3D printing order. We highly recommend for you to upload your part once and order multiple copies instead of uploading a file with multiple objects. Such file will be heavy and hard to upload as well as impossible to operate by our 3D printers.
11. Before applying Finishes

Multi Jet Fusion Finishes
Also, take in consideration if any finishing options will be applied to your 3D models. If so, maybe some design adjustments will be necessary to assure your 3D models will not lose any quality or details when the finish is applied.
Our online 3D printing service offers various finishing options such as Smoothing Beautifier, Polishing, Dying with Color Resist or Color Touch finishes. To give you the best idea of how your 3D models will look like our online 3D printing service will give you a 3D visualization of how your 3D models will look like.
12. Round details
Speaking of finishes, it’s important to mention metal 3D printing. As metal is a harder material to work with than plastic, some heavy polishing is applied. It’s a vital thing to look into when preparing 3D models for printing as any rough edges will be smoothed out while polishing.
However, some finishes might be just what you need for your production as we offer different plating options such as Mirror Polished for Sterling Silver or Pink Gold and White rhodium for Brass.
13. Multicolor 3D printing
If your production needs parts that are colorful, we also have a solution. Our multicolor will meet your expectations. But it’s important to remember about having the right color settings, otherwise, your 3D files will be unprintable.
Send your 3D models for printing today!
Hopefully, this design guide helped you to understand the steps you have to take to prepare your 3D models for printing. Our list included the most important aspects such as choosing the Additive Manufacturing technology, checking the size, detail and clearance limitations, making sure your 3D models are strong enough and adding supports if necessary.
If you run into any troubles preparing your 3D models for printing don’t hesitate to contact us! Our 3D printing experts at the Sculpteo Studio are here to help and ready to answer any of your questions.
And don’t forget to subscribe to our Newsletter and follow us on Facebook for the latest 3D printing news!