FDM vs SLS 3D Printing – What They Mean and When to Use Them
Posted By Lucie Gaget on Jul 23, 2019 | 0 comments
3D Printing or Additive Manufacturing refers to a group of technologies used to build three-dimensional objects. Depending on your project’s characteristics, the object you need to print, and the quality and cost required, one 3D printing technology might be more suitable than the others.
Currently, the most used technologies are FDM (Fused Deposition Modeling) and SLS (Selective Laser Sintering) but what are the main differences between FDM and SLS processes?
Industrial 3D printing
Although there are professional and industrial FDM 3D Printers, most printers of this type are consumer-grade printers, meaning that they are the most affordable kind of 3D printers and are mostly oriented towards a moderate printing frequency for one or a few users. On the other side, most SLS printers are professional 3D printers or industrial ones. Their cost represents a significant investment but they can handle thousands of high-quality prints per week on uninterrupted production.
If you’re curious about 3D printing but don’t own a 3D printer, you might be wondering if investing in a 3D printer is worth it. If you do, you are probably also thinking about the printing quality, the costs involved and the main characteristics of these two completely different technologies. For those of you who are in that situation, here you will find a side-by-side comparison of what you can get with each type of printer!
FDM vs SLS – The Showdown
As mentioned above, the Fused Deposition Modeling technology allows you to land in the 3D printing world in an affordable way, which is a big advantage, especially for individuals that usually don’t have a company’s budget. The core reason for this lies in the relatively simple concept behind FDM printers, which is to melt a plastic filament while positioning it in a structured way, layer by layer. That simple fact turned Fused Deposition Modeling (FDM) into the most popular printing technology and flooded the market with inexpensive and relatively easy-to-use desktop FDM 3D printers that can create objects in short lead time.
On the other hand, Selective Laser Sintering technology allows to 3D print an object by selectively sintering (ie. forming a solid mass of material by heating it but without reaching liquefaction) sections of successive layers of powder, placed on a powder bed, using a powerful laser beam. This 3D printing process most notably discards the need for support material (as there is unsintered powder all around the object being printed) facilitating the creation of complex and interlocking forms. This significantly more complex technology will cost the owner between 150 000 and 500 000 euros. Thankfully, everyone can still have access to the benefits of SLS technology without the need to purchase a printer by using a professional 3D printing service like Sculpteo.
If you want to discover more about these technologies you can have a look at our 3D Printers and 3D Printing: Technologies, Processes and Techniques page.
The capabilities of FDM and SLS can be analyzed and compared separately for three gradually increasing object complexities:
- Minimum complexity is a simple-shaped object with small or no overhangs. A spinning top will be our example object for this category.
- Middle complexity can be an object with a few overhangs or articulated parts that need to be printed all at once already assembled. For this category, we have chosen a 3D fabric similar to the ones used by the fashion industry, as Danit Peleg did with her 3D printed collection.
- High complexity is an object that may have many large overhangs, thin sections, overhangs in places difficult to access to remove support material or may not have a stable standing position to be printed on. For this case, we went with a Springy ball, which almost checks all characteristics on our list.
The head-to-head comparison done below was completed with the following machines, 3D printing materials and settings:
FDM: Stratasys MOJO and Makerbot Replicator Printers, with a layer thickness between 150 and 200 microns, printing with P430 ABS PLUS and SR-30 Soluble material on the Mojo and PLA on the Makerbot.
SLS: EOS P110 Printer with a layer thickness of 150 microns, printing white Polyamide (also known as SLS Nylon PA12). This is the most commonly used material for SLS printing.
Minimum complexity – The Tippe Top
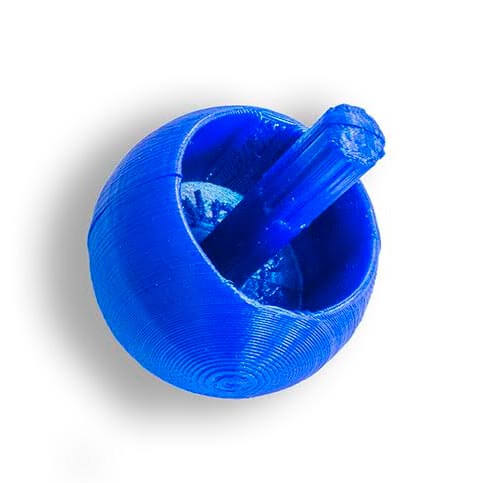
The FDM Top
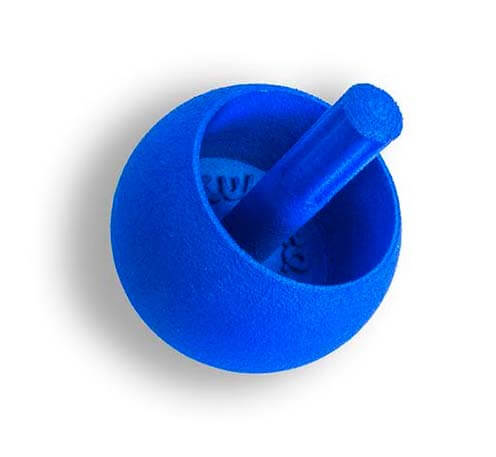
The SLS Top
The FDM Top: Due to the curved bottom of the design the top was split into two parts with the purpose of simplifying the printing. It could have been printed in several ways using support material, hence avoiding the use of glue altogether but doing that would render it impossible to print for the majority of the desktop FDM 3D printers, that don’t have a dual extruder and consequently cannot use support material. The top took one hour to print and it was doing its magic right after the two sides were glued together.
The SLS Top: It took 2 days to have the top in our hands using the SLS printer. The printing process itself didn’t take two days but the whole process did as while the top was being printed, hundreds of other objects were being printed too (it wouldn’t be practical to print one single object at once, but if it was done, it would take about an hour too). After printing, the top was polished and dyed, which accounted for about 4 extra hours of post-processing.
For this level of complexity, the main difference between the two tops is the aesthetic appearance. The layering on the SLS print is barely visible (and only on small angles), and even before polishing the surface comes out pretty smooth. On the other side, the FDM print shows an attractive shiny color but also its layers are visible for every angle, on every surface (even vertical ones). Disregarding the juncture and the poorly executed gluing, the text on the inside is hardly readable and the small overhang looks notably different than the rest of the print. Also, for some people, printing it at home can be a lot of fun.
Moreover, you may want to consider the cost of 3D printing, either at home with a full investment in your own printer or the cost of single print using a 3D printing service. It all comes down to how often you print. You can learn more about this with our Should You Buy a 3D Printer or Use a 3D Printing Service? analysis.
Medium Complexity – The ChainMesh
FDM Chainmesh
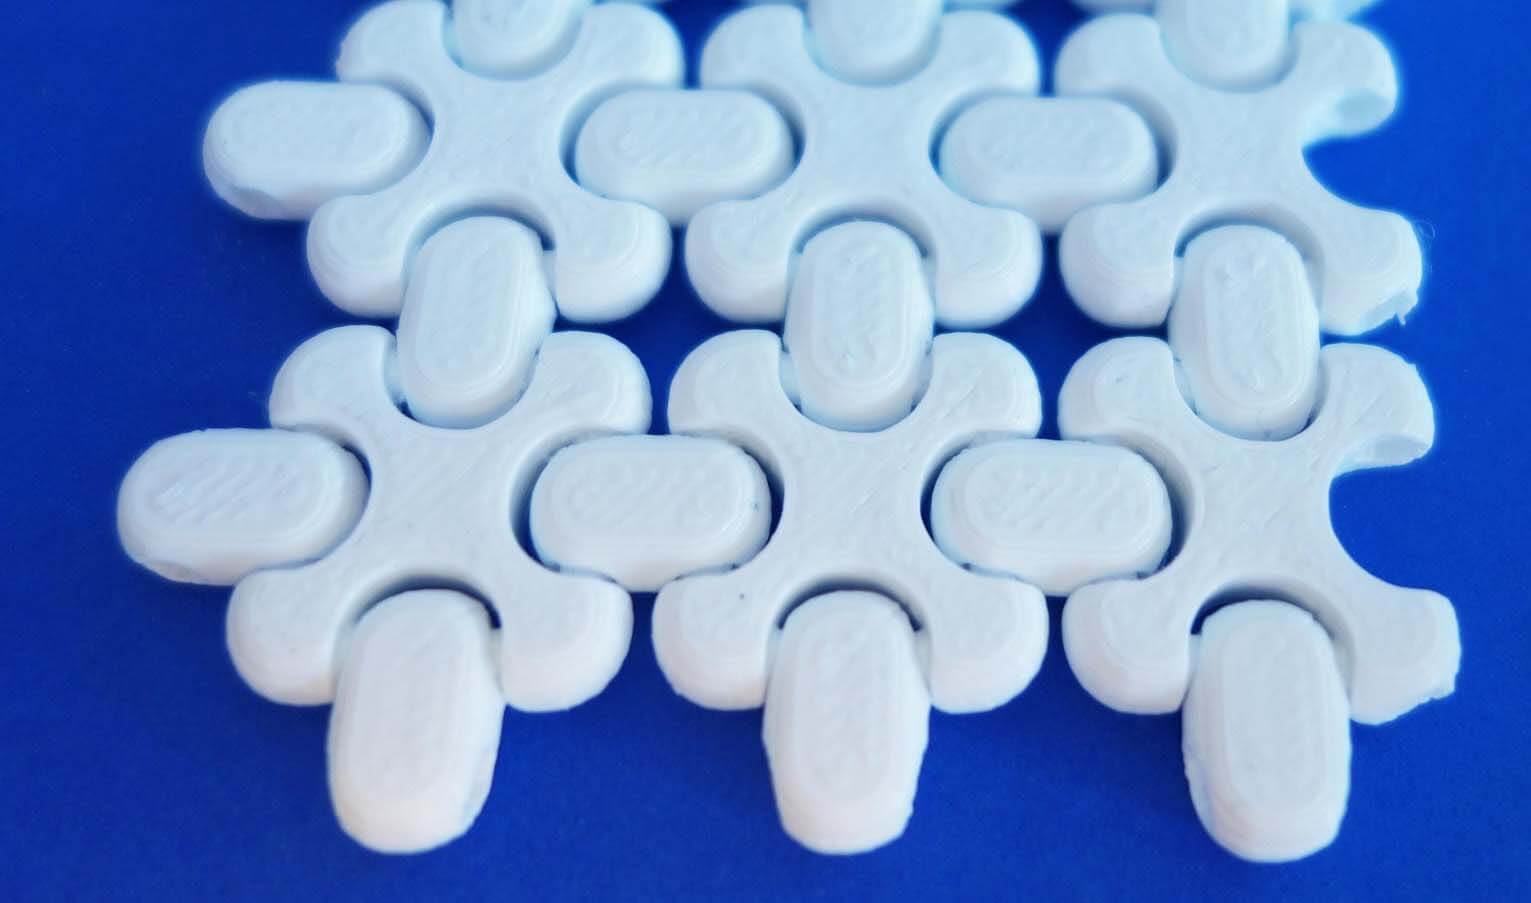
SLS Chainmesh
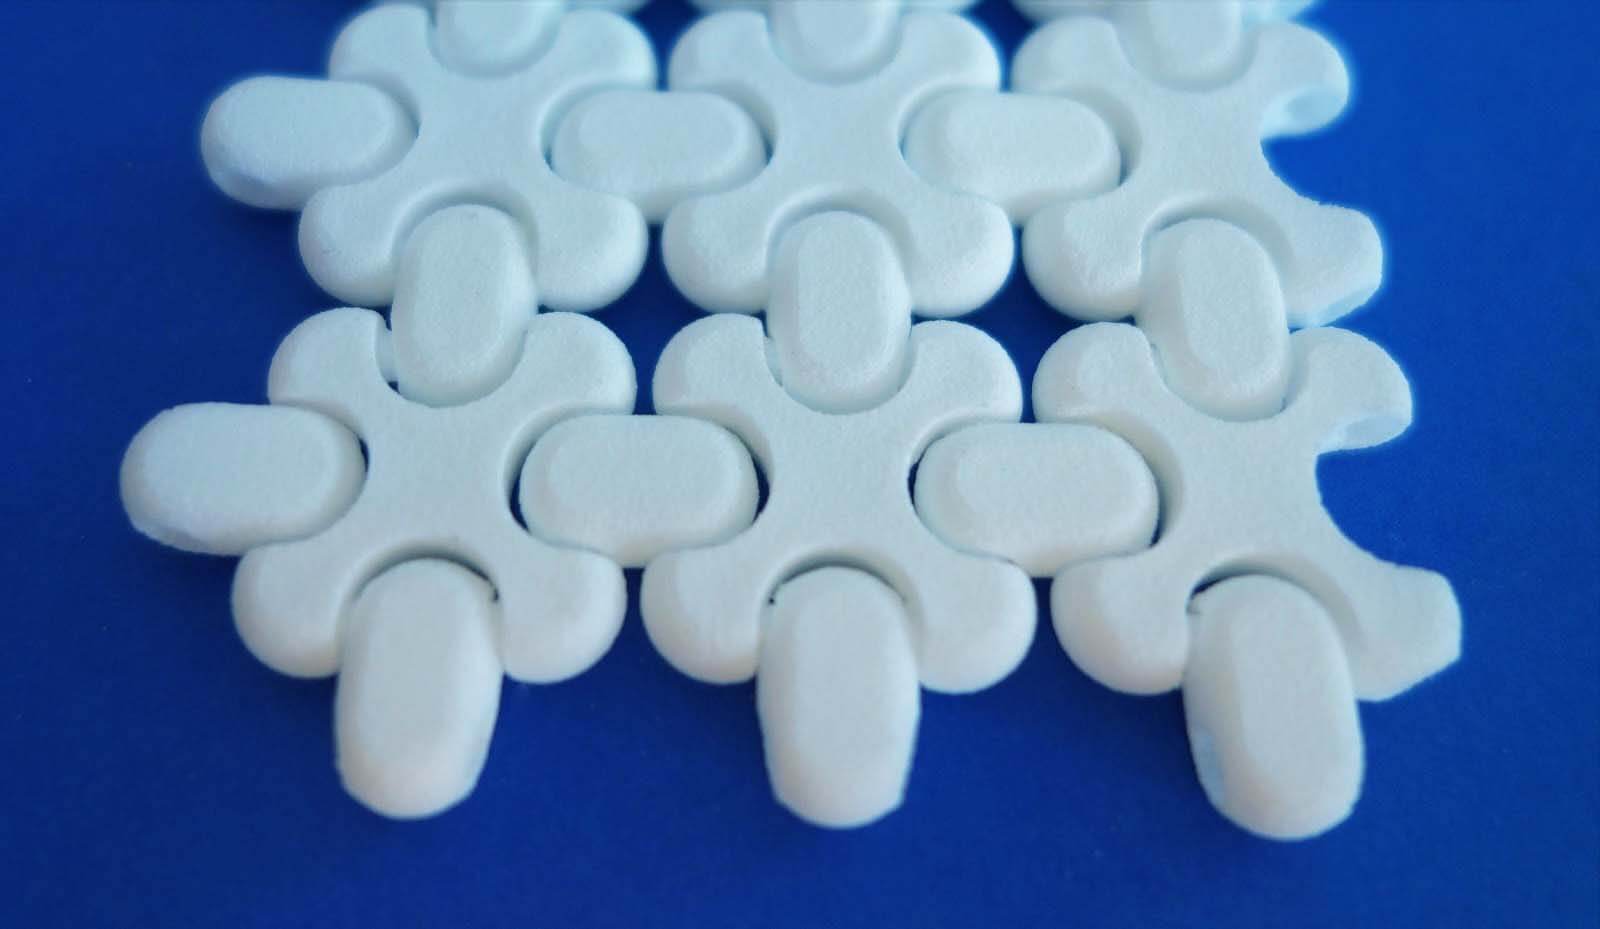
The FDM ChainMesh: The ChainMesh with all its individual parts was printed all at once already assembled, in almost 4 hours. The finish is rough and not really aesthetically pleasing to use for fashion purposes. The mobility between the components is good for a prototype and this allows to test multiple iterations in a short period of time.
The SLS ChainMesh: This ChainMesh was also printed in one single run, in the same way that the Tippe Top above was produced, but without post processing. The finish is smooth and its appearance would go well for fashion purposes and dyeing if required. The mobility of the components was smoother than on the FDM print, allowing more fluent movements of the entire mesh. This ChainMesh could have also been used for prototyping purposes but at the same time, you are definitely getting closer to the final appearance you are probably looking for.
On both the FDM (Fused Deposition Modeling) and SLS (Selective Laser Sintering) ChainMesh, the freedom of movement is pretty much the same although you do have to push harder on the FDM print due to the rougher surface. On the picture above you can clearly see the layers on the FDM object on the left, which is not the case on the SLS (Selective Laser Sintering) one on the right.
You can observe that the last layer on the FDM model left some lumps on the top. This detail might be a problem depending on what you are using the part for. If you wanted to dye it, the SLS part would be the best choice, but you can also print in multiple colors and materials on an FDM printer.
High complexity: The Springy ball
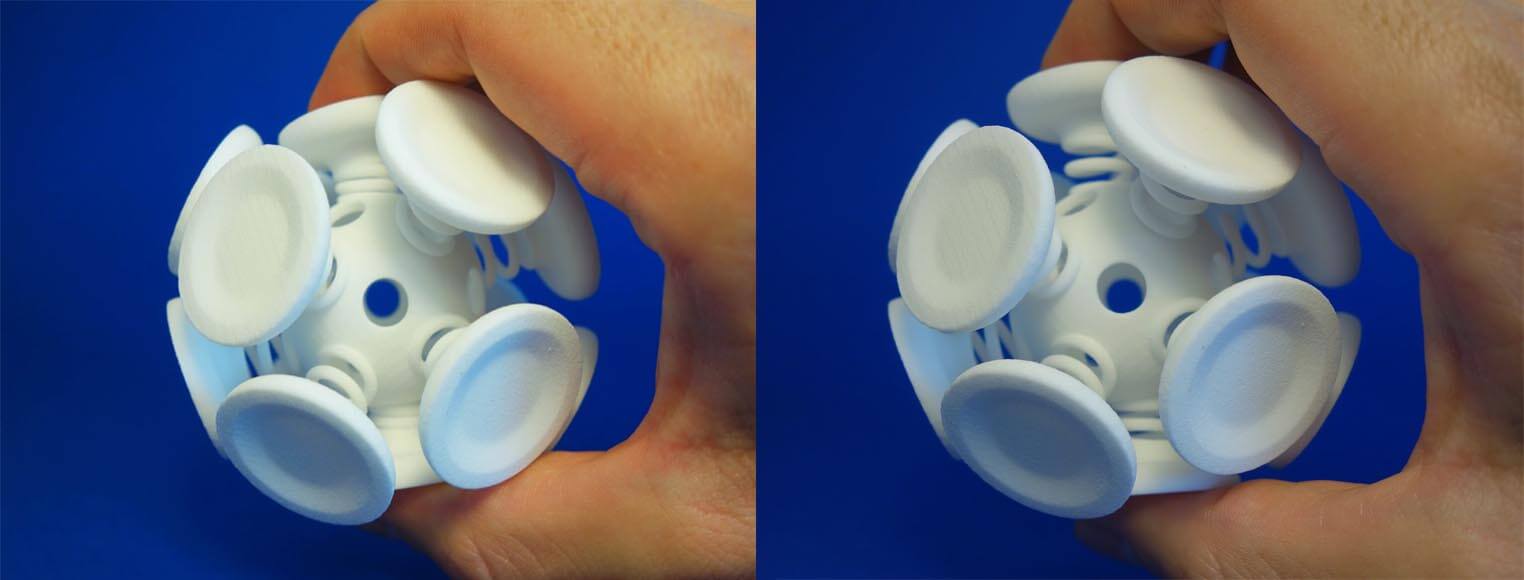
The SLS Springy Ball: The SLS Springy Ball that would be a real challenge for any 3D printer that requires support material, was nothing too special for our SLS printer. As we commented before, on an SLS printer the objects being printed are simultaneously being “buried” in unsintered powder, so any overhang can easily rest on this powder that acts as building material and support at the same time. This on top of the high strength of Polyamide gave us a bouncy and amusing 4″ Springy Ball. The printing time was the same as usual, and although a unique print could be done in about 3-4 hours including cleaning, it took us about 2 days to have it ready for the same reasons aforementioned.
The mechanical properties of Nylon PA12 are very interesting for this kind of projects. You can check out the technical specifications of SLS 3D printed Nylon PA12 and its design guidelines here (wall thickness, dimensional accuracy, tensile strength, build volume, etc.).
The FDM Springy Balls: This print was not successful. It took 19 hours to print it using support material, a lot of it (about 3 times as much as ABS itself when using Stratasys automatic support tool). We ran into problems when we tried to dissolve it though, as the time required to dissolve all that amount of support was too long, and the very same solvent started attacking and weakening the ABS itself. This wouldn’t be that much of a problem if we didn’t have really thin sections, as we have on the springs. In the end, by the time the support looked almost gone, we took out the part out of the solvent and it literally fell apart, with only the middle sphere and discs remaining.
Despite most of the support material not being easily accessible to remove it mechanically, we printed this object again but trying to get rid of as much support as possible by manually breaking it off, in order to minimize the time required on the solvent. Unfortunately, we still needed a few hours (but not 7 like the first time) which was too long for the springs to withstand, ending with similar results once again. Bear in mind that we are using the official solvent manufactured by Stratasys for this printer and this support material.
Finally, we agreed that this design was particularly difficult for a desktop FDM printer. It may not be impossible, but for sure quite challenging. We were left wondering how the springs would have behaved and/or if they would have been strong enough, due to the strong layering effect visible on FDM prints.
When to use FDM or SLS?
If you own an FDM 3D printer and you want to print objects of minimum to medium complexity, the FDM technology may be the best choice: it’s quicker, cheaper, and offers good results. Moreover, there are numerous FDM materials available, with diverse properties, even if there’s not such a wide range of options than with Selective Laser Sintering. Also, the parts are not post-processed in the same way. But you made your 3D printed part yourself, which is pretty cool!
That being said, the benefits of SLS 3D printing are numerous. Indeed, you might want to consider our professional SLS 3D printers for your more advanced projects, for complex designs, for rapid prototyping, functional prototyping, rapid manufacturing, low-volume production, or if you need a lot of copies and you don’t want to spend a week by the 3D printer.
Also, Selective Laser Sintering technology is mainly used in the field of industrial 3D printing. Many industries use Selective Laser Sintering (SLS) to make challenging projects come to life. For instance, did you know that it was possible to create medical devices thanks to additive manufacturing? Or even to produce custom-made prosthetics after anatomical models, obtained through 3D scanning, using an SLS machine?
Remember that depending on the shape, size and finish of your object, you can get up to 80% off for large quantities.
In the industrial field, SLS 3D printing even replaces more and more traditional manufacturing process, such as injection molding or CNC machining.
For those middle ground objects, you should ask yourself:
What is the purpose of this object?
What technical properties do I need?
What finish quality do I need?
Based on the answers to these questions, you can choose one printing technology or the other. Objectively, SLS prints tend to look a bit more like actual products, either industrial products or consumer products, since the layers are rarely visible. On the other side, FDM printers are so popular that there is a humongous variety of filaments, colors, textures, etc. Luckily, we also offer a wide range of 3D printing materials, colors and finishes that can give your object a finished product look when it comes to printing with the SLS technology, and we are constantly seeking to offer more materials, finishes and colors. For instance, you can try Nylon 3D printing, and many other powder materials, on our online platform.
If you want to have a first idea of how a 3D printing online service works, upload your 3D file!
Curious about 3D printing? Our online resources are here to give you a hand thanks to a large knowledge base! For instance, learn more about the other printing methods, such as Direct Metal Laser Sintering (DMLS) or HP Multi Jet Fusion. We also help you to create the best 3D models with many tips on how to design for additive manufacturing. You can also learn more about the numerous materials and applications of additive manufacturing in our dedicated blog where we share all the latest 3D printing news.


 Connect with Google
 Connect with Facebook