 Connect with Google
 Connect with Facebook
3D printing failure: How to avoid crossed volumes on your 3D model
Posted By Amandine Richardot on Aug 29, 2017 | 0 comments
Has your 3D printing gone wrong? CAD design for additive manufacturing is not always an easy task, especially if you’re not a professional designer! 3D models with crossed volumes are one of the most common design fails we encounter at Sculpteo when verifying that your object is printable. What is it? Why is it an issue? And what can you do to avoid it? Today we teach you how to prevent this crossed volume issue from happening!
3D printing failure due to crossed volumes: A common example
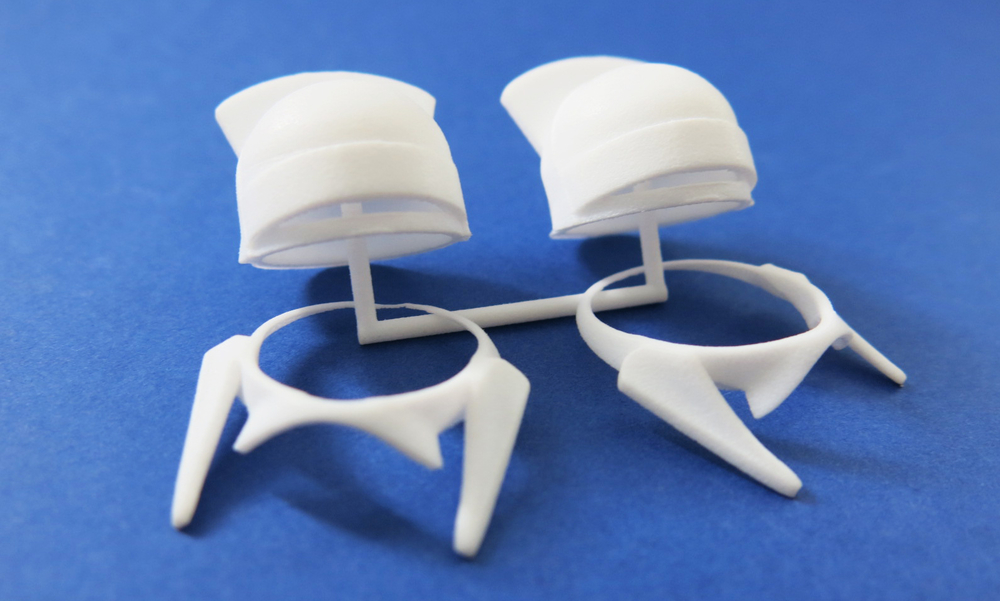
3D printing is a great technology, but it can encounter some difficulties. Here’s one case where the result was not really matching our customer’s expectations:
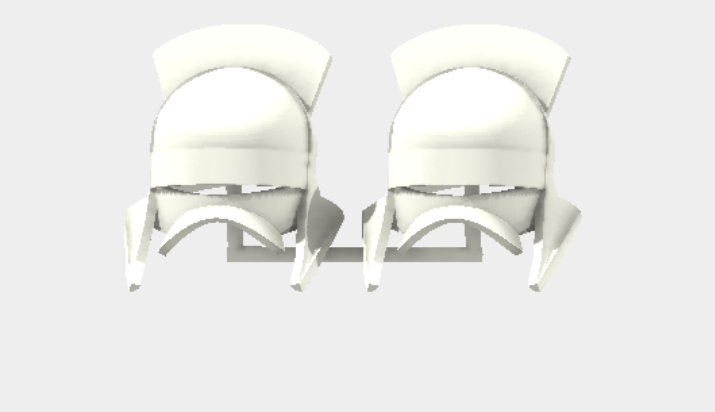
You might be wondering what possibly happened to get such a result. Here’s the original model, which appears to be two totally normal helmets:
But we need to dig deeper to find what’s problematic with this 3D design:
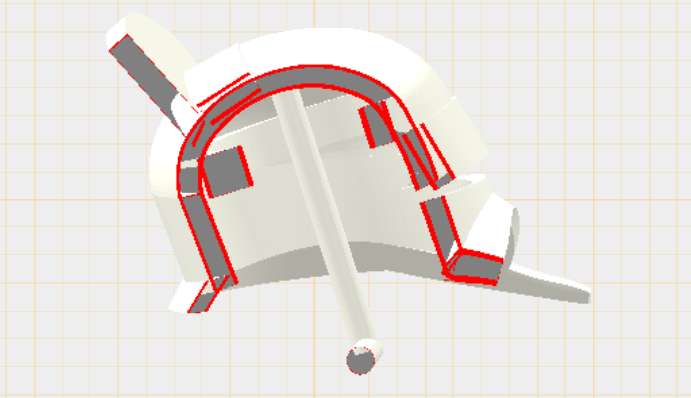
Indeed, with this crossed view, you can notice that there are red lines in the middle of the different surfaces. They clearly indicate that there are crossed volumes, which are at the core of this 3D printing failure.
What are crossed volumes?
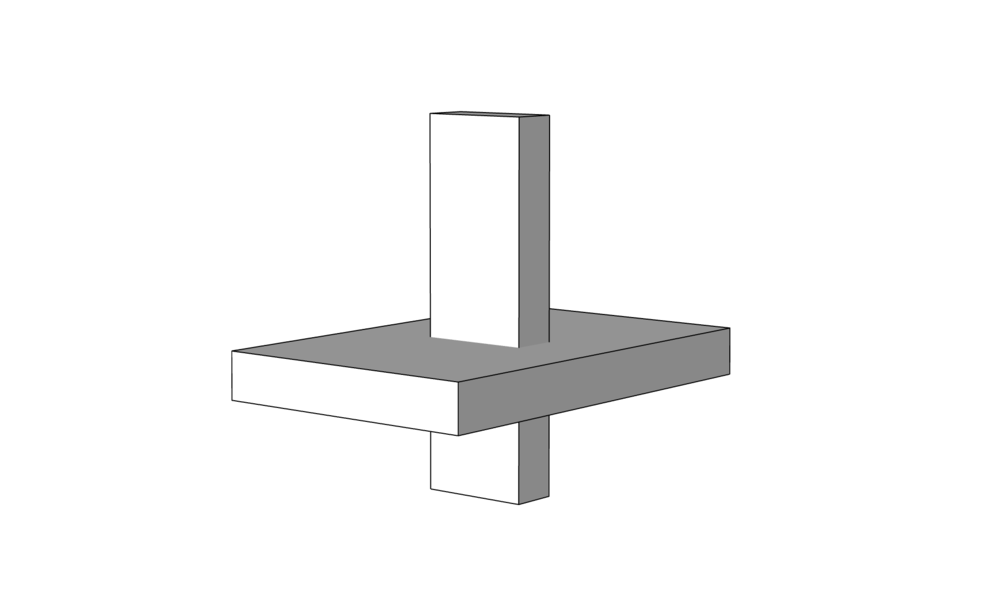
To help you understand what crossed volumes in 3D modeling are, let us take a much more simple design. We’re going to use these two rectangle shapes:
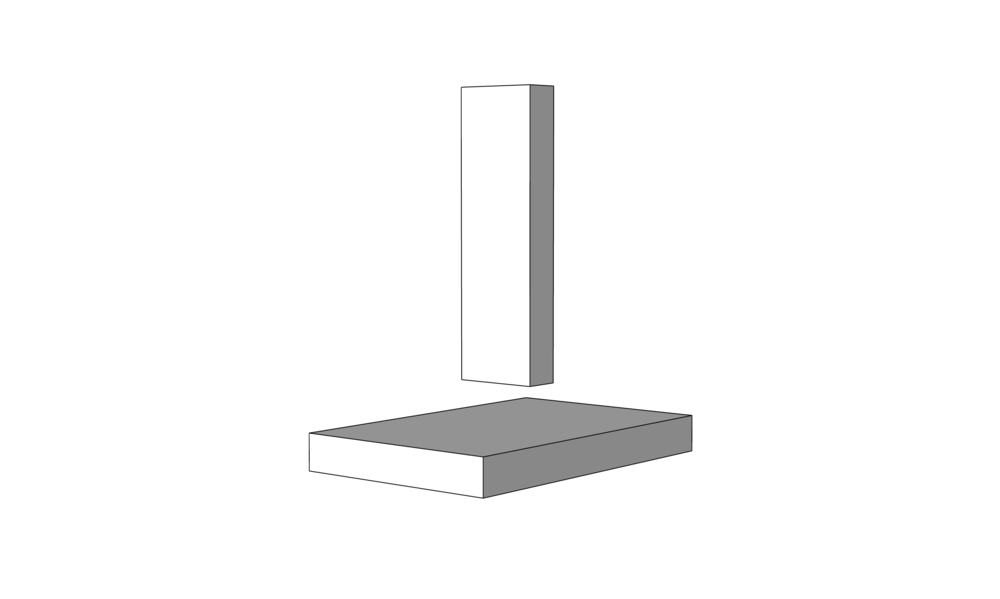
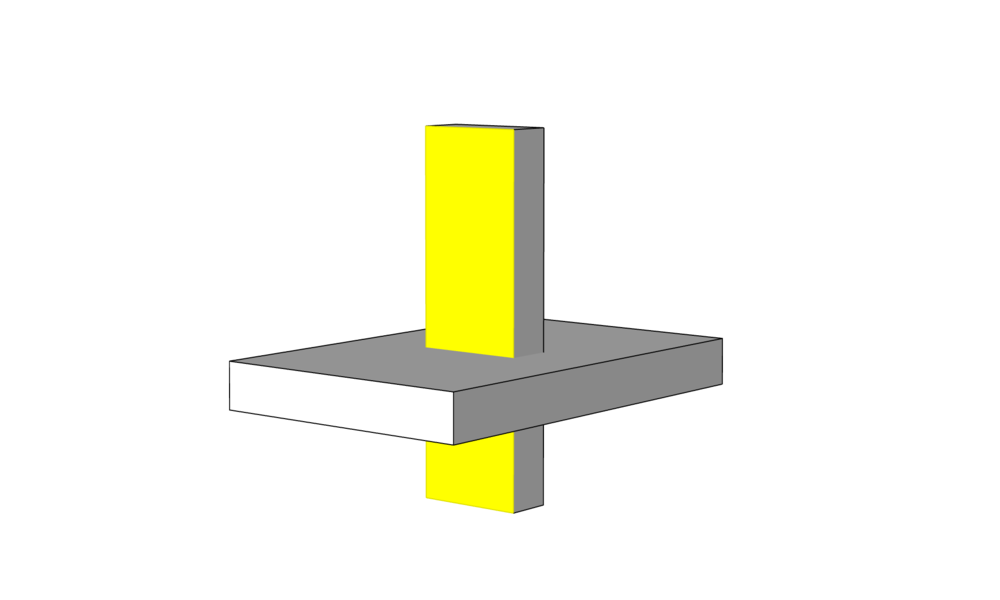
If we decide to make them cross each other, we’re going to have this result:
That’s where things are going wrong: our two rectangles remain two separate entities, crossing each other but not being a unique volume:
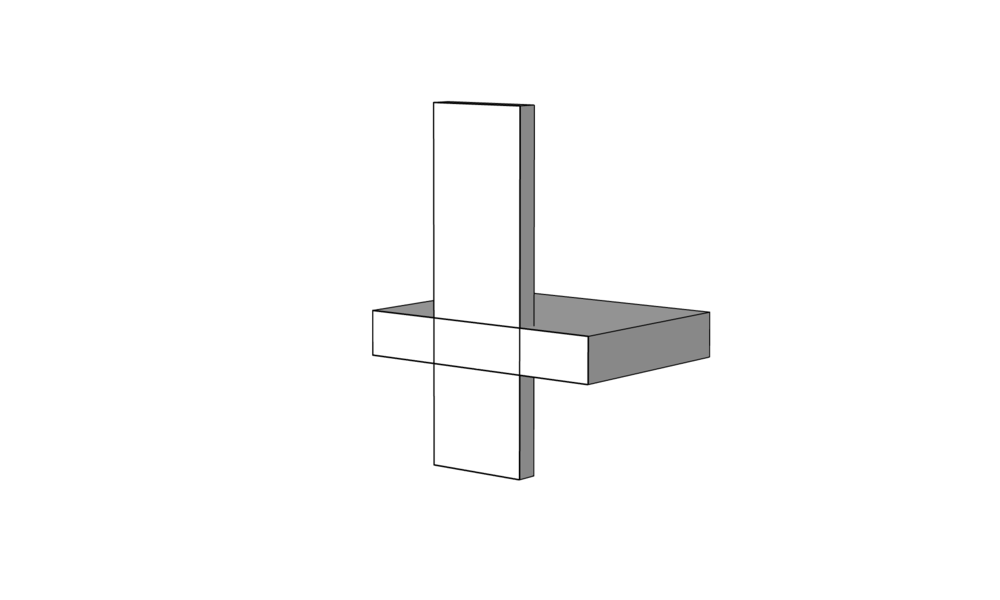
And unfortunately, a 3D printer has many difficulties reading these crossed volumes. It considers that there are two separate objects and, thus, will print them apart.
The solution: Boolean Union
How to avoid this common 3D printing failure? Well, we have a good news for you: it usually only takes one click in your CAD software!
Indeed, you just have to click on the “Boolean Union” button that you can find in any CAD software and your selected elements will be fused together.
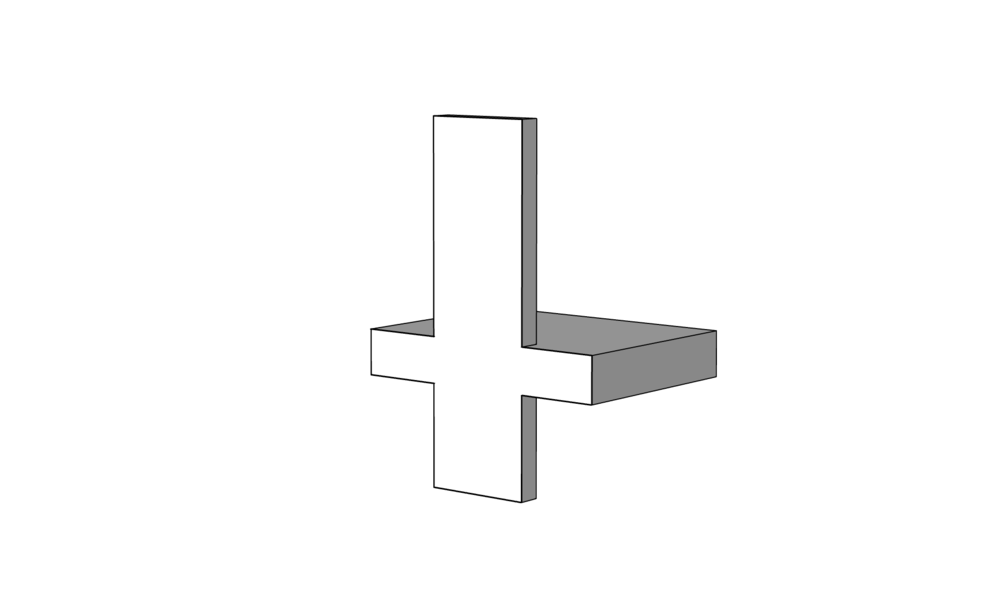
After doing this, your 3D model is ready to be successfully 3D printed!
Discover our 3D design tutorials!
Looking for some other 3D design tips? Discover our 3D design tutorials, allowing you to quickly create your models for 3D printing!
- Solidworks tutorial
- Sketchup tutorial
- Fusion 360 tutorial
- Inspire tutorial
- Tinkercad tutorial
- And many others!