 Connect with Google
 Connect with Facebook
How to Use a Drone to Create a 3D Model
Posted By Jess Hedstrom on Aug 23, 2017 | 0 comments
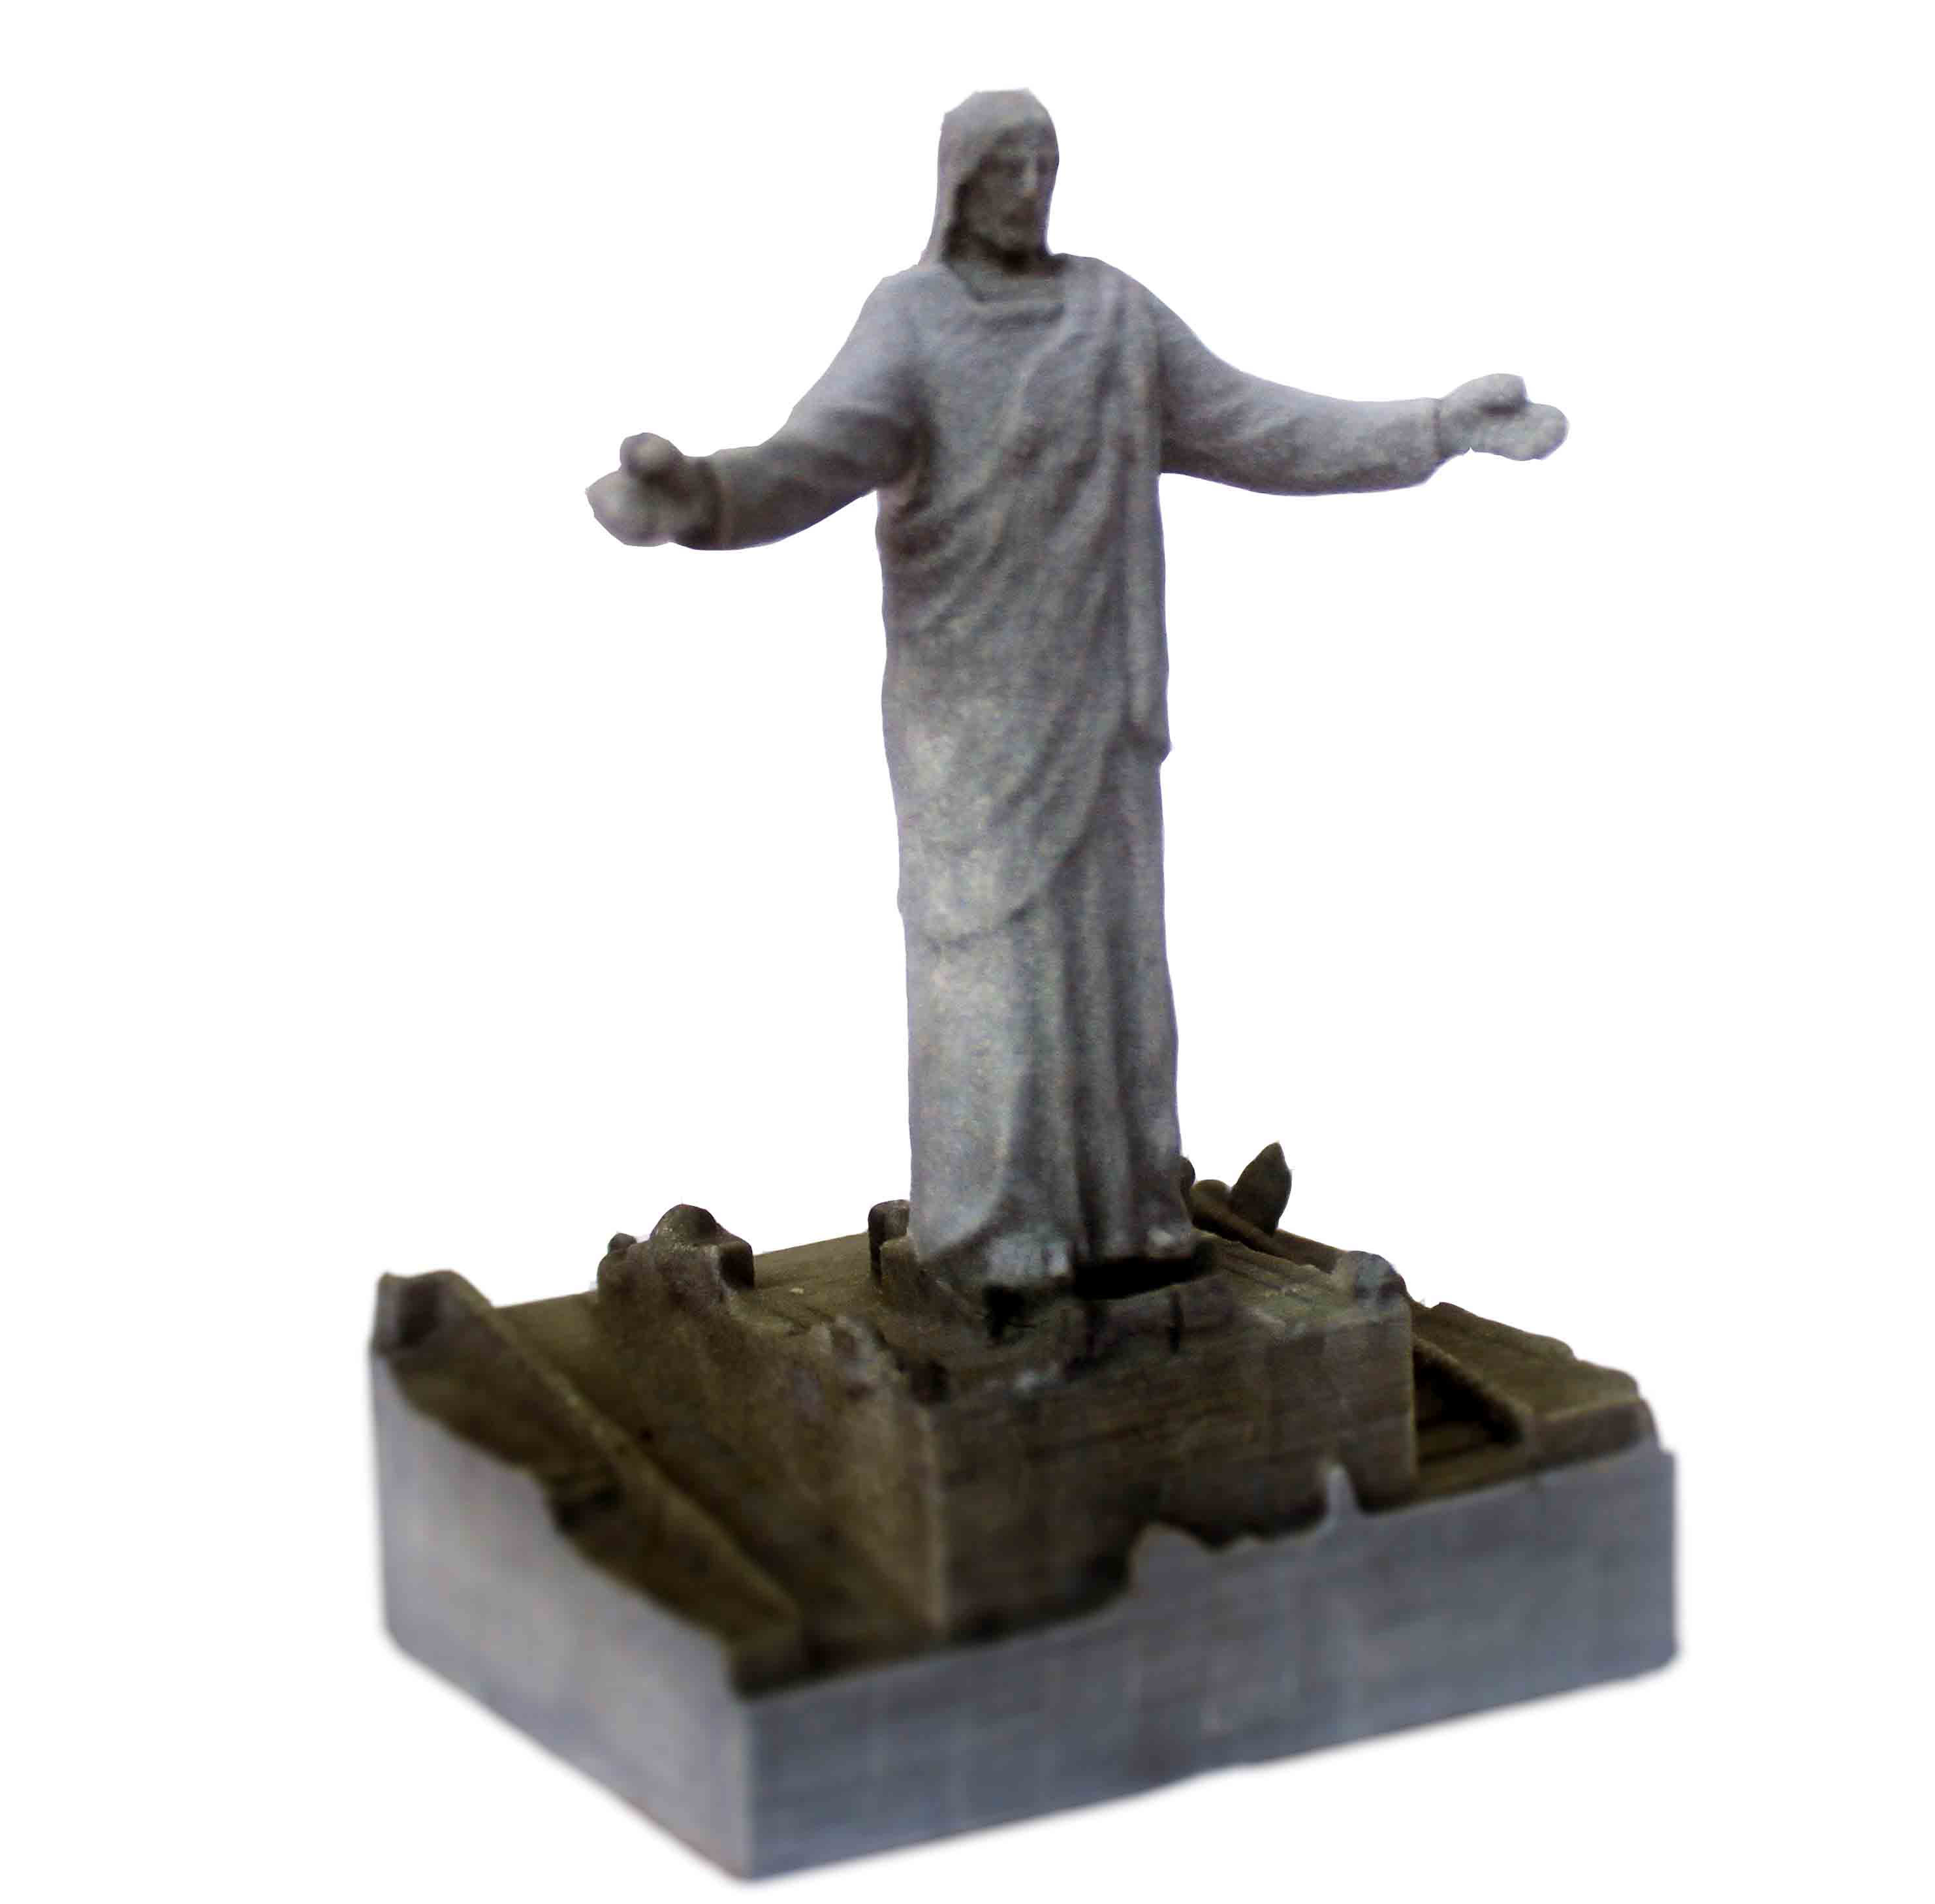
Using a drone to take photos when scanning large items is becoming a more common practice in 3D printing. We talked to wildlife photographer Jeff Cremer about how he used a DJI Phantom 3 Pro drone, a camera and a modeling software to create a replica of a statue of Christ of the Pacific, on a hill in the capital Lima, Peru. Jeff shared with us his method for capturing the 100+ photos.
Before we share the steps to create scan files for large items using a series of photos, we think it’s important to talk about the process behind this type of “3D scanning”. We’re going to use a process called photogrammetry, which is the process of collecting a group of points from a series of photos.
How to use a drone to create a 3D scan
Jeff used the “point of interest” setting on his drone which allows the drone to automatically circle the statue while taking pictures of it. He set the center point at the top of the statue’s head and moved it back by about 82 feet (25 meters), and that’s where he set his radius.
The camera on his drone was set to take photos every 2-3 seconds. So as the drone completed one circular pass around the statue the camera was able to collect approximately 30-40 photos.
When I asked Jeff if there are certain issues that can affect the results of the scan due to the use of a drone, he let me know that changing light, dark shadows and lens flares can be an issue. To reduce the amount of correction your 3D model may need because of changes in the lighting, go out on a day when the lighting is consistent which is typically an overcast or cloudy day. Doing this will reduce your chances to encounter these issues.
Moreover, to reduce the blur effects that can occur in photos when using a drone, make sure to check if your camera will allow you to turn off the image stabilization. If it cannot be done, try to change your shutter speed to something like 1/1000th of a second to reduce the “noise” which causes the blurring effect.

The flight path of the drone was programmed to make 3 circles around the drone one around the top of the statue, one around the head and shoulders and the last was around the base of the statue.

The photo above shows the flight path; each blue square is a photo that was taken. The three levels that the photos were taken from are more obvious in this photo.
If you’re interested in creating your own drone feel free to use this tutorial care of Make Magazine. You can also refer to our blogposts such as ‘A drone that combines Laser Cutting and 3D Printing” to get more inspirations and ideas in creating your own drone.
First Rendering: Creating 3D model from the 100+ photos
Jeff used a program called Altizure to make the 3D rendering of the statue. This software is specifically created for generating 3D maps from drone photographs. Altizure is a free software which can be used from your browser. It does, however, require you to enter in your UAV registration information. Make sure that you have your UAV model & Camera model ready because they do ask for that information. If you have a drone that you made yourself, don’t worry, you can indicate that you have a DIY drone and it will still work.
One of the downsides of Altizure is that you cannot export the file for 3D printing, but they do provide a very detailed render. There are additional software options aside from Altizure, for example at Sculpteo we have used Autodesk 123D Catch in the past, along with the powerful combo Meshmixer and Meshlab. At Sculpteo we have tutorials that can guide you through how to use Meshlab to clean up a 3D model created from 100’s of photos, complete with a webinar on Meshlab and a similar webinar on Meshmixer that walks you through the process.
Jeff used Autodesk Memento to upload his images to their cloud server. He also used the slice tool in Memento to cut away the unnecessary background. He kept only the statue & base. When you compare this wireframe image of the statue with the first & second photos in this article you can see just how much Jeff cutaway: the mountain the statue is sitting on, the parking lot, houses in the background, and a little pasture with horses on it to the left of the parking lot have been all cut away.
Viewing the model in wireframe or mesh-mode exposes the model’s defects like holes, particles or bad intersections (bad geometry). These could cause problems when trying to 3D print your model. “3D scanning for 3D printing” is a great resource for fixing some of the most common issues, including those listed above which can take place when creating a 3D model from a series of photos. Jeff then exported the file from Memento as a .obj and he zipped it together with the texture maps (again visit our webinars if you’re unfamiliar with the file types), and Jeff uploaded his model to the Sculpteo website.

Viewing the model in wireframe or mesh mode exposes the model’s defects such as: holes, particles or bad intersections (bad geometry).
I chose Sculpteo because I saw that they had full colour printing available. I also liked that their website does automatic analysis and repair of the uploaded files to make sure that the model prints ok. Shapeways.com or other services may have these options but Sculpteo looked the easiest. – Jeff Cremer, Amazon jungle wildlife photographer

If you’re interested in learning more about Jeff Cremer you can view his photos on Instagram or by visiting his website.
3D printing can also be a real asset for your drone manufacturing process. 3D printed drones present various advantages: Start 3D printing drone now using our online 3D printing service.