 Connect with Google
 Connect with Facebook
Introducing our new Print Page: Making our 3D printing service more user-friendly everyday
Posted By Amandine Richardot on Oct 18, 2017 | 0 comments
Offering you a more customer-centric experience on our 3D printing service is one of our main focuses. That’s why, as some of you might have noticed, we recently made some updates on our Print page. What has changed exactly? Why did we decide to modify it? Follow the guide!
What is our Print page?
Our Print page is the page that appears straight after you upload your 3D model on our 3D printing service. Here’s how it looks:
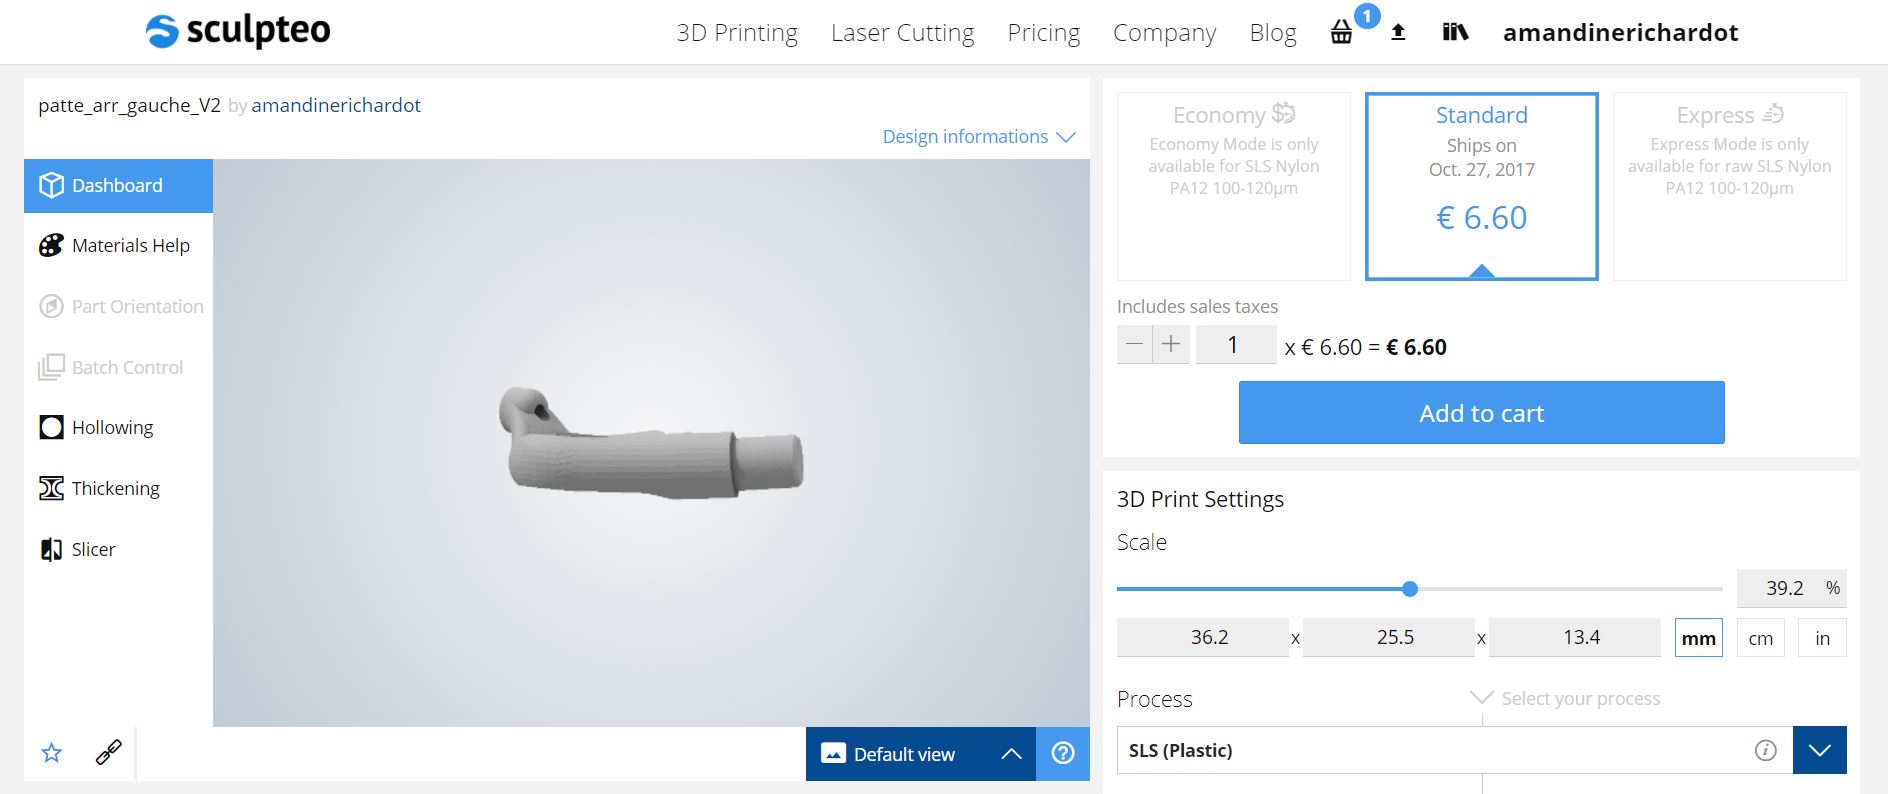
This page is an essential part of your journey on our website. That’s where you can choose the technology, material, finish, and color for your 3D printed part. You can also use our various 3D printing software tools like Part orientation, Batch Control, Hollowing, Thickening, and Slicer. To learn more about these tools, you can refer to these blog posts on our Repairing tools, our Optimization tools, and our Reviewing tools!
Arthur Cassaignau, Product Owner at Sculpteo, managed the whole project. Here’s why he thinks our Print page is key:
“The Print page is where our users set up their 3D prints, but it’s more than that: this page is a synthesis of all of our knowledge. We want our users to be able to set up their prints according to what they precisely want (number of units, dimensions, materials, technologies), but that’s not the only thing. On the exact same page, and at the same time, our customers can visualize clearly their part thanks to our 3D viewer which is dynamic, and they can use our various tools developed in-house.”
Why we decided to make some changes on our Print page
The former version of our page had been created with other constraints than the ones we face today, as explained by Arthur:
“Sculpteo’s offer changed a lot over the past 3 years. We integrated various 3D printing technologies, like CLIP (DLS), HP Multi Jet Fusion and metal 3D printing processes, and we launched several new materials. As a result, we needed to make some changes on this page for our customers to find easily what they are looking for.”
Also, 3D printing software is a key expertise at Sculpteo, and we wanted to give our customers an easier access to our online tools:
“Our 3D printing software tools are really performant, but they were a bit hidden in our former page. We wanted to make them more visible.”
The goal behind these changes was clear: offering you the best 3D printing experience ever.
“Our goal is to avoid confusion for our users when they order a 3D print at Sculpteo. We want to make sure that each customer makes the right choice, and that he will fully enjoy the potential of our 3D printing tools.”
What has changed on our Print page
Many things have changed on our Print page to make your order process easier! The bigger change is that your 3D printing settings are now in a single place, right under the pricing. That’s where you can set up the scale and make your choice between our processes, materials, finishes, colors, and varnishes. This is a major change because it makes it easier for you to find your way through our various choice of 3D printing options.
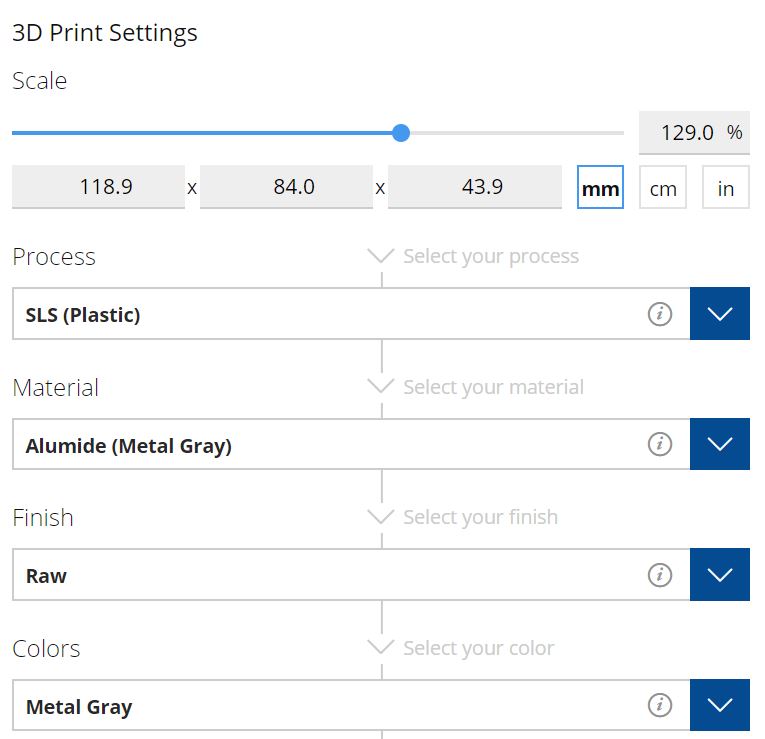
The price widget has also been updated. It now functions with cards showing the economy mode, standard mode, and express mode.
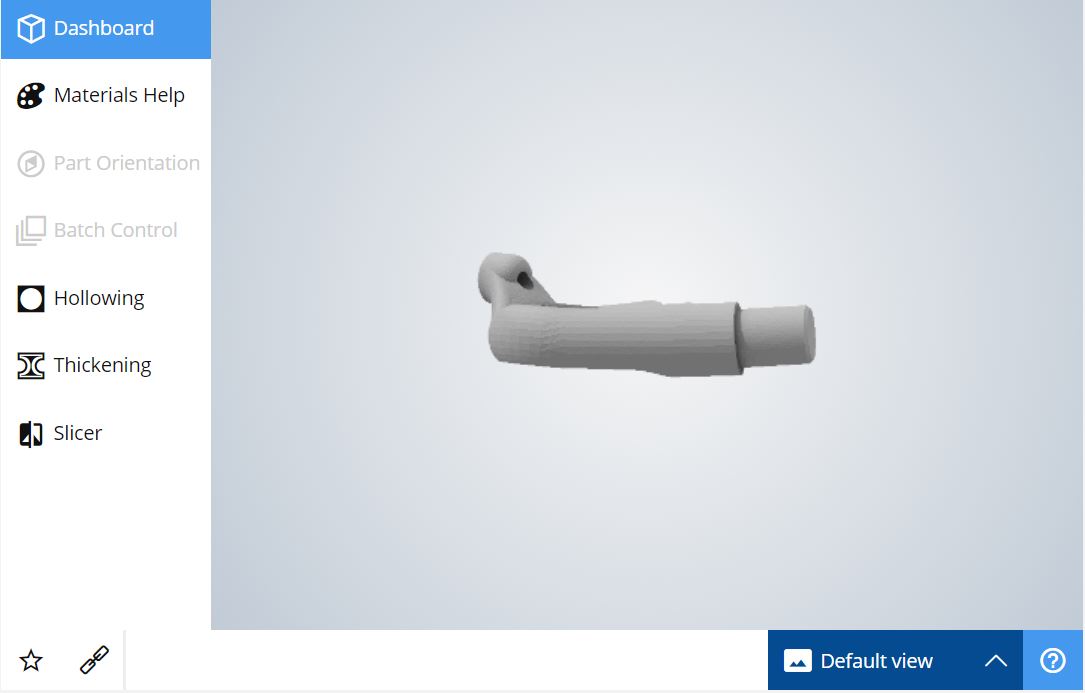
Regarding our 3D printing software tools, which used to be located in tabs underneath the 3D viewer, they are now integrated into it. You can find them on its left: Part orientation, batch control, hollowing, and thickening. The different views can be found in the right bottom corner of the 3D viewer: Default, wireframe, cutaway and solidity check.
Other functionalities can also be interesting. The “chain” icon lets you directly copy the URL of the page to share it. The Question Mark gives you useful tips on how to make the most of our 3D viewer and of our 3D printing tools.
Finally, to make sure that your 3D model can be 3D printed, we display a message when you click on “Add to cart” if some fragile areas were identified on your part. In that case, you’re asked if you want to go back or to proceed.
Our 3D printing software tools are still available
Do you want to learn more on how to use our 3D printing software tools? We even created some video tutorials to help you master them.
Here’s one on Part orientation for instance:
You can also thicken automatically your 3D model is it’s too fragile:
Moreover, you can hollow your 3D printed part to make it lighter, and thus cheaper:
Ready to use our new print page? Upload a 3D model and start using it now!