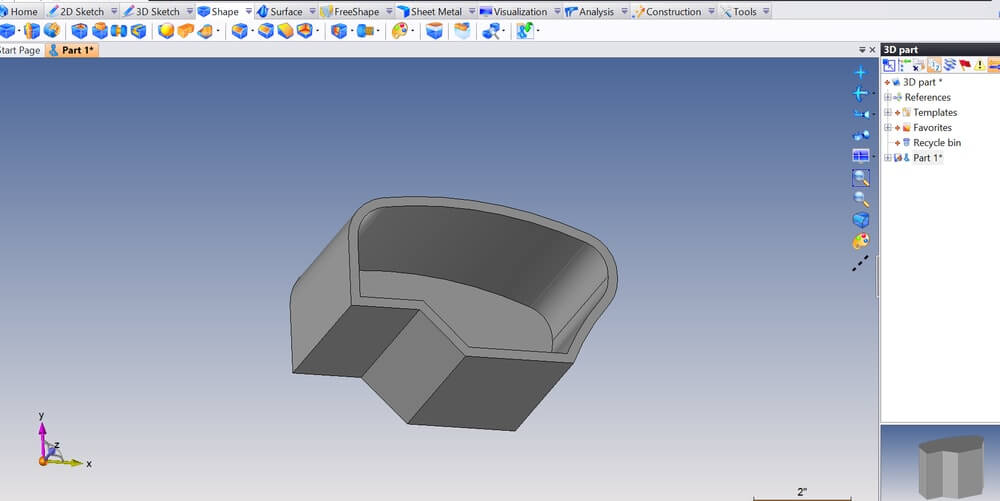
Create a solid 3D part with TopSolid

Summary​

1. Create a sketch with TopSolid

Now you have a sketch that is in 2D. In order to turn it into a solid 3D part, you have to extrude it. You can extrude a part in three possible ways. 

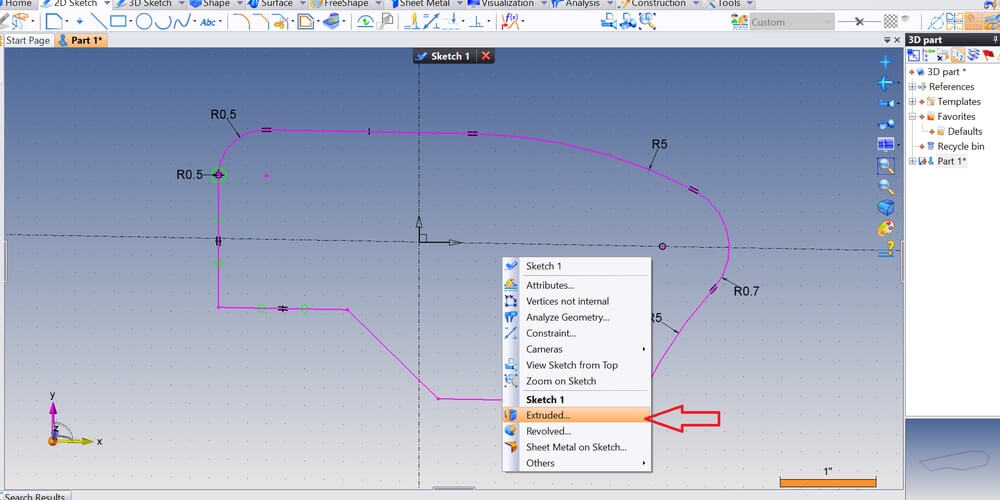
One way is to right click on the sketch and select “Extruded”.

TS 1.2 1.jpg

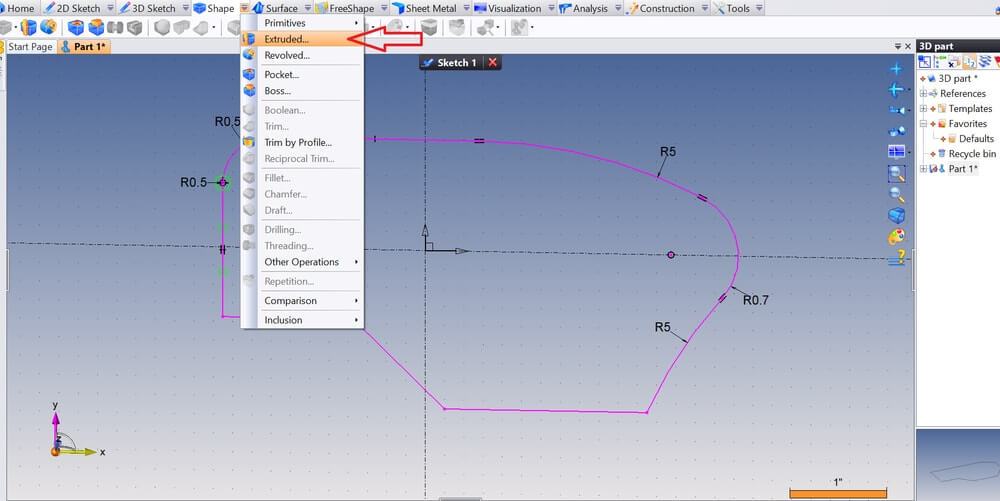
The other way is to go the menu on the upper bar, select “Shape” and select “Extruded” in the list of the available options. 

TS 1.2 2.jpg

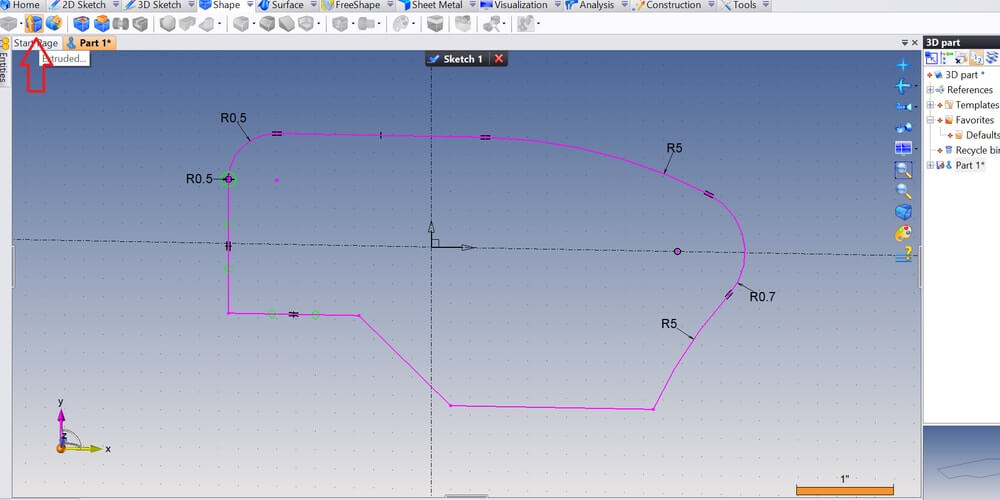
The easiest and simplest way, especially when you get familiar with the software, is to select directly the “Extruded” button from the menu bar, as indicated by the red arrow in the following picture. 

TS 1.2 3.jpg

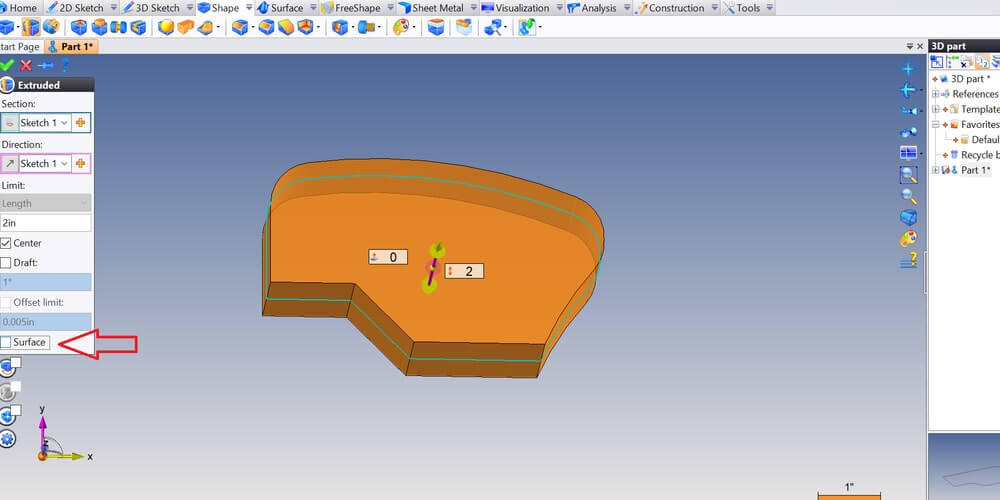
No matter how you choose to do it, when you enter the extruder mode it looks as in the following picture. If the “Surface” box is checked, you have to uncheck it so that your model is extruded as a solid part, and not only as an outline.  

TS 1.2 4.jpg

Also, enter the height of the extrusion and unbox the “center” option, so that the extrusion is distributed only towards one direction. Now you can validate. 

Your 3D model should look like this:

TS 1.2 5.jpg

A very useful tool when designing a 3D model is the “drilling” tool. With that, you can create holes in your solid 3D model. With TopSolid software, using the drilling tool is particularly easy when you’ve already designed some circles while sketching. You can activate the “drilling” tool in two ways. 

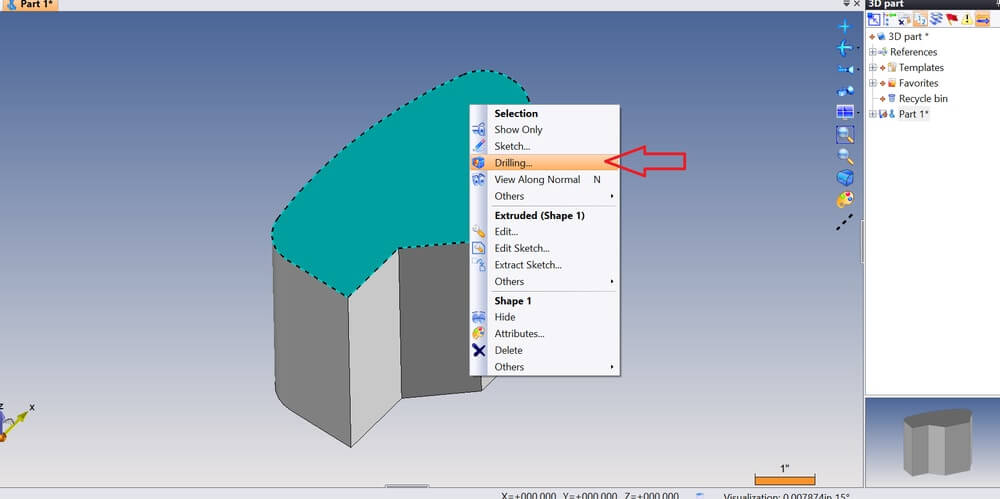
The first way is to right click on the surface of your 3D part where you want to create a hole and select “Drilling”.

TS 1.2 6.jpg

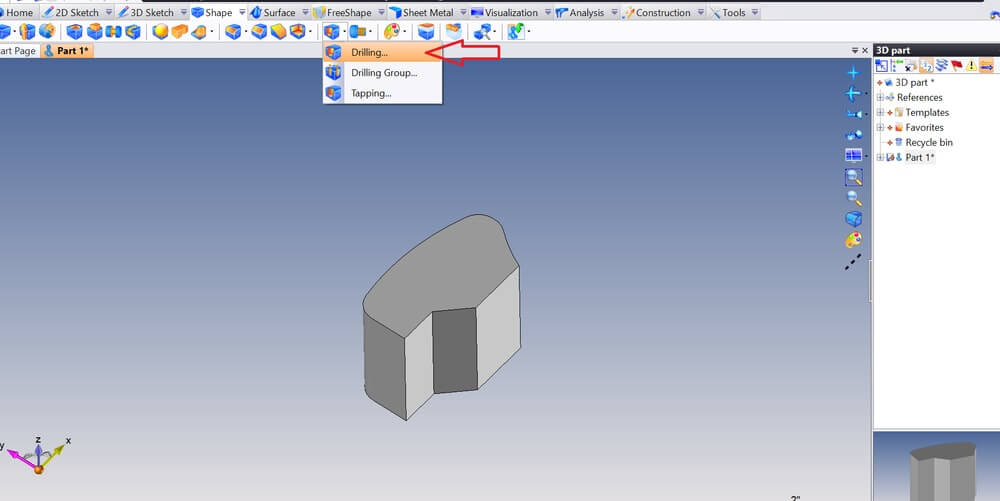
Otherwise, you can go to the upper toolbar and select “Drilling” as indicated in the following picture.

TS 1.2 7.jpg

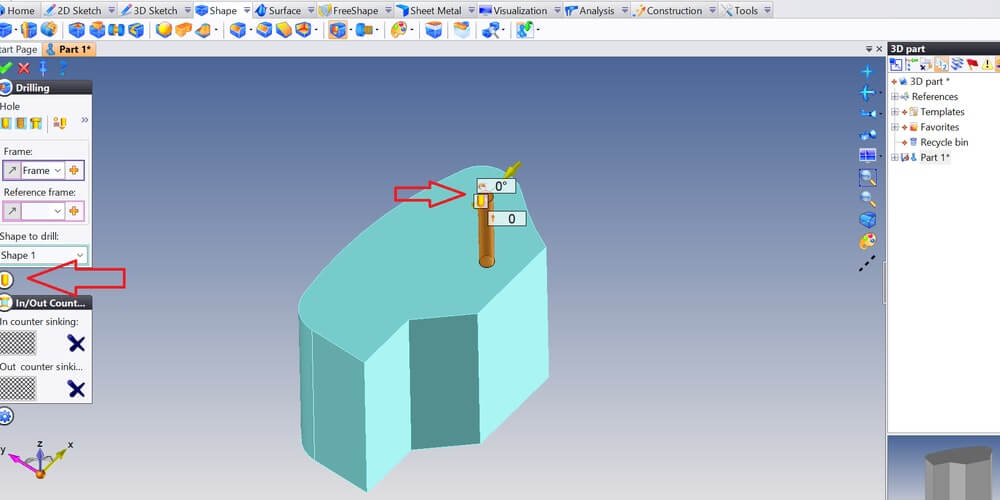
Now, select the place of your 3D design you want to place the hole on.

TS 1.2 8.jpg

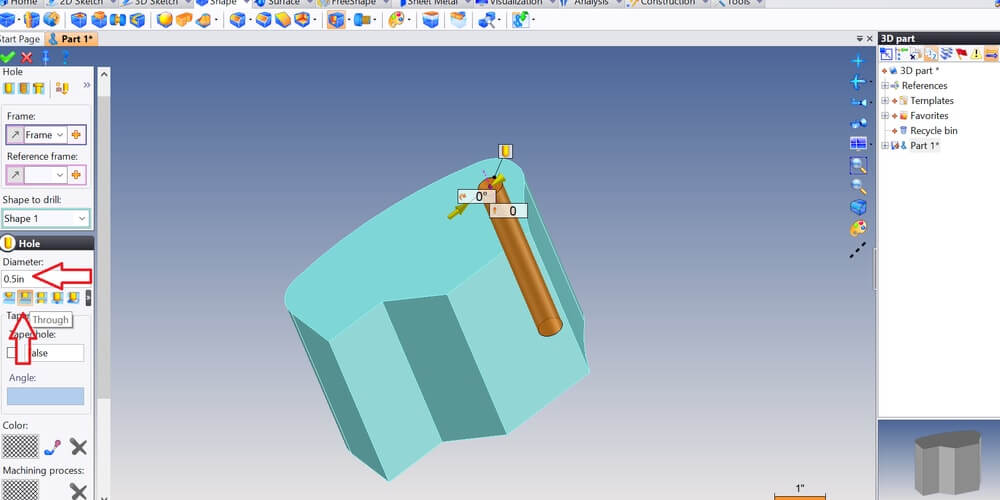
Now, you can define more of its parameters. First of all, it is design-wise to select the “Through” option instead of any other, because this setting enables you to apply a hole through the whole height of your 3D part, even if you change its thickness. Moreover, you can define the diameter you want your hole to be.

TS 1.2 9.jpg

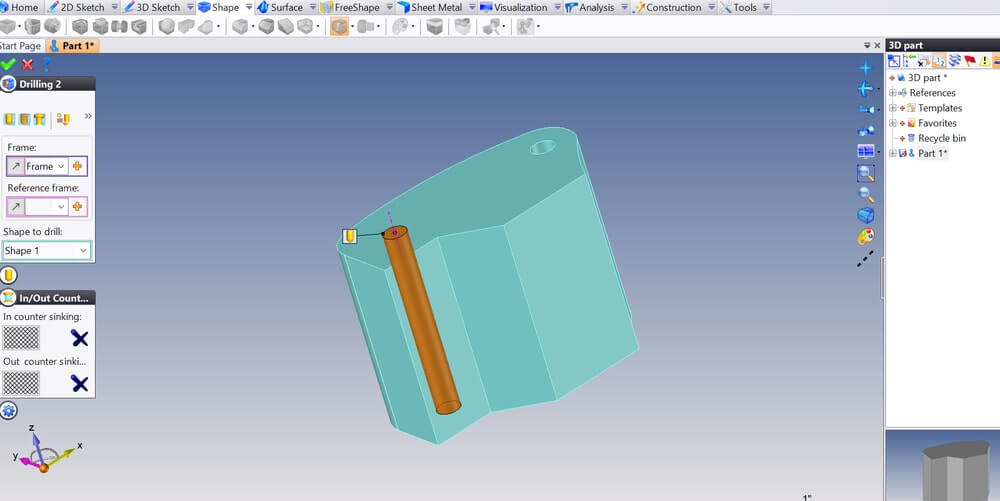
You can apply drilling as many times as you wish, and then validate.

TS 1.2 10.jpg

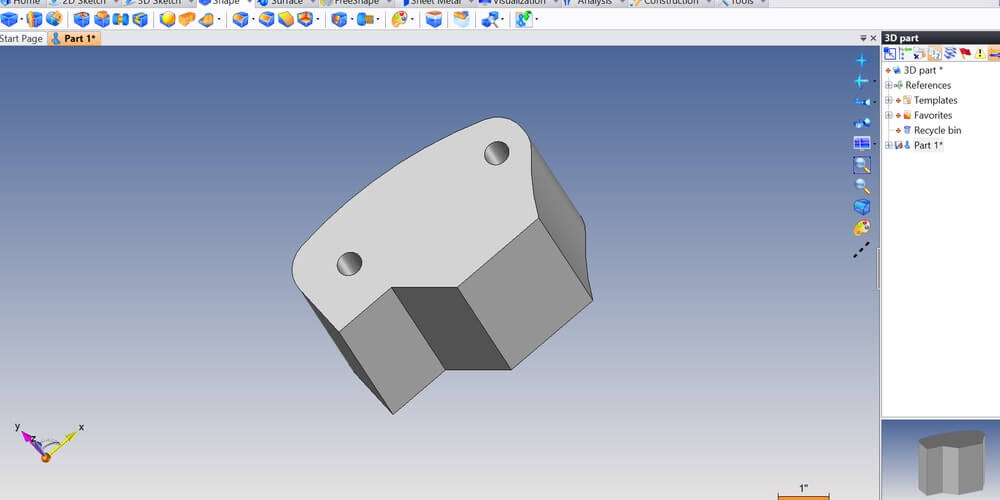
The result after two drillings should look like this:

TS 1.2 11.jpg

Now let’s hollow this 3D model and apply a uniform wall thickness to it . We do so because hollowing is a very effective way to reduce the maximum volume of your 3D model, and thus reduce your 3D printing price. We recommend you to do it as much as possible on your 3D parts. For more tips about hollowing, you can check out our blogpost about how to reduce your 3D printing price with hollowing

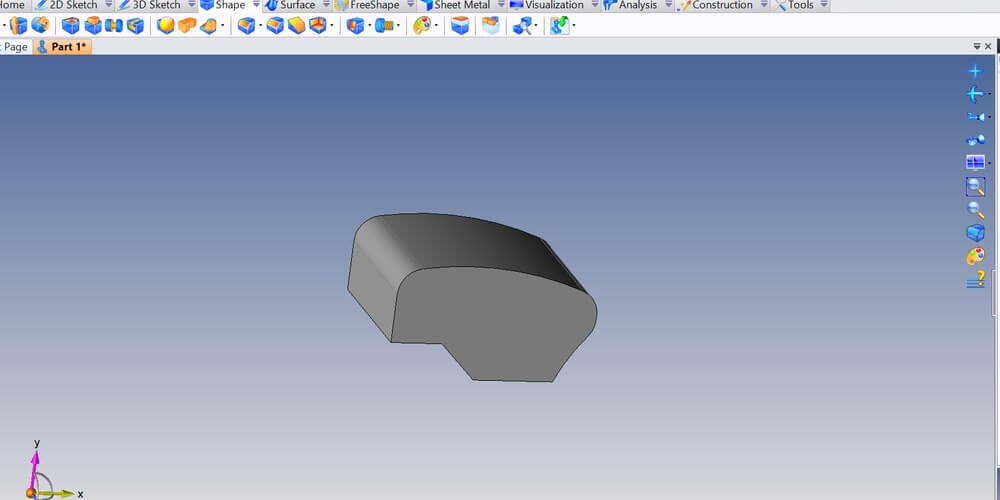
Now, let’s undo the “drilling” from the previous steps and bring back the part to its solid form. It should look like this:
TS 1.2 5.jpg

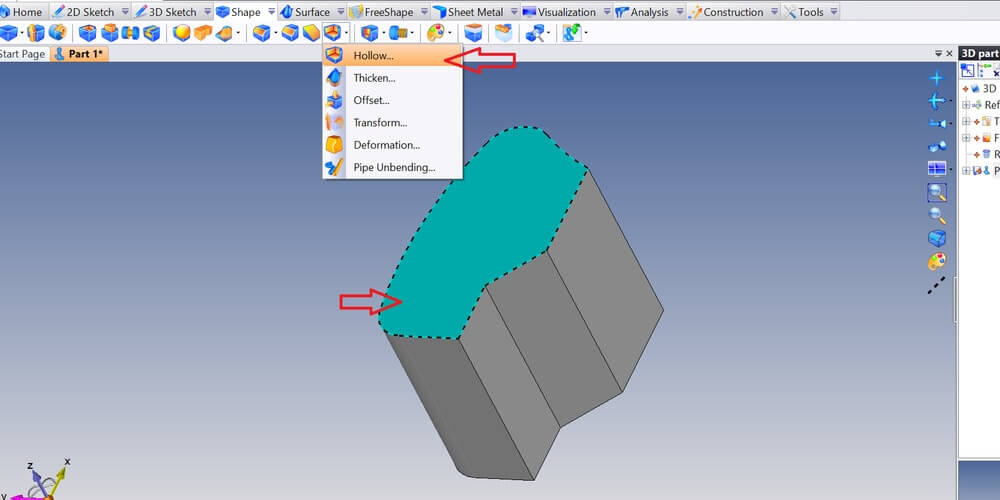
In order to hollow a part, you have to specify the direction. Like this, the surface you choose as a reference will be completely eliminated, and the hollowing tool will create a shell around the rest of the 3D part. 

To do so, right click on the desired surface and then go to the upper toolbar and select the “Hollow” tool. 
TS 1.2 12.jpg

In the window that will appear, enter the value of the depth that you want your shell to be. Though, mind the direction of the hollowing! The arrow that indicates the direction should be pointing inwards the part, so your model is hollowed from its inside. To change that direction, deselect the box “Invert”.
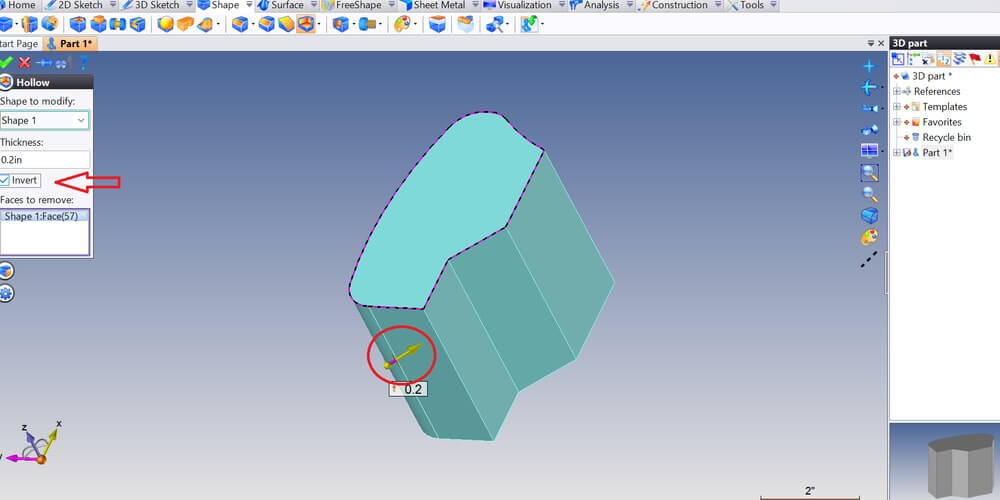
TS 1.2 13.jpg

Now, validate and it’s done! 

TS 1.2 14.jpg

Alternatively, you can hollow your part from a different surface. Or even hollow your part selecting multiple surfaces. Let’s see how is this possible.

Undo the “hollowing” command to return to the initial solid shape of your part. Now right click on two different surfaces by pressing the “Ctrl” button, and select “Hollow”.
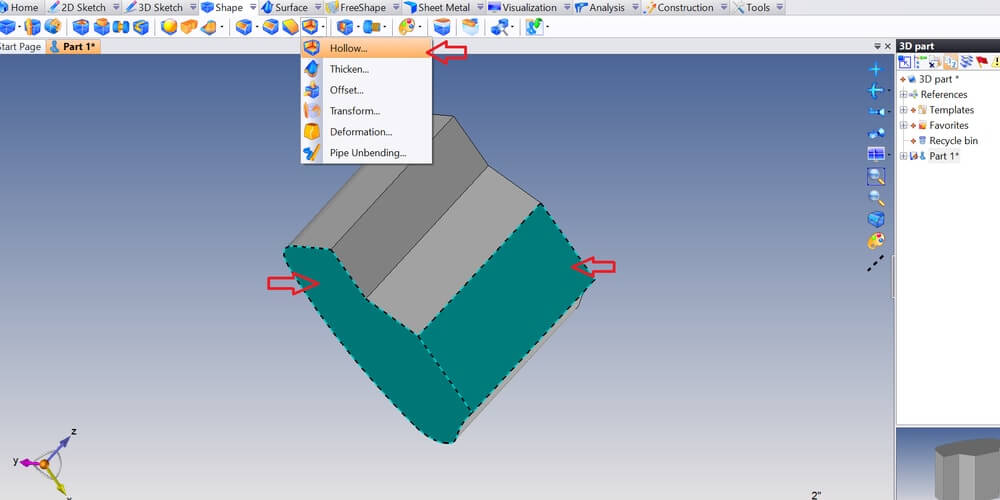
TS 1.2 15.jpg

On the new window that appears, select both the surfaces to be hollowed, as indicated by the red arrows. Enter the value of the depth of hollowing and mind the direction of hollowing. 
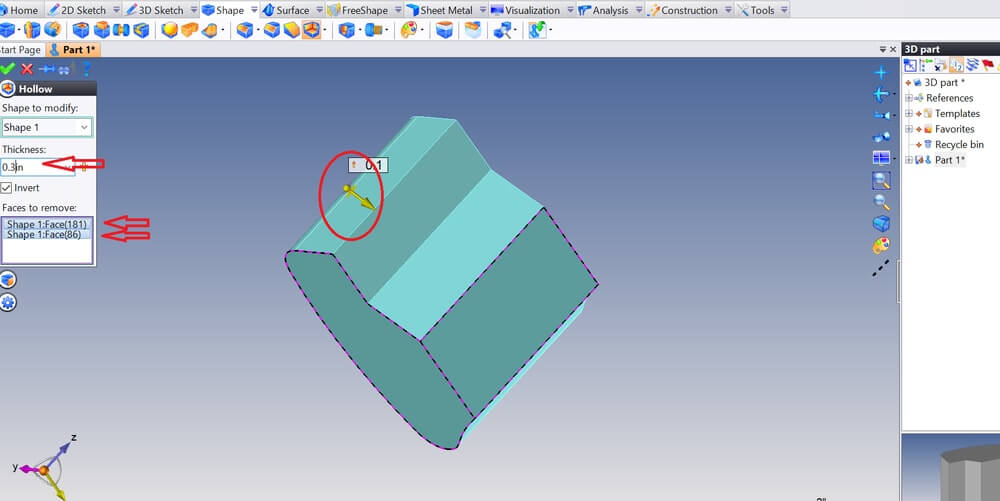
TS 1.2 16.jpg

Press validate and your model should look like this:
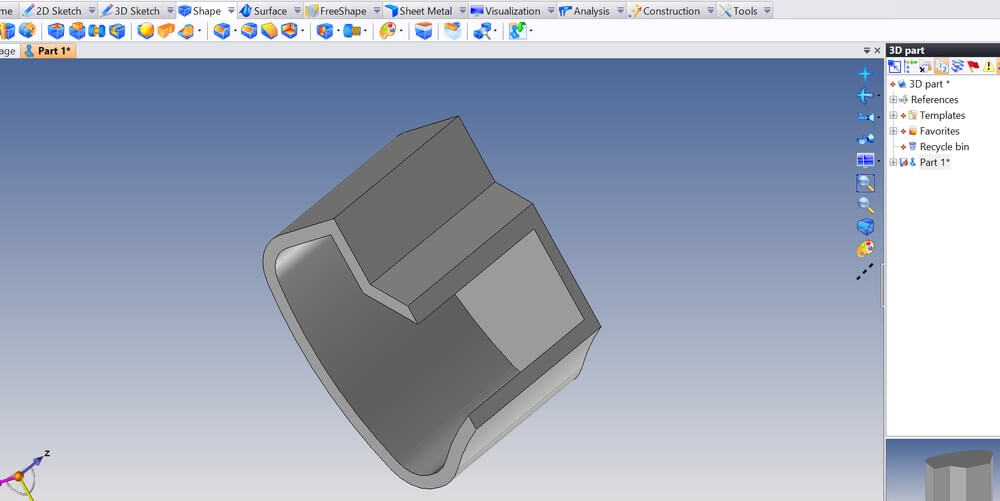
TS 1.2 17.jpg

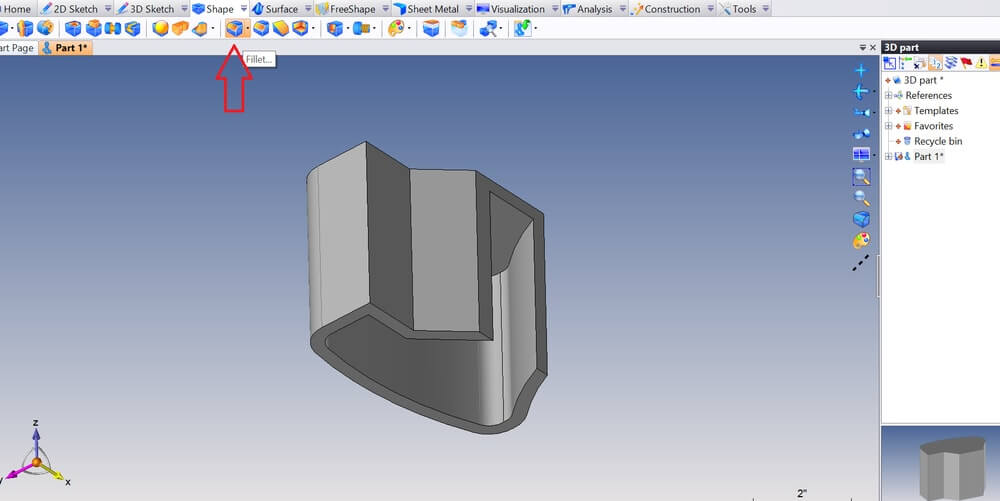
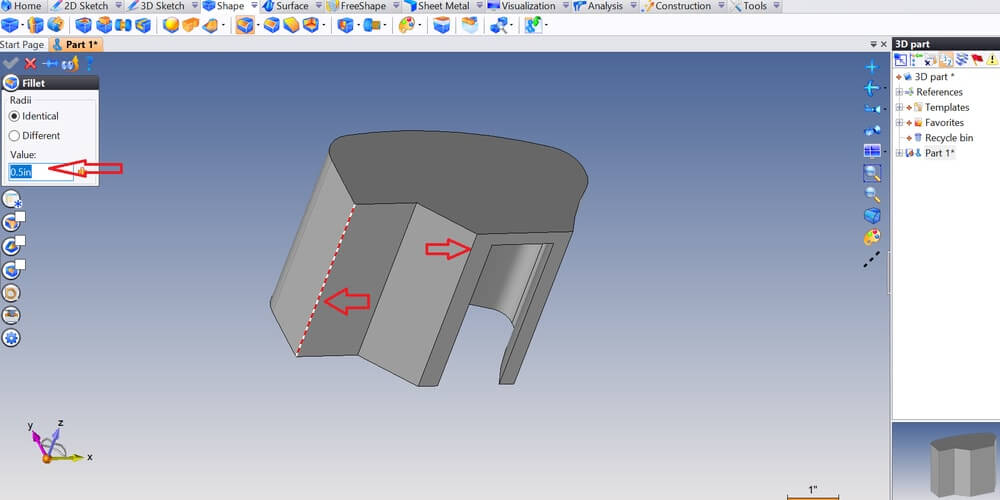
You can add some fillets to your design to make the sharp edges smoother. To do that, select the “Fillet” button from the upper toolbar.

TS 1.2 18.jpg

Now select the edges that you want to smooth, and enter the value of the radius. If you want all your edges to have the same fillet, click on the “Identical” box.

TS 1.2 19.jpg

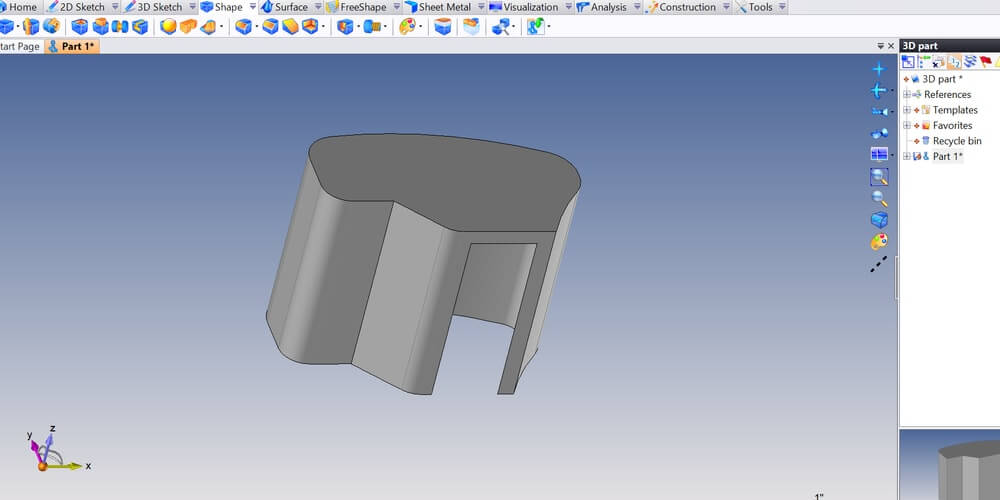
Validate, and your 3D part should look like this:

TS 1.2 20.jpg

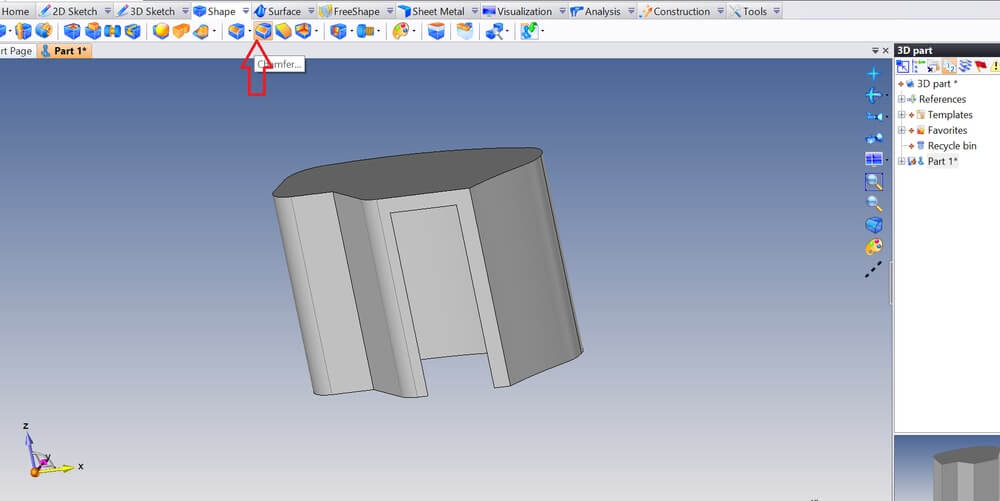
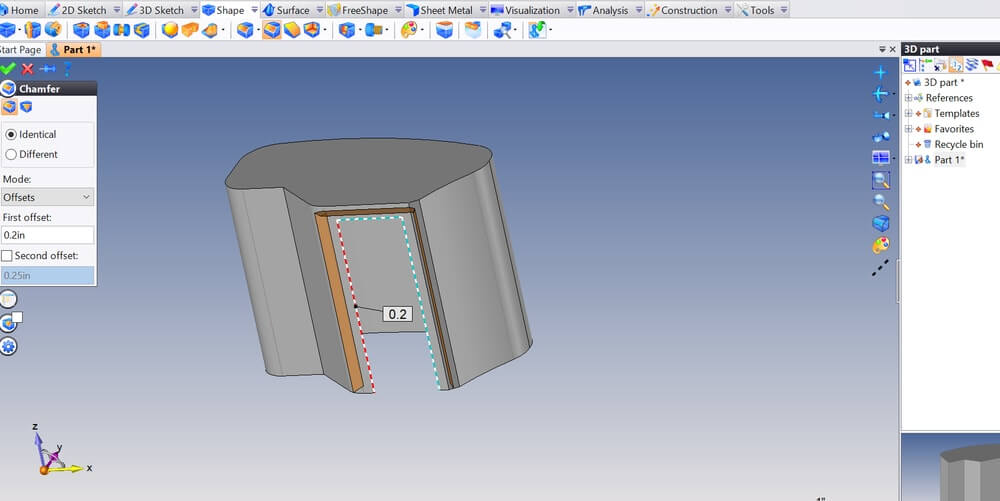
If you want to add some chamfers to your design, select the “Chamfer” button from the upper toolbar.

TS 1.2 21.jpg

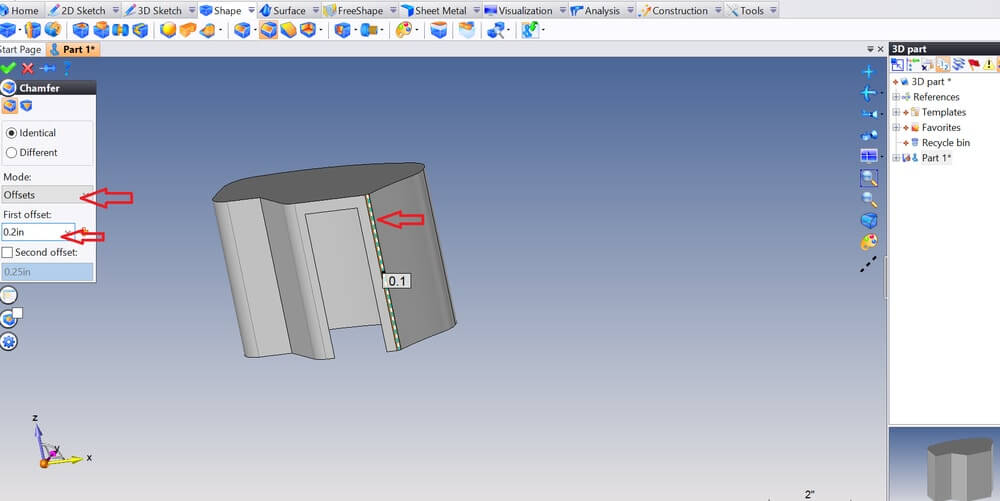
The procedure is the same as adding the fillets. Select the edges that you want to chamfer. On the window that appears on your left, enter the value of the chamfer and select the “Offset” mode.

TS 1.2 22.jpg

You can select multiple edges to chamfer at the same time, simply by left clicking on them. 

TS 1.2 23.jpg

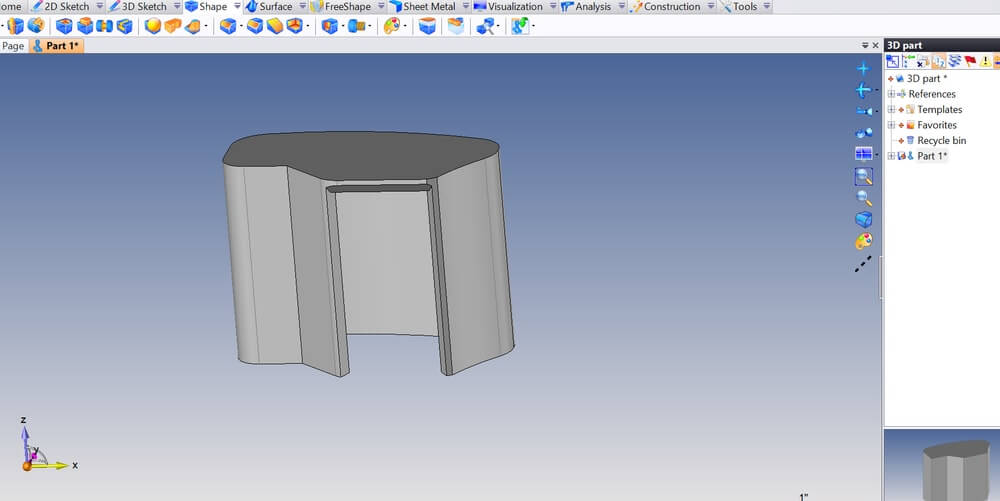
Once you validate, your 3D printed part should look like this:     

TS 1.2 24.jpg